LOVE ❤ these! My nieces adore churros, and I love making a simple but special treat for the families I cook for each week. These will be perfect for fajita night coming up soon!
My kids had friends over for a taco dinner the other night, and we “needed” a special dessert. These churro cupcakes were perfect for our theme!
This recipe was adapted from Lady Behind the Curtain, via Sweet Carolines Cooking. I loved the cinnamon-sugar topping underneath the cinnamon cream cheese frosting. Although we did debate whether or not these cupcakes were more “churro” or “snickerdoodle,” we all agreed they were tasty. 🙂
On January 29, 2016, I shared BuzzFeed recipe video below on my Facebook feed with a note to use the kale from my local CSA share to make this for Sunday dinner. And I did. And paired it with simple salt-and-pepper thin spaghetti noodles.
HUGE hit! Takes maybe 5 minutes to layer in the casserole dish (line with aluminum foil to make clean up faster and easier too), and it turned out to be a GREAT way to HIDE VEGGIES from my guys because what they saw looked like pizza on top of chicken. They just thought it was all chicken-y cheesiness and AWESOME.
I’ve made this several times since that first weekend dinner with the following variations:
frozen chicken with fresh toppings – little bit juicier in the bottom of the pan, but otherwise no difference; the breasts were small and thin, and took 45 minutes
cubed chicken breast and everything layered more like a casserole for more servings, and baked directly over cooked penne pasta in the casserole dish; same temp and time as original recipe
“Mexican” style using canned chopped chilis and pepper jack cheese, still using the sliced tomatoes
I’ve got a growing group of friends who have straight up food allergies to corn, gluten, soy – and, Lord help me, all three! And that makes safe store-bought sauces that most think of as a single ingredient not nearly impossible but actually impossible.
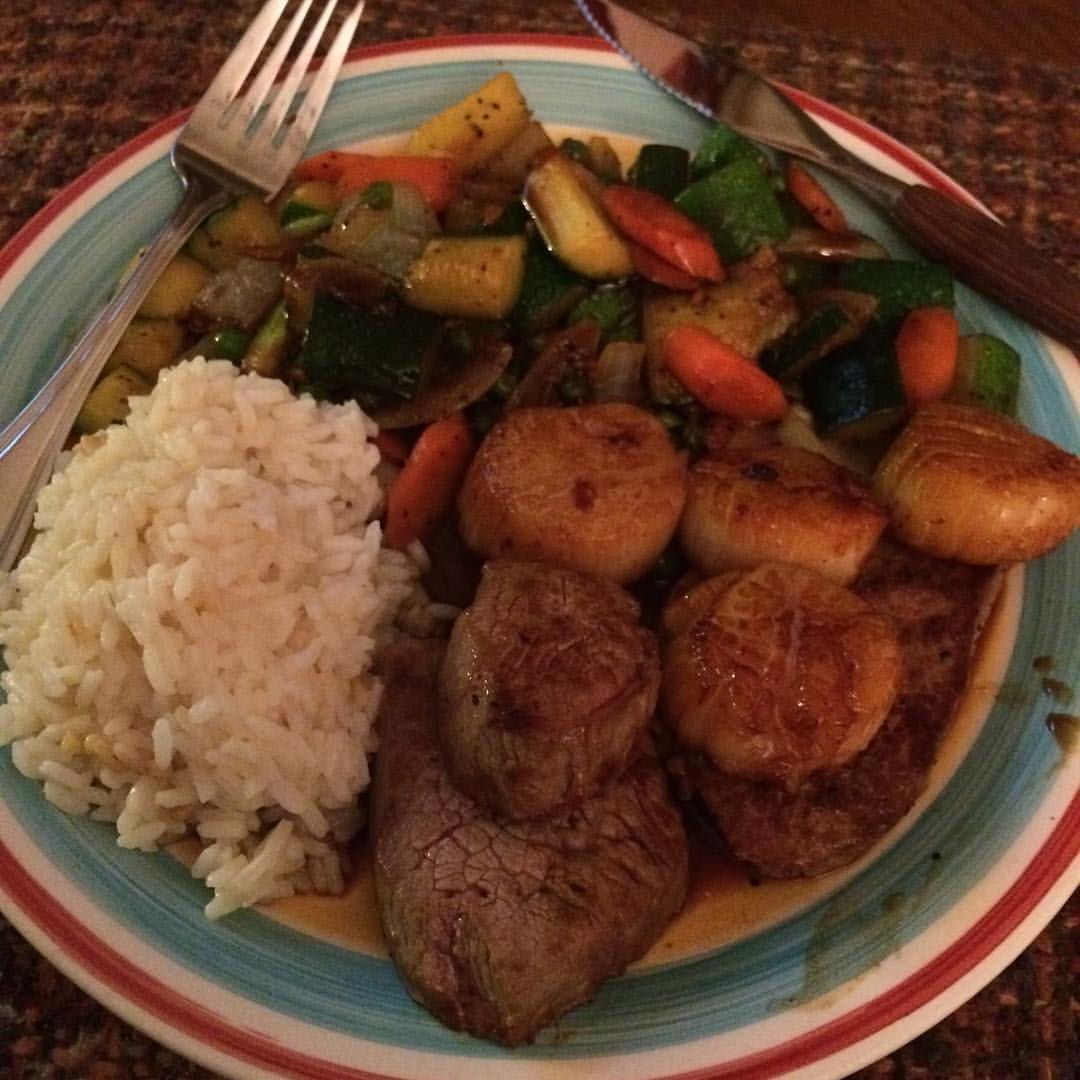
Hibachi-at-home: steak, scallops, veggies (zucchini, carrot, onion, peas), rice – using this homemade soy sauce turned into teriyaki sauce.
Here’s my alternative to soy sauce when cooking for them – and now myself since I can control the sodium level so much more!
1/4 cup strong beef or mushroom broth (use homemade or Pacific brand)
1/4 cup organic apple cider vinegar (make your own with this recipe)
1.5 cups water
2 T molasses – be sure to get organic and check the label for corn syrup or corn-derived additives – I get mine raw from a local farm
2 cloves finely minced garlic – I recommend using a garlic press
1/2-inch of fresh, finely minced ginger – I recommend using a cheese grater
1/4 t finely ground pepper
kosher or sea salt – add in 1/4 t amounts until you achieve the soy sauce saltiness you like
Combine all ingredients in a sauce pan and bring to a boil. Simmer for 20 minutes. Cool and store in the refrigerator for up to 6 months.
Did you know that Teriyaki Sauce is nothing more than a sweeter soy sauce? Add 1/2 to 3/4 cups of this soy-free soy sauce to a sauce pan with 1/2 cup corn-free brown sugar, combine well and simmer for 20 minutes.
Recently, I found myself craving something beefy and comforting, so I put out a call for ideas on Facebook. Boy, did my girlies come through for me. Beef Stroganoff. It has a rich history as a classic Russian dish. And wouldn’t you know it, it’s got its own website! But essentially, this dish is beef cooked in a creamy mushroom sauce.
Having spent a delicious month in St. Petersburg, Russia, in 1993, I know that, at least at that time, most Russians didn’t have regular access to good cuts of beef, and I learned that both of my Russian families made their beef stroganoff about the same way: cooking down wild, handpicked mushrooms and onions, adding some beef in to brown, deglazing with some water (making a bit of broth), and cooking this for several hours on low, then adding in some sour cream at the end to thicken up the sauce.
Sounds like the perfect crock pot recipe to me, but I wanted something a little more compact since I’d be at work all day and wanted my family to be able to put dinner together themselves. So I settled on a casserole that achieves the same purpose and delivers 4 healthy servings an no leftovers to junk up the fridge.
1 cup sour cream (or milk if you’re out of sour cream)
1/4 t kosher or coarse sea salt
1/2 t ground pepper
You can see I’ve gone with a little help from the pantry rather than a totally-from-scratch recipe.
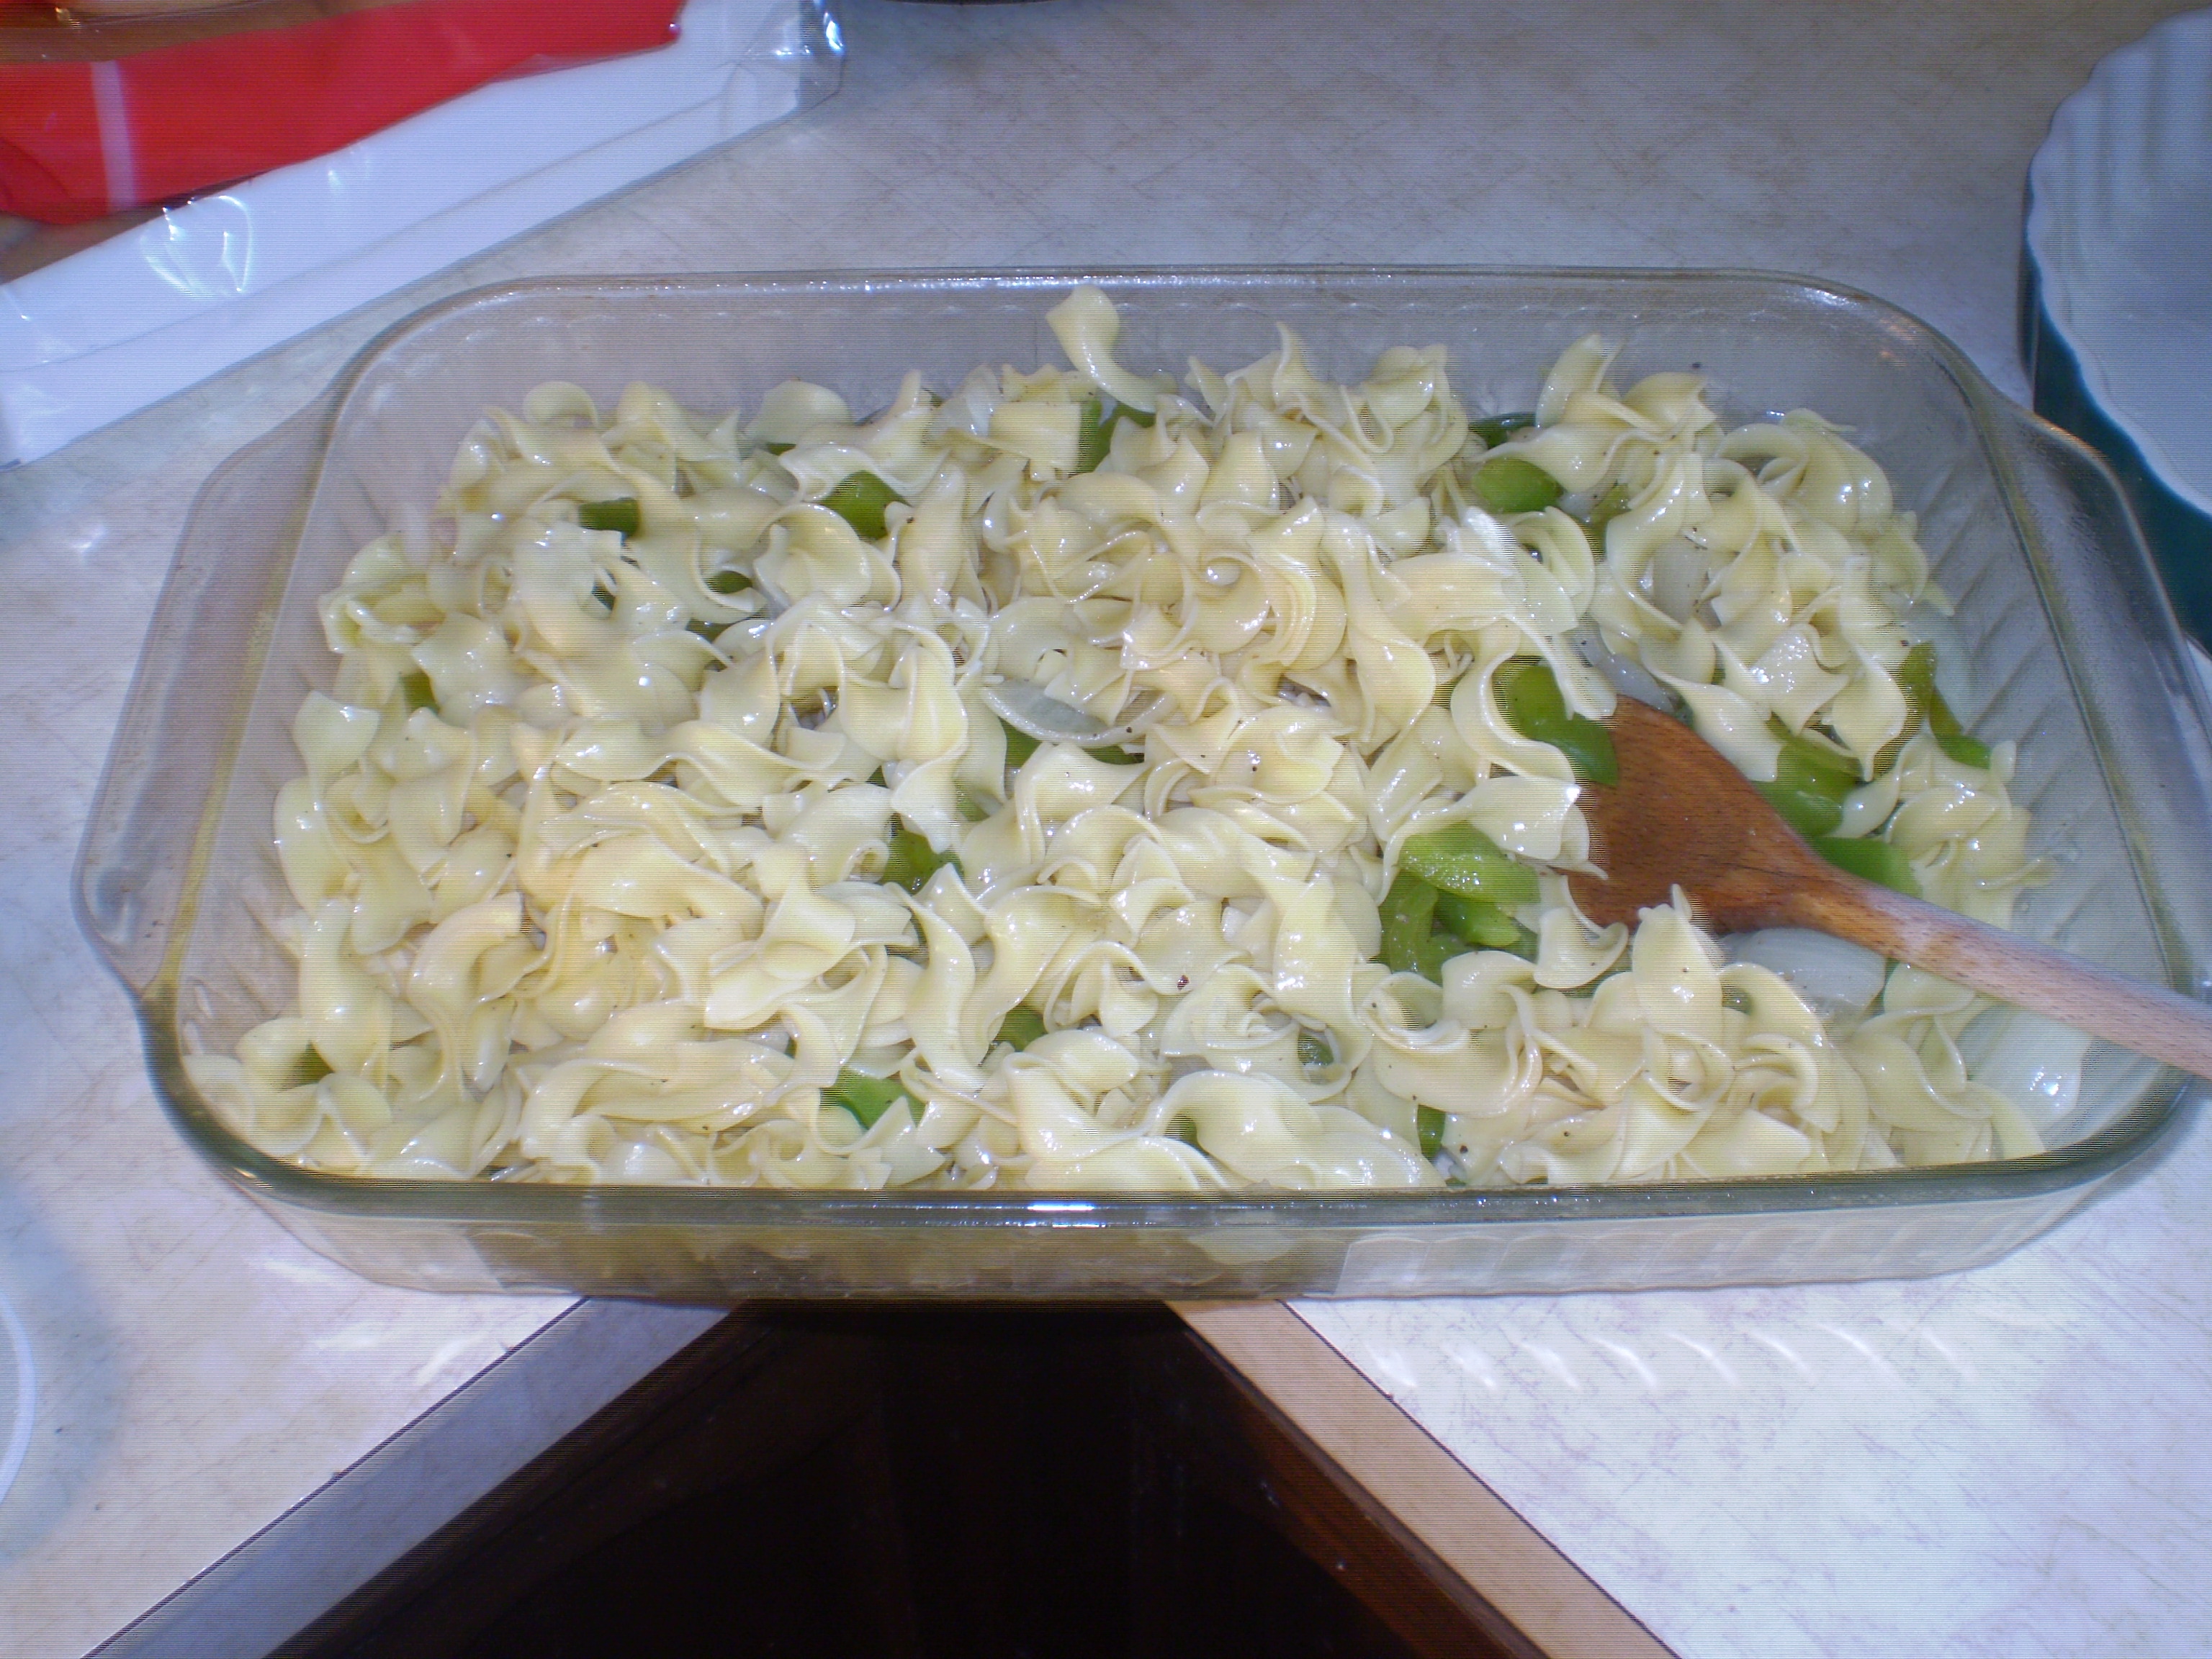
So I start with cooking the noodles. When they are drained, pour them into a casserole dish, lightly sprayed with cooking spray if you’re worried about sticking, which is not usually a problem.
Next I move on to the veggies…on medium heat and with 1 t of your favorite cooking oil, sweat the water out of the mushrooms and then add the peppers and onions for a quick saute; I’ve stopped cooking veggies in oil. I do these separate because I want to make sure they keep their crunch. If I put them in with the meat and sauce, they would cook down and have no texture left to liven up the casserole when it’s heated. Before they start getting brown, dump them in with the noodles and give it all a quick stir.
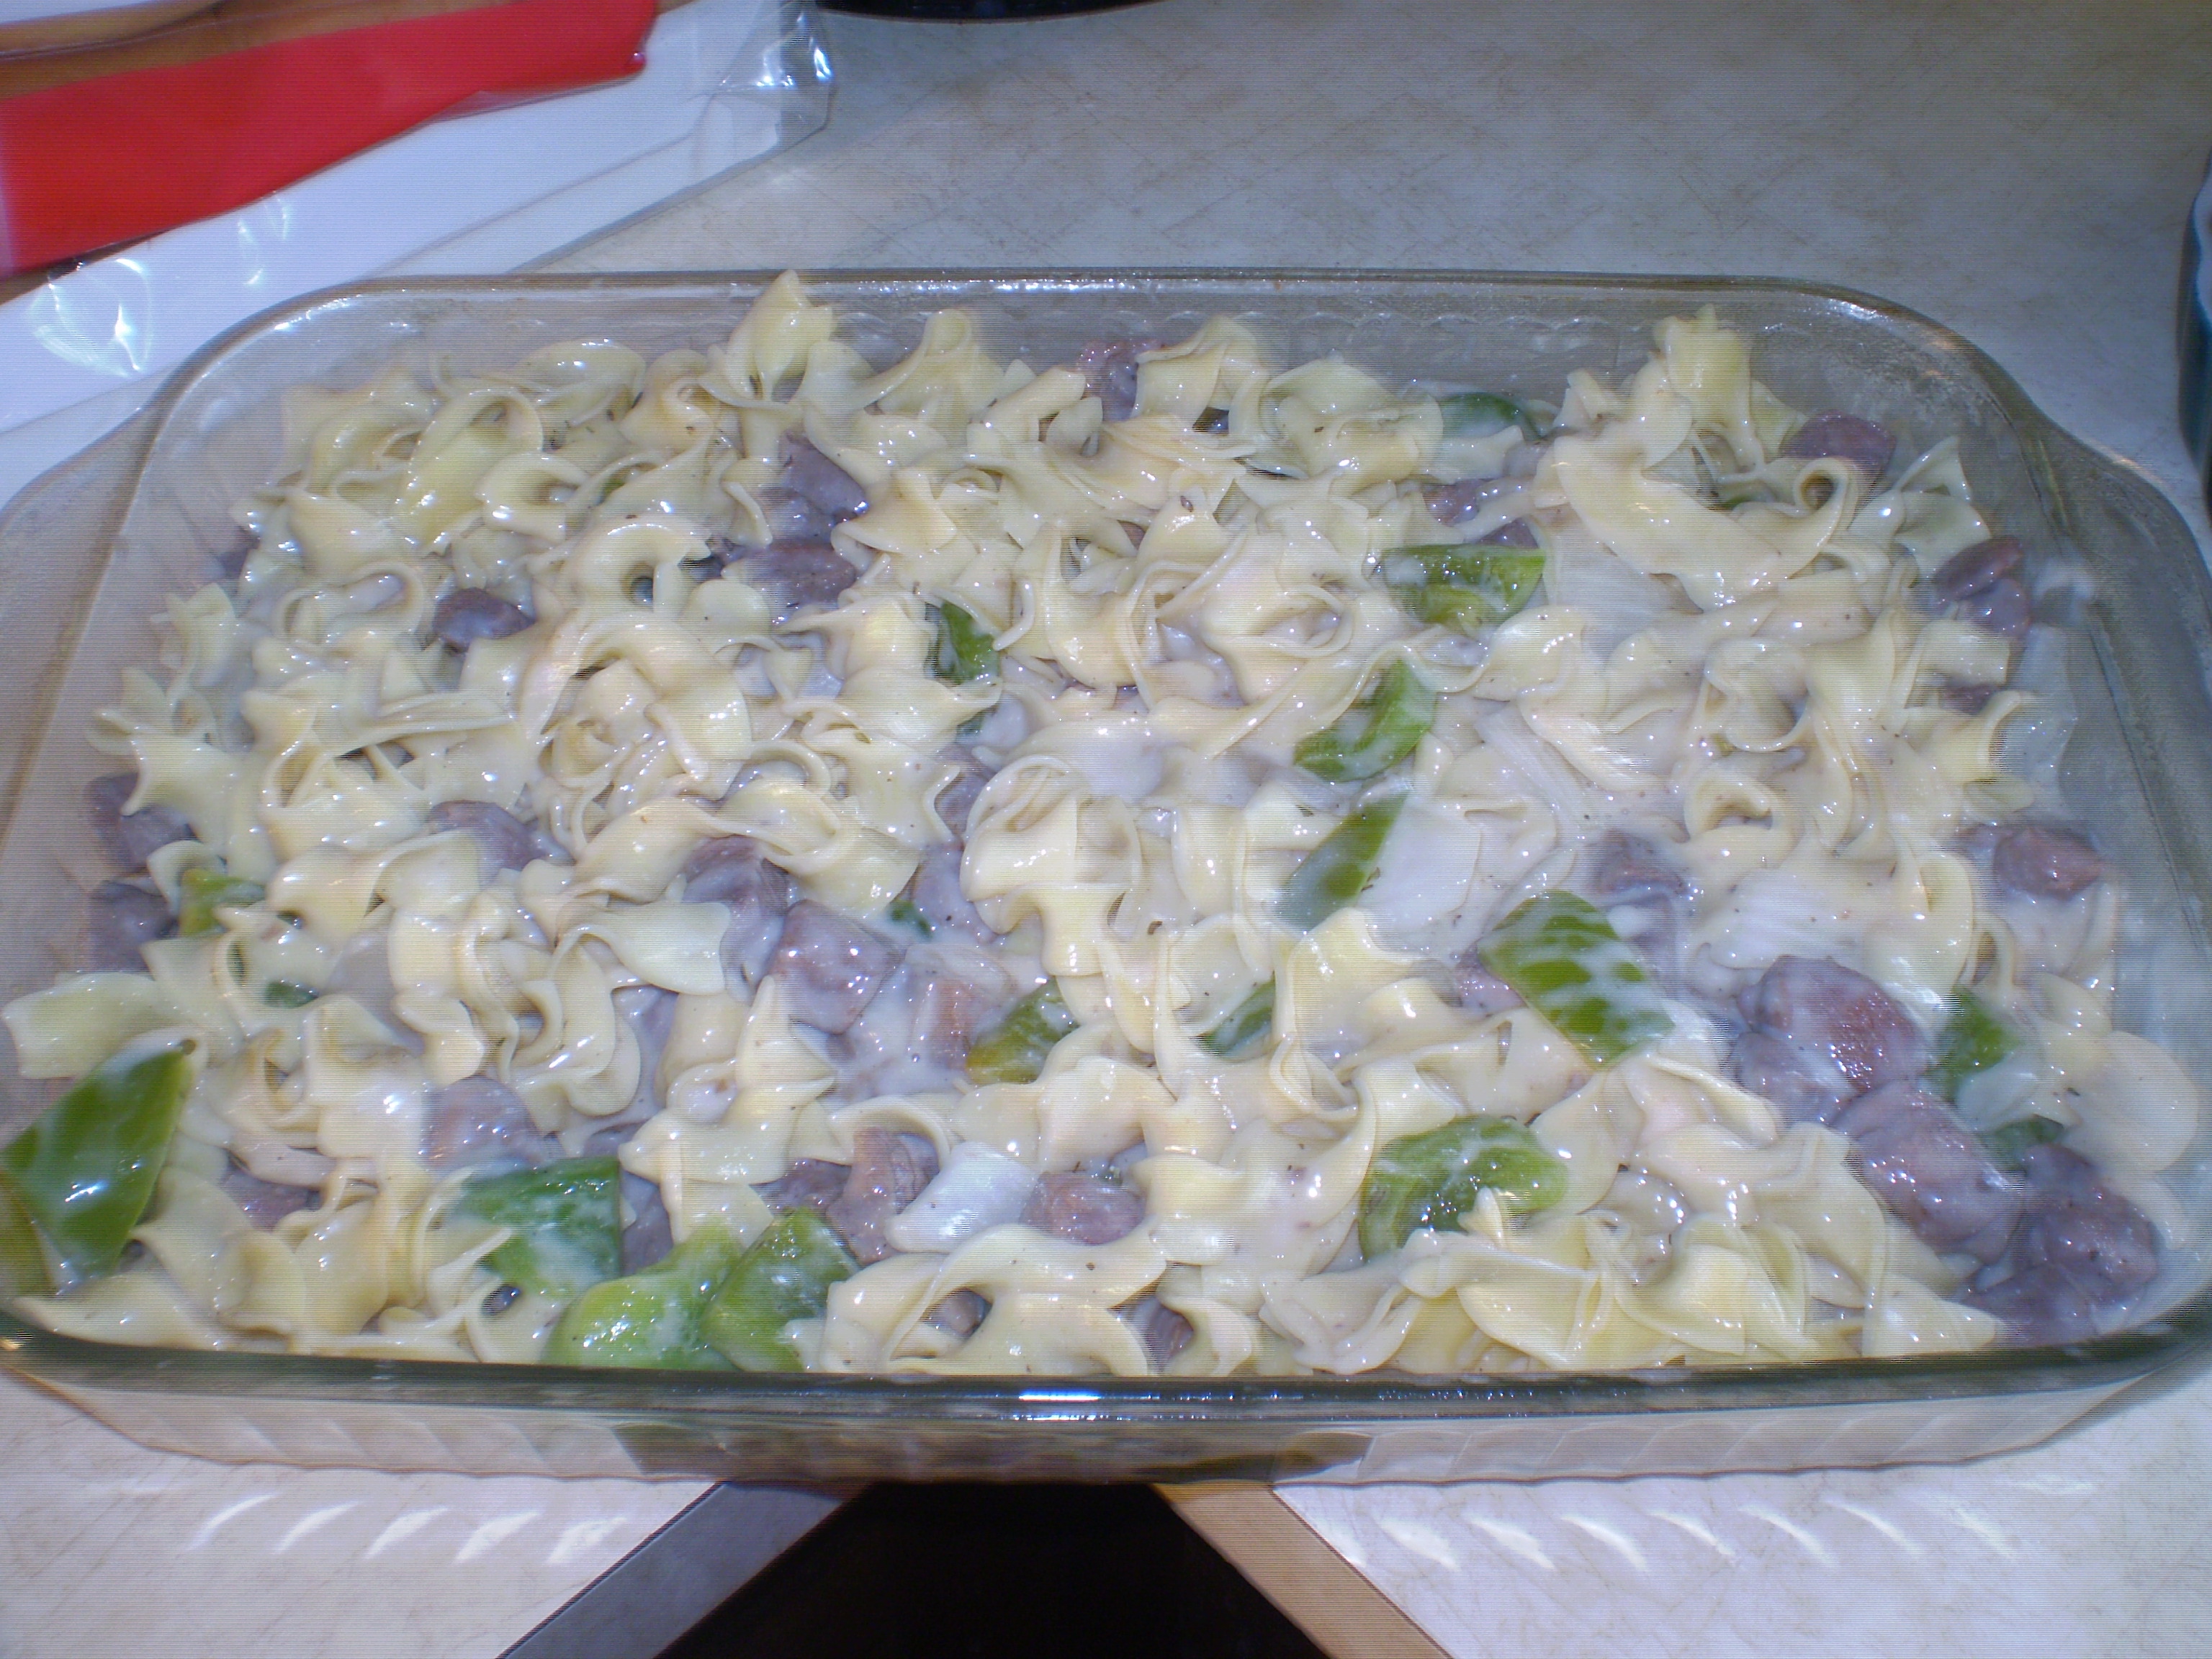
The last part is just as quick. We had some venison stew meat already cut up, so I tossed that into a pan with a little olive oil. When it gets just barely cooked through, dump in the cream of mushroom soup and sour cream, stir, and simmer for maybe 10 minutes, mostly to make sure the sauce comes together. Then dump this in with the noodles, peppers and onions, stir, and viola! Beef Stroganoff Casserole.
Now, certainly, you can pop this in the oven to finish and serve it up in about half an hour.
But I needed this as a make-ahead. And here are the instructions I’ll leave for the family to follow tomorrow:
To have dinner ready to eat by 6:30 pm, start at 5:45 pm
Preheat oven to 350°
Take the casserole out of the fridge and stir slowly and carefully
Cover the casserole with aluminum foil
Put the casserole in the oven for 30 minutes
Take the foil cover off and put in for another 15 minutes
As I’ve got Harris Teeter brown and serve rolls to go with mine, I’ll add the rolls during the final cook since they take 12-15 minutes. My folks will also be cooking up some sauteed squash and onion to go with this casserole.
For 8 nutritional servings or for 6 fuller servings, double the noodle, beef, and soup quantities; I also fully double the veggies, but that can be too much for many. Do not double the sour cream; there’s no need.
My mom is diabetic. And even though her dad was diabetic her whole life, and she was raised essentially on a diabetic diet (as it existed in the 60s and 70s), she’s got very diabetic-unfriendly eating habits.
But one good choice she craves and sticks to is granola. The oats are a great carb choice for diabetics, a slow digesting carbohydrate whether eaten cooked or raw. She loves oatmeal during the winter months, but really needs to have the sweet bite to it. She loves yogurt, but really needs to have a sweet bite to it. She really (psychologically) needs the sweet or she feels like she’s deprived.
But she won’t buy granola from the store because it’s saturated in various sugars: brown sugar, honey, corn syrup, maple syrup, and more.
Thus is born our experiment, beginning with what I consider Basic Granola.
And like so many “recipes,” this is a system, not a by-the-numbers or it’s wrong kind of food.
So here’s my system – which tracks pretty closely with the vast majority of granola “recipes”:
1.5 cups oats
1 cup nuts – mix as many as you like into the blend, but only 1 cup total
1 cup dried fruit – mix as many as you like into the blend, but only 1 cup total
Yep, it’s that simple.
Now, for the recipe people, here’s exactly what’s in my Basic Granola pictured here:
1.5 cups rolled oats (Publix brand, no need to go fancy)
1T dried ground cinnamon (Publix brand)
1t dried ground nutmeg (Publix brand)
1t salt (Morton’s)
1 cup water
Mix these five items together in a bowl, cover and let sit in the refrigerator overnight.
Prep your nuts; I used what I already had in the cupboard:
1/3 cup sunflower seeds (Publix organic unsalted from the produce section)
1/3 cup hemp seeds (Manitoba Harvest Hemp Hearts)
1.3 cup slivered almonds (Mariana from the Publix produce section)
Prep your binding; because my granola places emphasis on being diabetic friendly, I have limited sugar to a functional role and eliminated all granular sweeteners – natural or artificial:
1/3 cup honey (from a local farm near me)
1/4 cup oil or melted butter (Pompeiian Grapeseed Oil)
When you’re ready to bake, mix the nuts and the binding into the softened oat mixture. Spray or grease a medium or large cookie sheet with at least a little lip, spread the mixture in a thin layer in the sheet. Bake at 250° for 1 hour and 15 minutes; increase heat to 300° for 20-40 minutes more. The longer time is especially useful in high-humidity climates or times of year.
As your mixture sits to cool, it will harden into the crunchy texture most people are looking for, so don’t get frustrated if it doesn’t harden while still in the oven. It won’t, and you’ll risk overcooking or burning your granola.
Serving Ideas: the standard serving is 1/4 cup
cooked oatmeal topper (tip: prepare half of an oatmeal serving and add 1/2 cup granola to finish out the meal)
yogurt mix-in
ice cream topper
fruit pie topping (instead of crust)
blend into smoothie for an oatmeal smoothie
sweet potato casserole topping
roasted root veggies topping
My mom is really happy with this batch and can’t wait for my Christmas blend using pistachios and dried cherries.
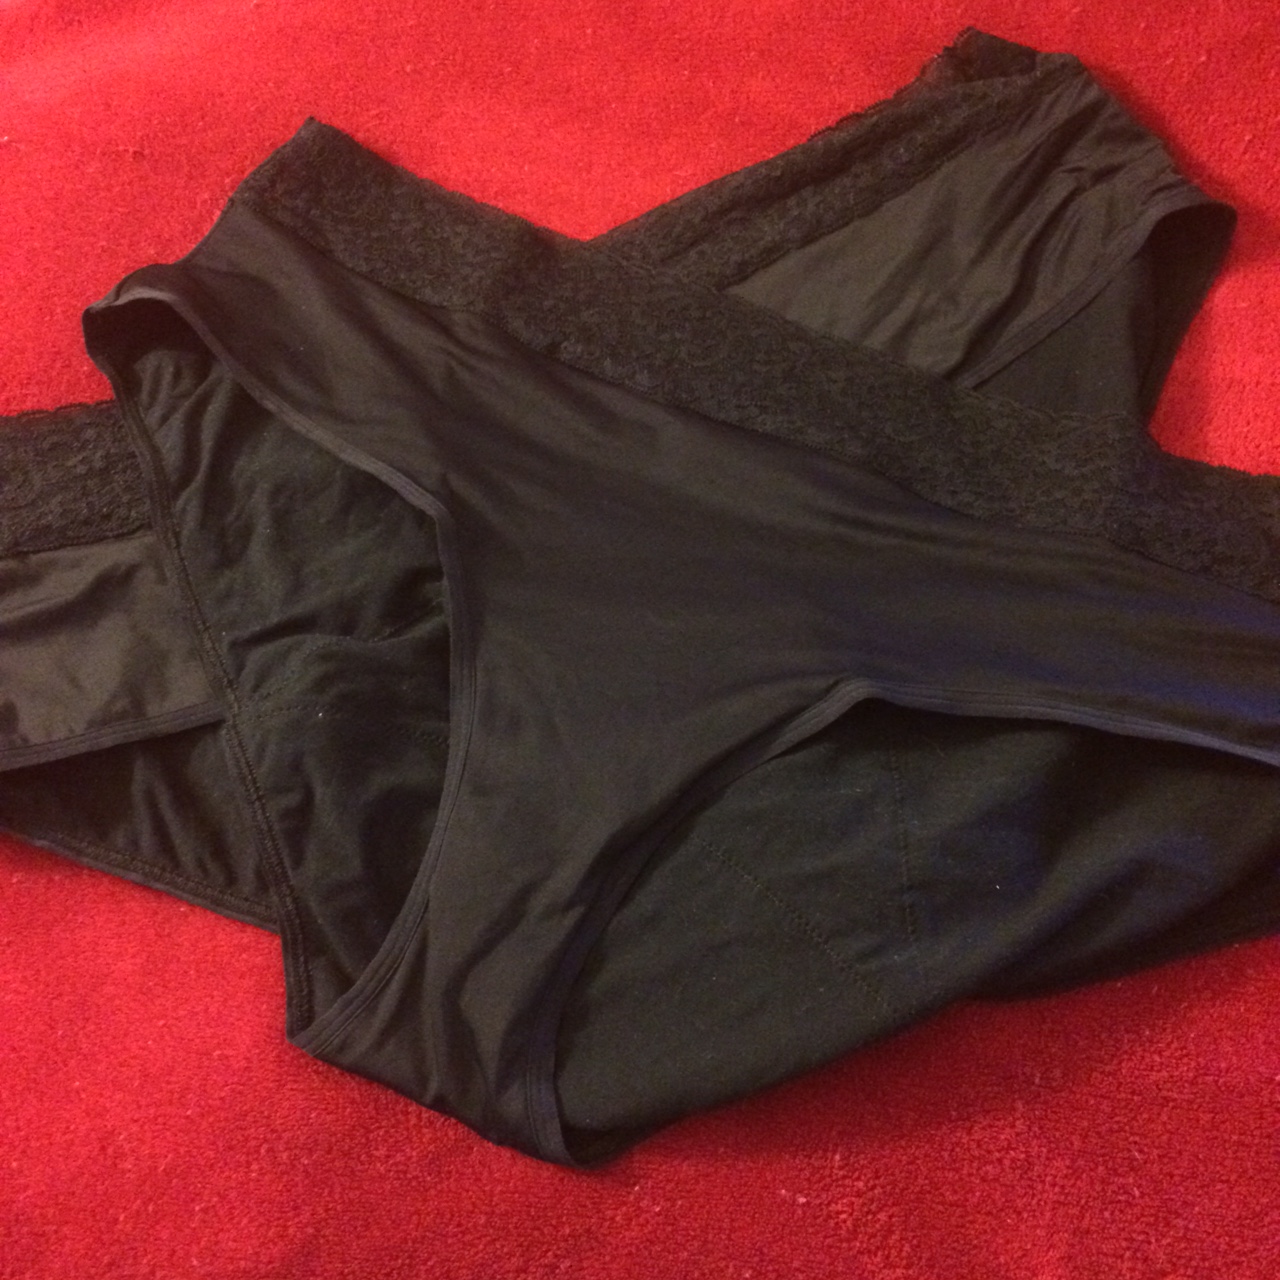
2 of the 3 pair of THINX I purchased; I’m wearing the 3rd pair now.
I’m keeping them. And getting some more!
NOTE: The following account of my trial of THINX is completely unsolicited and unpaid; I paid regular price out of my pocket for these period panties and have had no communication with THINX other than the purchase transaction.
Here’s why I tried them:
Aside from performance, I’m always looking for a more sustainable way to manage hygiene, and these are reusable with no solid waste to cause biodegradability concerns.
That comes with the added benefit of being more cost effective in the long run; I estimate it will take 2 months per pair of panties for the cost equivalency of my current disposable method.
And then there’s the education and supply mission of the company: for every pair I purchase, they donate a pair to a woman in a country where period products are simply not available, where girls are banished to a shed for their week a month, missing school, work, income opportunities, etc. Like Tom’s shoes in that way.
Here’s what I chose as my trial kit:
For starters, I got 3 pair (best discount) of the hiphugger style to try; it’s one of two styles designed for “heavy days”. If I don’t like them (doesn’t seem like that will be the case), I simply send them back for a refund – even if I’ve used them.
I ordered the 2x, which is currently their largest size. For sizing comparison, I wear a 22 or 24 in pants without stretch, 20 in pants with stretch.
Here’s my period profile:
So that you can judge how THINX would perform for you, it’s necessary for me to disclose my period profile. I’m a 100% free-bleeder, using pads exclusively.
My period lasts almost exactly 5 days:
First 12 hours: comparable to spotting
Next 24 hours: what I consider regular, using 1 pad per 12 hours
Next 24 hours: what I consider heavy, using 1 pad per 6 hours largely due to clotting – really tricky for the overnight
Next 48 hours: return to regular, sometimes with a 4-6 hour period with no bleeding at all
Next 12 hours: spotting through completion
THINX has attempted to give guidance on how long you’ll be able to wear a particular pair, but as they only use standard tampon size as their guide, those of us who free-bleed (especially those who have only ever free-bled and not used tampons at all) have no frame of reference. I will attempt to provide that below, even specifying the brand and size of pad I typically use during different phases of my period.
Here’s how they performed:
Day 1: since I started midday, and my first day is just spotting, I used a pad. No sense in wasting one of my three precious pairs of THINX on spotting IMO.
Day 2: roughly 9 am – 11 pm – regular flow
Today is my regular flow day on the front end, and I’ve been wearing the first pair since about 9 am. The only time I feel wetness is when I pull them up after going to the bathroom. It’s a fleeting coldness more than wetness that lasts less than 15 seconds. I’ve also paid particular attention to smell, and so far, I’ve had to put my nose within 12 inches of the panties to smell anything at all and even then it’s faint. No leakage at all, and again, I’ve had one pair on for almost 12 hours now.
I’m not at my heaviest flow yet. That will start overnight tonight and continue through tomorrow, so I’ll let you know on that. For reference, during my heavy flow, I use two long, overnight Always pads as the same time with an overlap right in the middle. And I clot pretty significantly during that 24 hours.
Day 2 Overnight: roughly 11 pm – 10:30 am – Transition from regular into heavy
The overnight went great. It wasn’t until the morning wake up when I get a little restless that the panties slipped and sagged in the butt, allowing 1 small leak onto the bedsheets. The panties are comfy, but I didn’t really register that the material is much more slippery, silky almost, than my regular cotton panties. So they slide easily. In addition, I’m a side sleeper and it was easy to see how the side (around the leg toward the outer hip where there’s no absorption planned) has more blood than the front panel (where there is absorption planned). This likely won’t be a problem for back sleepers as that’s where the full coverage absorption is in the hiphugger panty.
Day 3: roughly 11 am – 3 pm – Heavy day
This day was the truest test. I deliberately checked frequently (went to the bathroom) and tried to keep them on as long as possible to really test capacity. Just as when I wear pads during heavy days, the THINX filled quickly and started slipping off, creating the same saggy butt problem as I experienced when first waking up. It’s the same problem babies have with a full diaper. I had 1 leak while sitting, but to be fair, it was right as the panties hit capacity, not any kind of deficit in the design or concept.
They lasted 5 hours, just shy of my double-pad 6 hour stretch, so I consider that a huge win for capacity.
With only one pair left to test, I switched to regular panties with double pad because first pair were not yet dry to wear (not surprising, just noting). I’ll address my laundering experience below.
At this point, I estimate the capacity to be as follows: 2 regular tampons (THINX estimate) = 4-5 hours on heaviest day = 1 tampon per 2.5 hours.
This is pretty consistent with other accounts of THINX performance by both paid and unpaid trials. (Reminder: my trial is completely unpaid; I paid regular price out of my pocket for these period panties and have had no communication with THINX other than the purchase transaction.)
Day 4: are they dry yet?
I mentioned laundering earlier, and it is actually the part of the THINX concept that elicited the most varied criticism, with users reporting anywhere from 24 hours to 4 days for the washed panties to dry enough to be worn. So here’s what happened with mine:
The first pair I wore (day 2), I rinsed in the sink (as instructed before washing) and hung them to dry; I didn’t wash them immediately because I really wanted to find out about the drying. I’d read that the panties took up to 4 days to dry, so there would practically no way to wear a pair twice in one cycle. Thankfully, I can confirm that roughly 36 hours after rinsing (they were thoroughly soaked) the first pair is completely dry. I suspect that, as with the “feeling of wetness” issue, the panties dried in an air conditioned setting were simply cold, not actually wet.
I started them drying in the bathroom overnight, hung from a hook in the shower where they didn’t touch the wall or anything. In the morning, I moved them to a hanger and hung them from the door jamb so they could continue to benefit from full circulation. By 8 am this morning, they are completely dry and ready to wear again.
For comparison, the two other pair stayed in the bathroom and are still quite wet. It should be no surprise that hanging dry in the least humid room of the house will speed up the drying, but it was worth the comparison.
So after a brief switch back to pads during the heaviest phase of my cycle (since all three pair were in rinse, clean and dry mode), I’m back in the first pair and also back to a regular day and expect to be able to wear one pair for the day.
Here’s what I’ll try during my next cycle (September):
I want to test the hiphuggers a little further during my heavy days/nights, especially the sagging and leakage to see if it was/is a result of capacity or if the panties just won’t stay put. So in September I’ll be using pads in THINX during the heavy phase.
This is pre-emptive of simply purchasing the only fuller coverage panty available from THINX.
Here’s what I really want to do when my budget allows:
I intend to purchase six more pairs
three pairs of the high waist for the heaviest day and for overnights
three pairs of the hiphuggers to round out the set
That should allow me to get through my entire cycle without having to worry about laundering and drying when it’s not convenient.
Costing It Out:
The site runs a special discount when you purchase three pairs that basically makes is $100 for a 3/pack. With the basic economy pack of pads coming in a $7 and lasting (me, at least) 2 months, that’s $3.50/mo in pads. At that rate, it will take 7 years and 2 months to break even on the panty investment ($300/3.50/12).
I don’t necessarily foresee a need to replace the panties before then if they’re only being used 12 times a year (assuming I get my full 9-pair collection) – that’s roughly 85 times over that period.
In that same amount of time, I would NOT be using and disposing of approximately 1,600 pads.
Special Shout Out to a Man
I doubt I would have the candor or even simply the idea to be this open and natural about my own period or the process of managing a period if I hadn’t had one specific man-friend many years ago ask as part of the sexual history part of our getting-to-know-you. Thank you to the unique men who recognize that physical processes and activities are not shameful, are part of a shared life with a female partner, and respect that many choices result from those conversations.
The Environmental Working Group has been teasing us for about six months about their new Guide to Healthy Cleaning. EWG scientists have examined in the laboratory and rated for safety over 2000 household cleaning products, from laundry detergent to bathroom cleaner to air freshener. And, yes, some of these include the professional products used by the elite cleaning companies around the country.
So how does this new guide and database add value to the professional cleaning industry?
VALIDATION: Many in the cleaning industry have been citing medical and chemical studies that suggest the effect of cleaning products on the increased frequency and severity of many mutagenic diseases such as cancer and reproductive disabilities.
CONSUMER AWARENESS: The more a consumer feels he/she has control over purchasing and lifestyle decisions, the better decisions that consumer can make. One of those “better” decisions is to trust and employ the cleaning company who’s been saying this all along!
CHEMICAL FREE CLEANING: We’ve been advancing the study of safety and efficacy of many cleaning products and equipment toward the development of Chemical Free Cleaning…where no one would need a database like this because the only ingredient is tap water!
REFERENCES: When you search for a specific product or product line, not only do you get EWG’s safety ratings; you’ll also see a list of the ingredients and the various regulatory and/or scientific sources that list their effect on humans. These range from surface irritation to reproductive interruptions to known cancer effects.
CAVEAT: Just because the data revealed through the guide came largely from the science laboratory doesn’t mean that the recommendations come from cleaning professionals. We’ve already spotted a few recommendations that do more to advance home cleaning myths than scientifically validated cleaning or disinfecting methodologies. Here are two reminders just about vinegar…or maybe some new information for those who haven’t yet taken theIICRC House Cleaning Technician Certificationclass:
Vinegar doesn’t clean or disinfect: vinegar’s use in the cleaning procedure was born of the need to rinse clean the residue left from an alkaline cleaning solution, which is more commonly needed than an acidic cleanser. Vinegar’s acidity neutralized and rinsed clean the residue, leaving a nice, clear shine. Thus was born the legend of the vinegar cleaner.
Vinegar as a disinfectant is based on scientific supposition, not any actual disinfection studies; to be a preservative, vinegar must have some positive effect on keeping bacteria at bay, but as yet, no studies have shown that it actually sanitizes or disinfects to the level of making your counter safe from chicken juice bacteria.
Scientists and health professional still seeking the “perfect” disinfectant.
The healthcare profession has long held a reasonably common set of criteria for the ideal disinfectant:
be fast acting, even in the presence of organic substances, such as those in body fluid (resistant to inactivation)
be effective against all types of infectious agents without destroying tissues or acting as a poison if ingested (broadly active)
easily penetrate material to be disinfected without damaging or discoloring the material (not poisonous or otherwise harmful)
be easy to prepare and stable even when exposed to light, heat, or other environmental factors (penetrating; not damaging to non-living materials)
be inexpensive and easy to obtain and use (stable; easily prepared)
not have an unpleasant odor (not unpleasant to work with)
(quoted from the lecture outline of Stephen T. Abedon [Ph.D., Microbiology] of Ohio State University for Microbiology 509)
Veterinarian Dr. Shawn E. Seitz agrees in his 2012 white paper “The Ideal Disinfectant,” citing the same six plus a few more (highlighted) to consider:
Neutral pH (preferably 6.5 – 7.5)
Excellent cleaning ability
1:64 concentrate (2 oz per gallon of water)
Cost effective
One-step functionality
Facility sparing – compatible with the composition of the surfaces you are cleaning
Hard water compatible
Ability to function in an organic load
Environmentally friendly – specifically friendly to the indoor environment and the air we breath
Safe – specifically safe in the face of accidental ingestion, inhalation, or absorption through skin
Ease of use
Pleasant fragrance
Spectrum of activity
The common thread – scientists, specifically health scientists, have developed a pretty clear goal that the evolution of cleaning and disinfecting products should keep in front of them. That’s why when Modern Cleaning began researching and testing products claiming to achieve cleaning and disinfection without chemicals, we developed this profile of the Ideal Chemical Free Cleaner:
Cleans as effectively as a well-tested and proven traditional cleaners using chemical detergents, surfactants, and/or disinfectants
Poses minimal risk to humans, indoor pets, and the indoor and outdoor environments
Has a small (or smaller) carbon footprint (from manufacturing through disposal)
Rinses clean, leaving no residue
Quickly reverts to inert elements
Manufactured on site (at the cleaning event)
Despite the continual evolution of products and equipment that come closer and closer to meeting these ideals, to date “the ideal disinfectant doesn’t actually exist because the extremes of safety and efficacy are often at odds with one another in usage applications and during product development,” according to Dr. Seitz. What we know about particularly the manufacturing and shipping impacts on product development and what we know about the effects of the disposal process on our outdoor environment is largely speculative, as few have made such scientific inquiry a priority.
What we can test and measure is the influence of reduced chemicals on how clean the products and tools can leave the indoor environment and how much “less dirty” that same environment becomes from week to week when a chemical free cleaning procedure is used.
This weekend, my friend Sarah offered me her entire crop of butternut squash…because she didn’t know what to do with them. Sarah, you don’t know what you’re missing! This delicious squash has a simple, light, nutty butter flavor of its own but also provides a wonderful base for sweet or savory additions.
As we are on the cusp of Fall and the morning and evening temperatures are cooling, I’m ready to start on soups, and butternut squash soup is hands-down my favorite! Luckily it’s also the one I can’t seem to screw up despite the fact that I don’t measure…ever!
Here’s what you’ll need for my savory version of the soup:
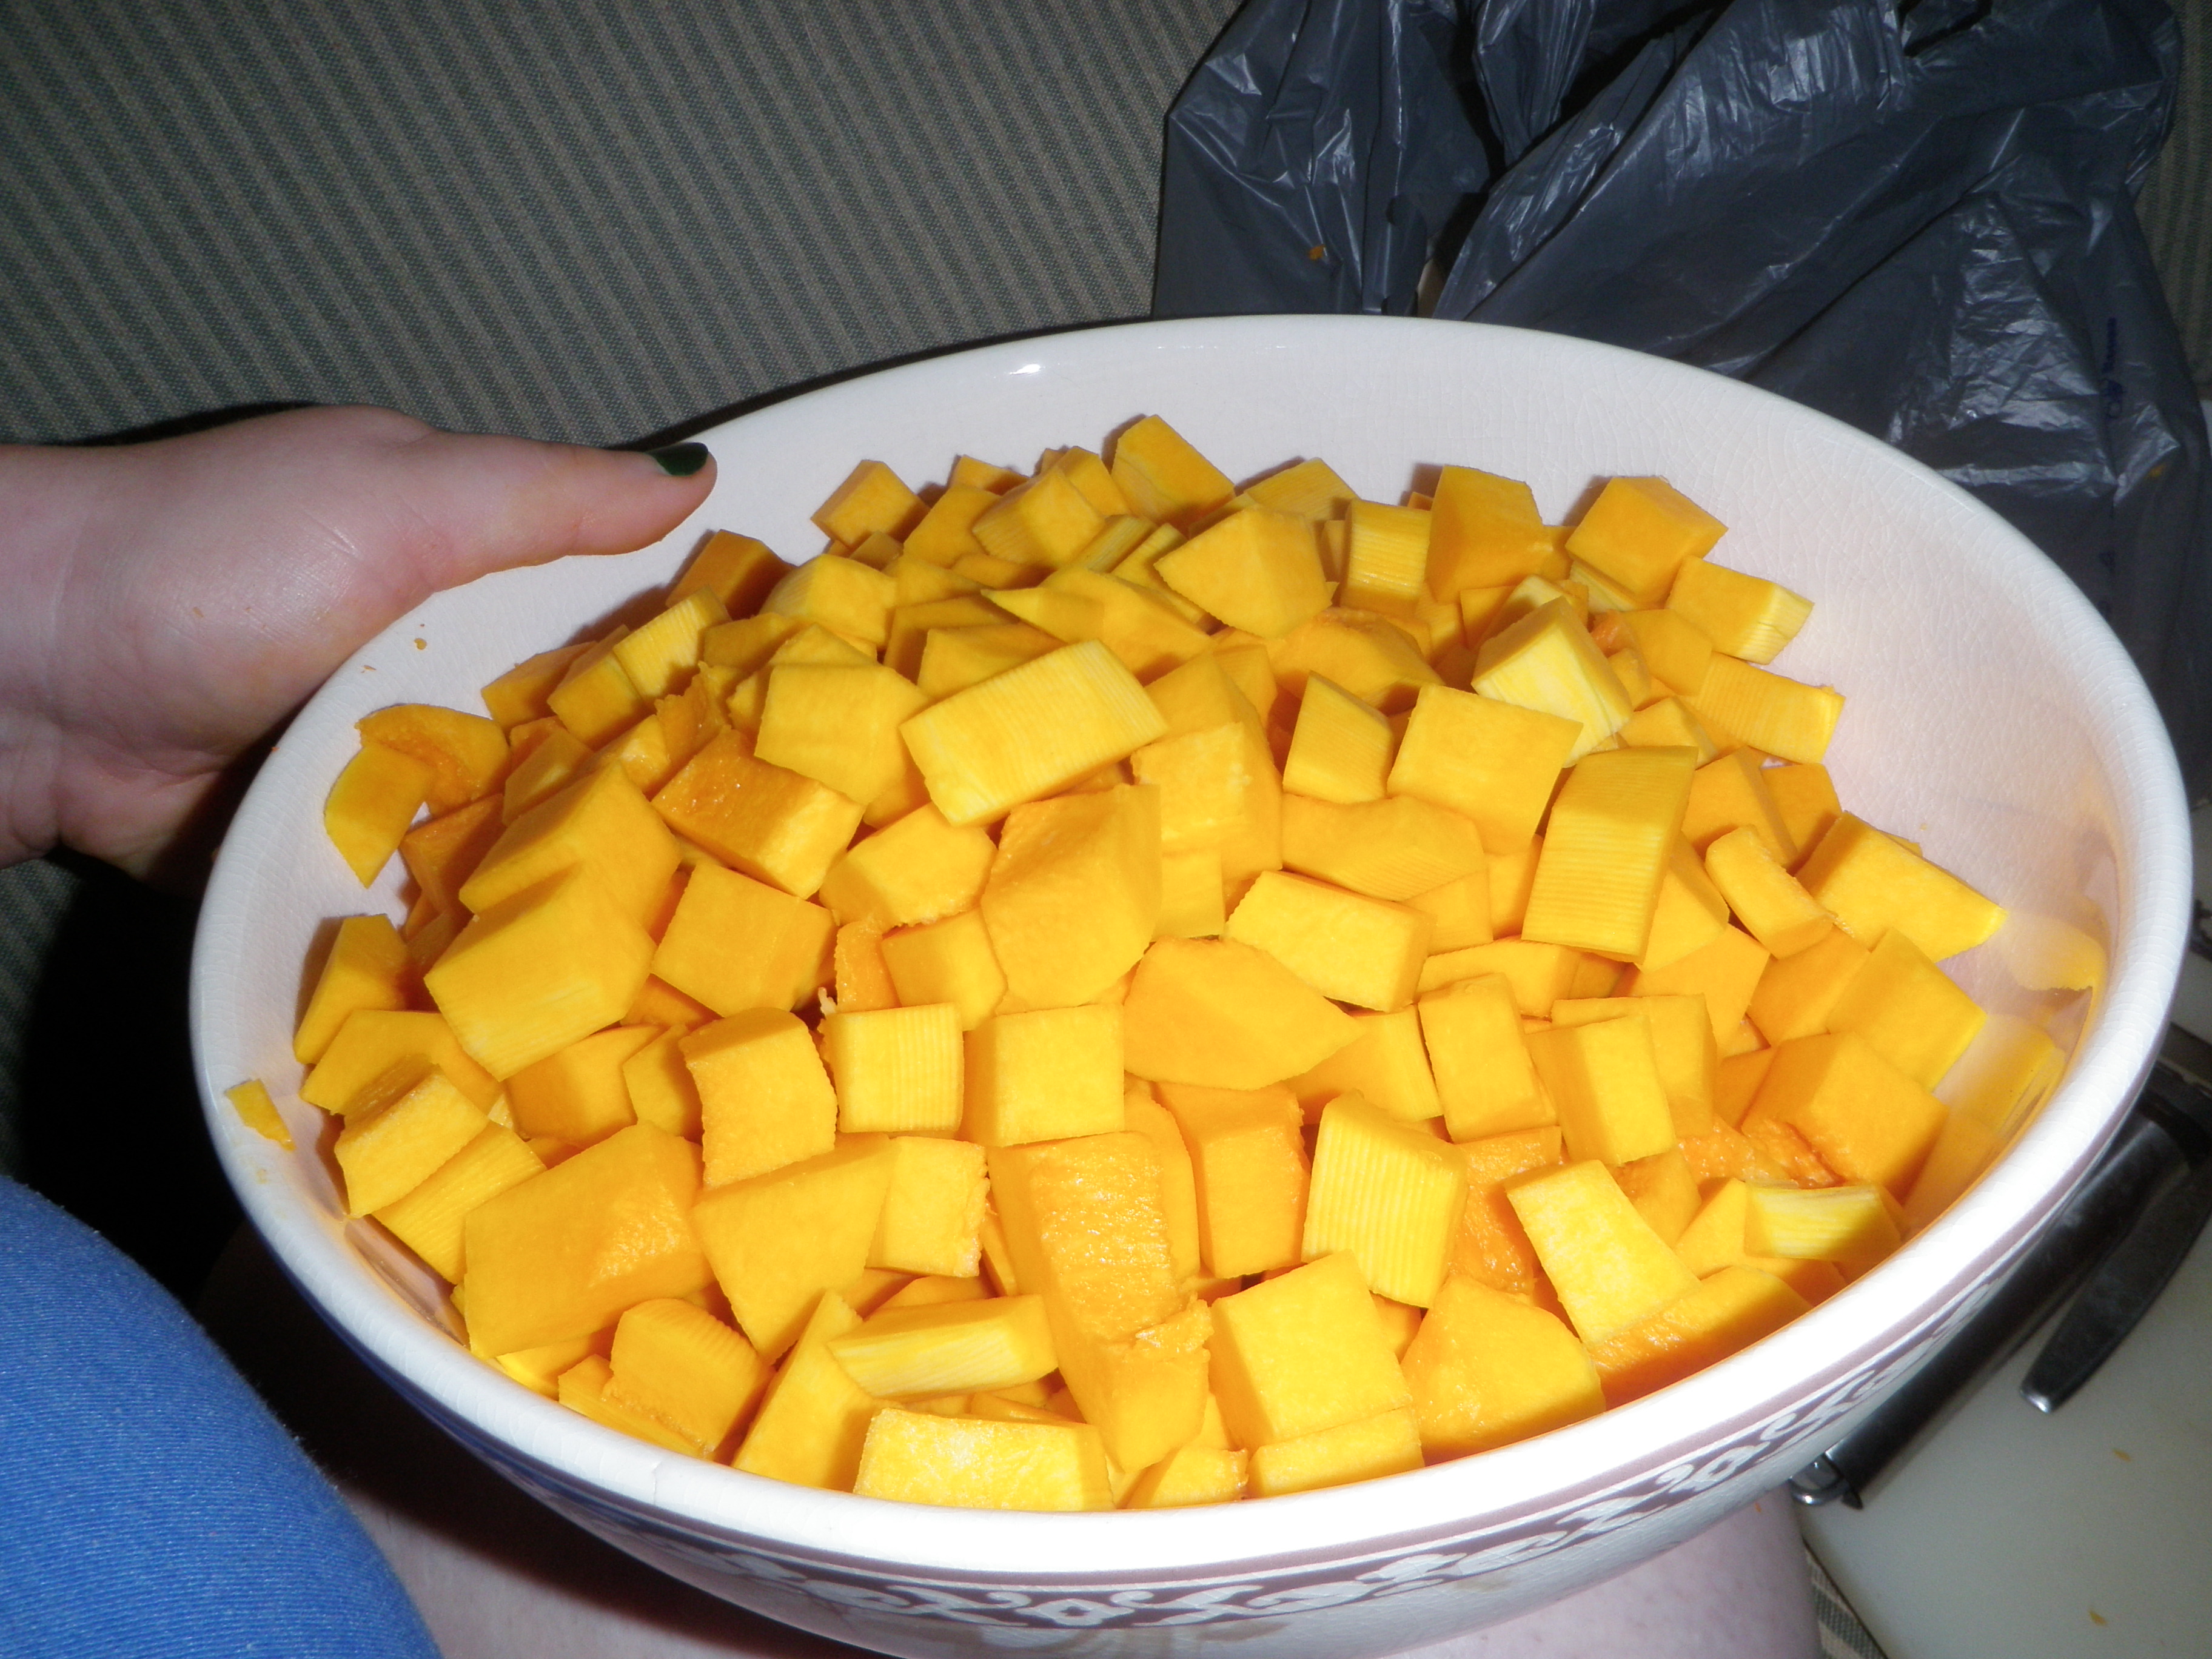
Butternut squash: peeled, seeded, and diced
Sweet onion: peeled and quartered
Carrots: cleaned and chopped
Garlic: one whole pod peeled (not one clove, but the whole pod of 10-12 cloves)
Stock or Cream: up to 8 cups, depending on your preference
Spices: Salt, Black Pepper, Ginger, Cumin, Coriander Seeds
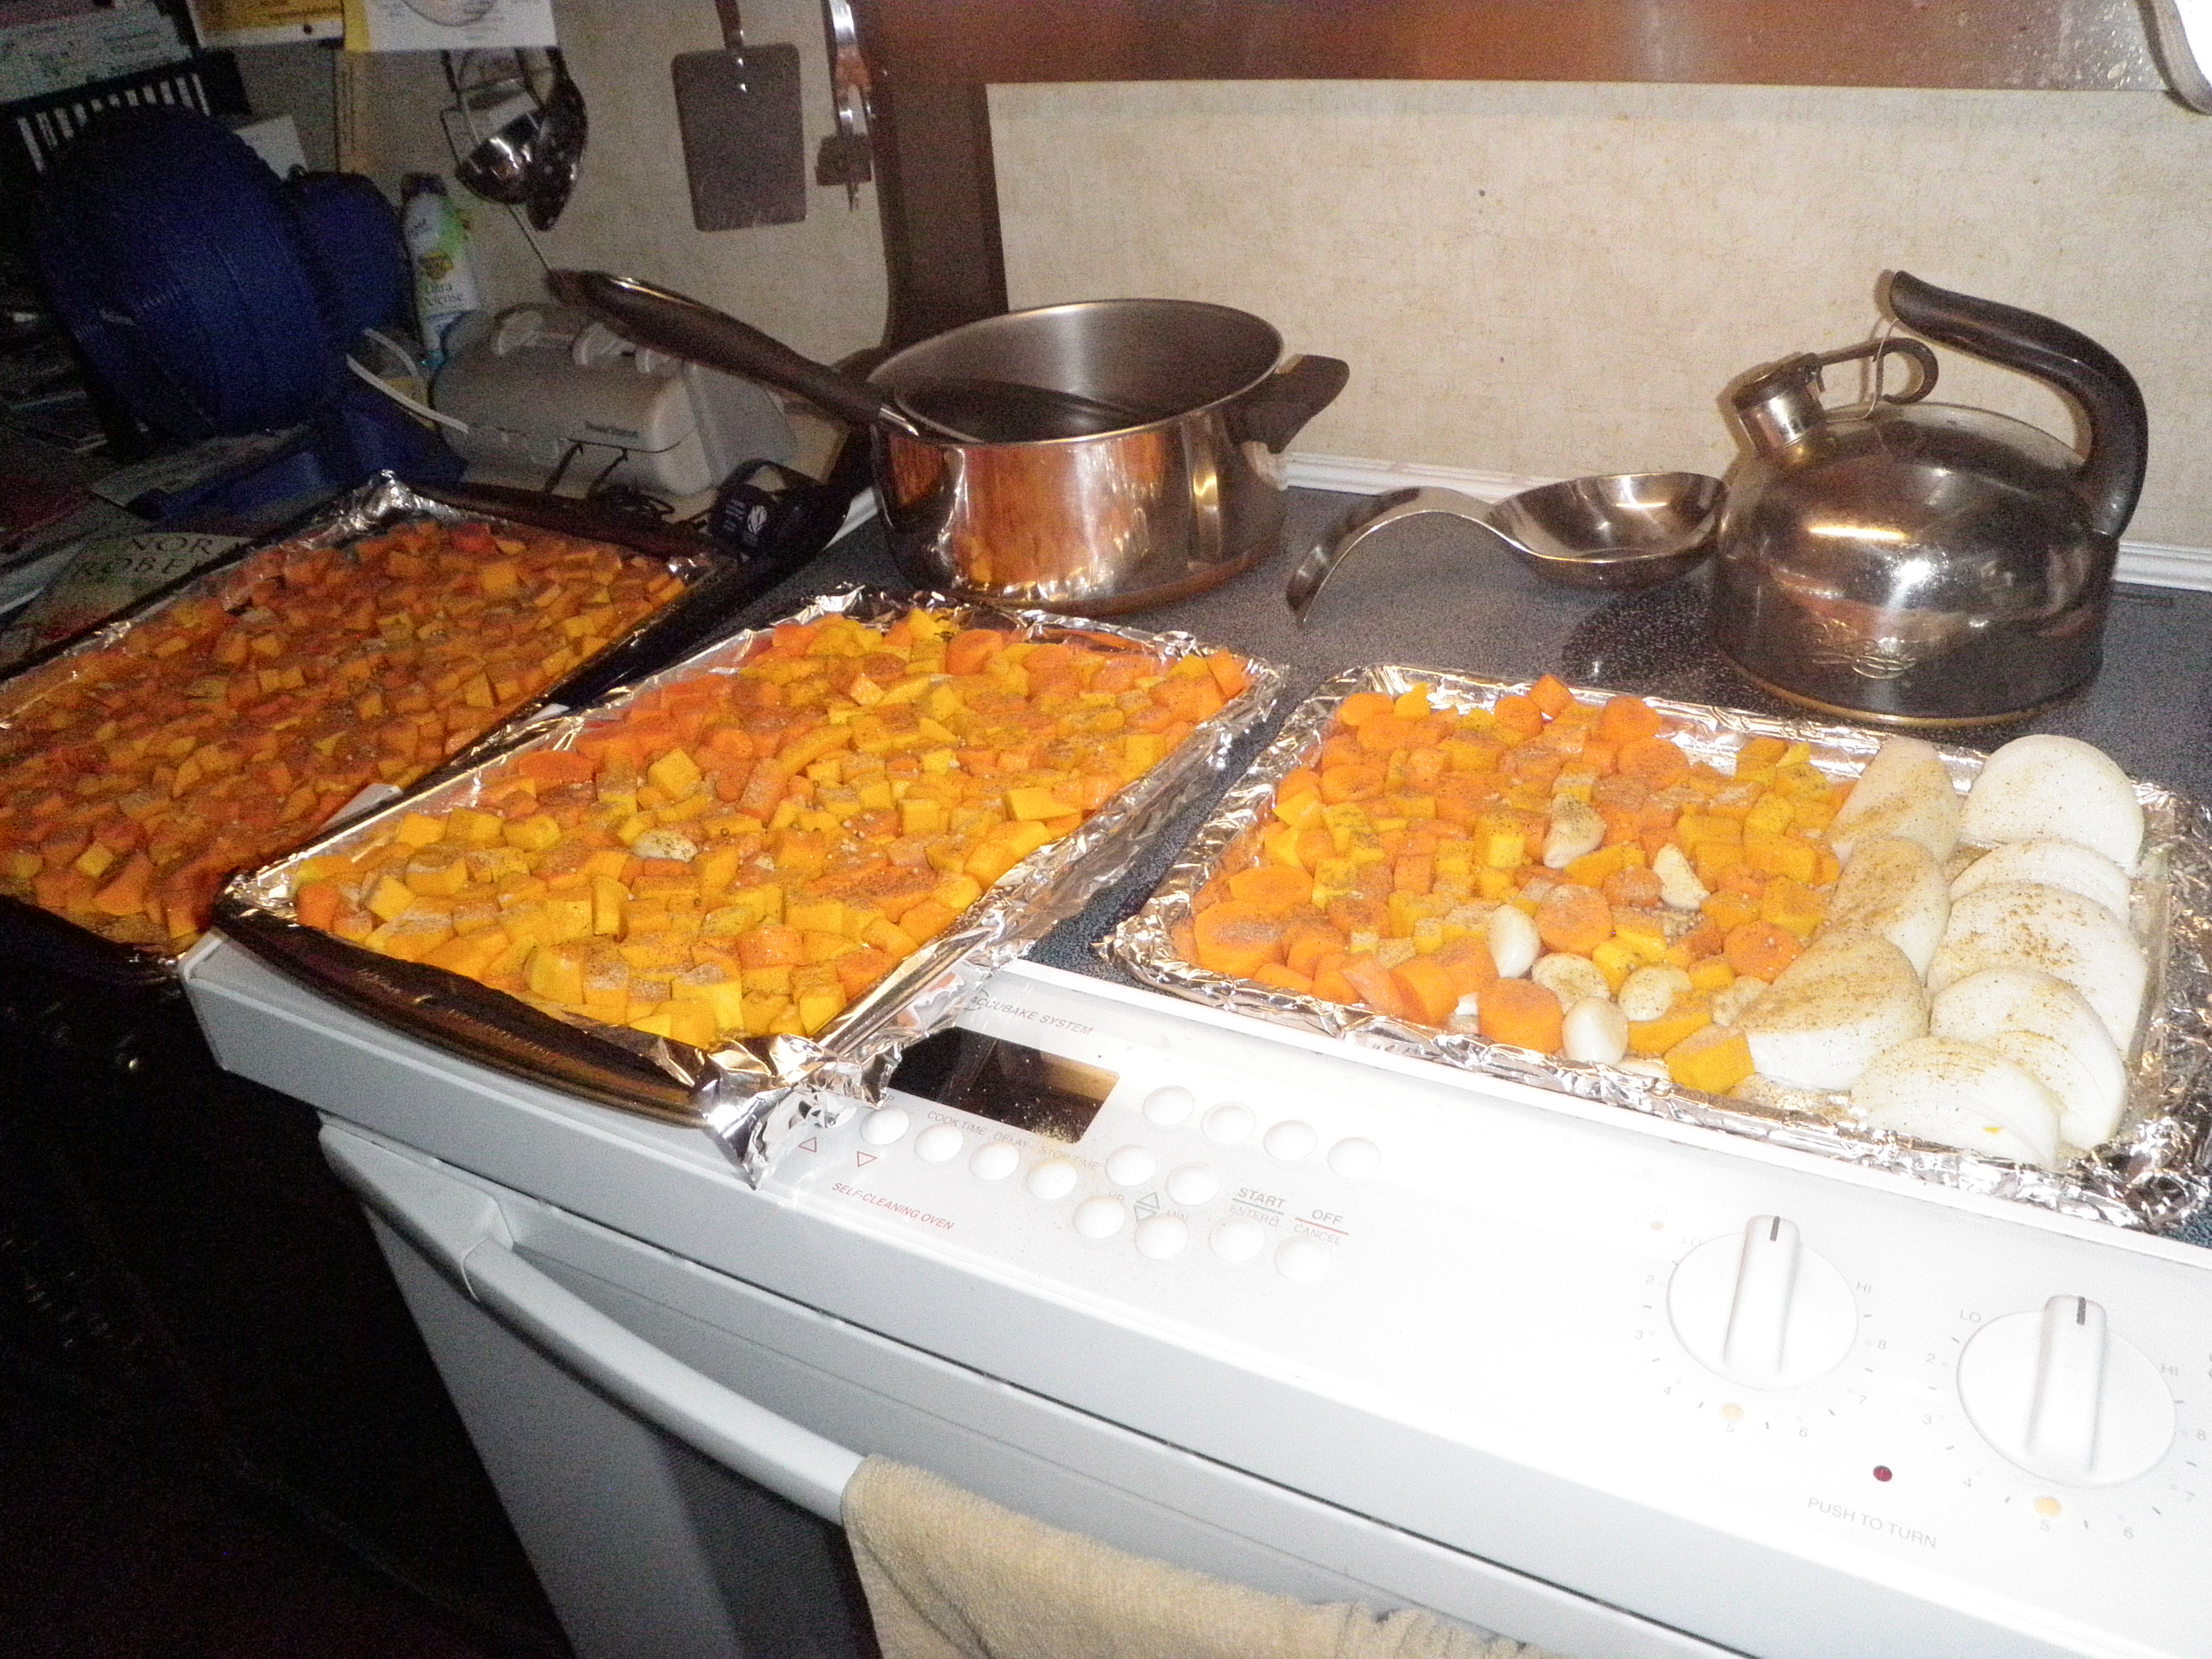
Get all the veggies cleaned and cut. I usually do this while watching a movie, a method I “developed” from my days living in a tiny Brooklyn flat with no kitchen counters. If you’re using fresh ginger, peel, dice, and add that to the roasting mix.
Spread them all out on cookie sheets, making sure everything is in just one layer. Dust with salt, pepper, and spices; use as much or as little as you like. Roast at 400°F for 45 minutes. Turn off the oven and let them sit for another 15 minutes.
Dump all the veggies carefully into a large stock pot. Here’s where I’ve got to talk you through some options.
Option 1: Stock or Cream
The difference between a soup or a bisque is the use of stock or cream as your thinning or thickening agent. There are a few other options besides cream for a bisque, but that’s the traditional one. Vegans can choose vegetable stock or soy or rice milk. For the least flavor interference, use homemade vegetable or chicken stock. For a richer, velvety flavor, use beef stock. For the sweeter version of this soup, use ham or veal stock. And you can always use just plain water, especially if you are looking for a thicker consistency and not worried about having to use too much.
Option 2: Blending Method
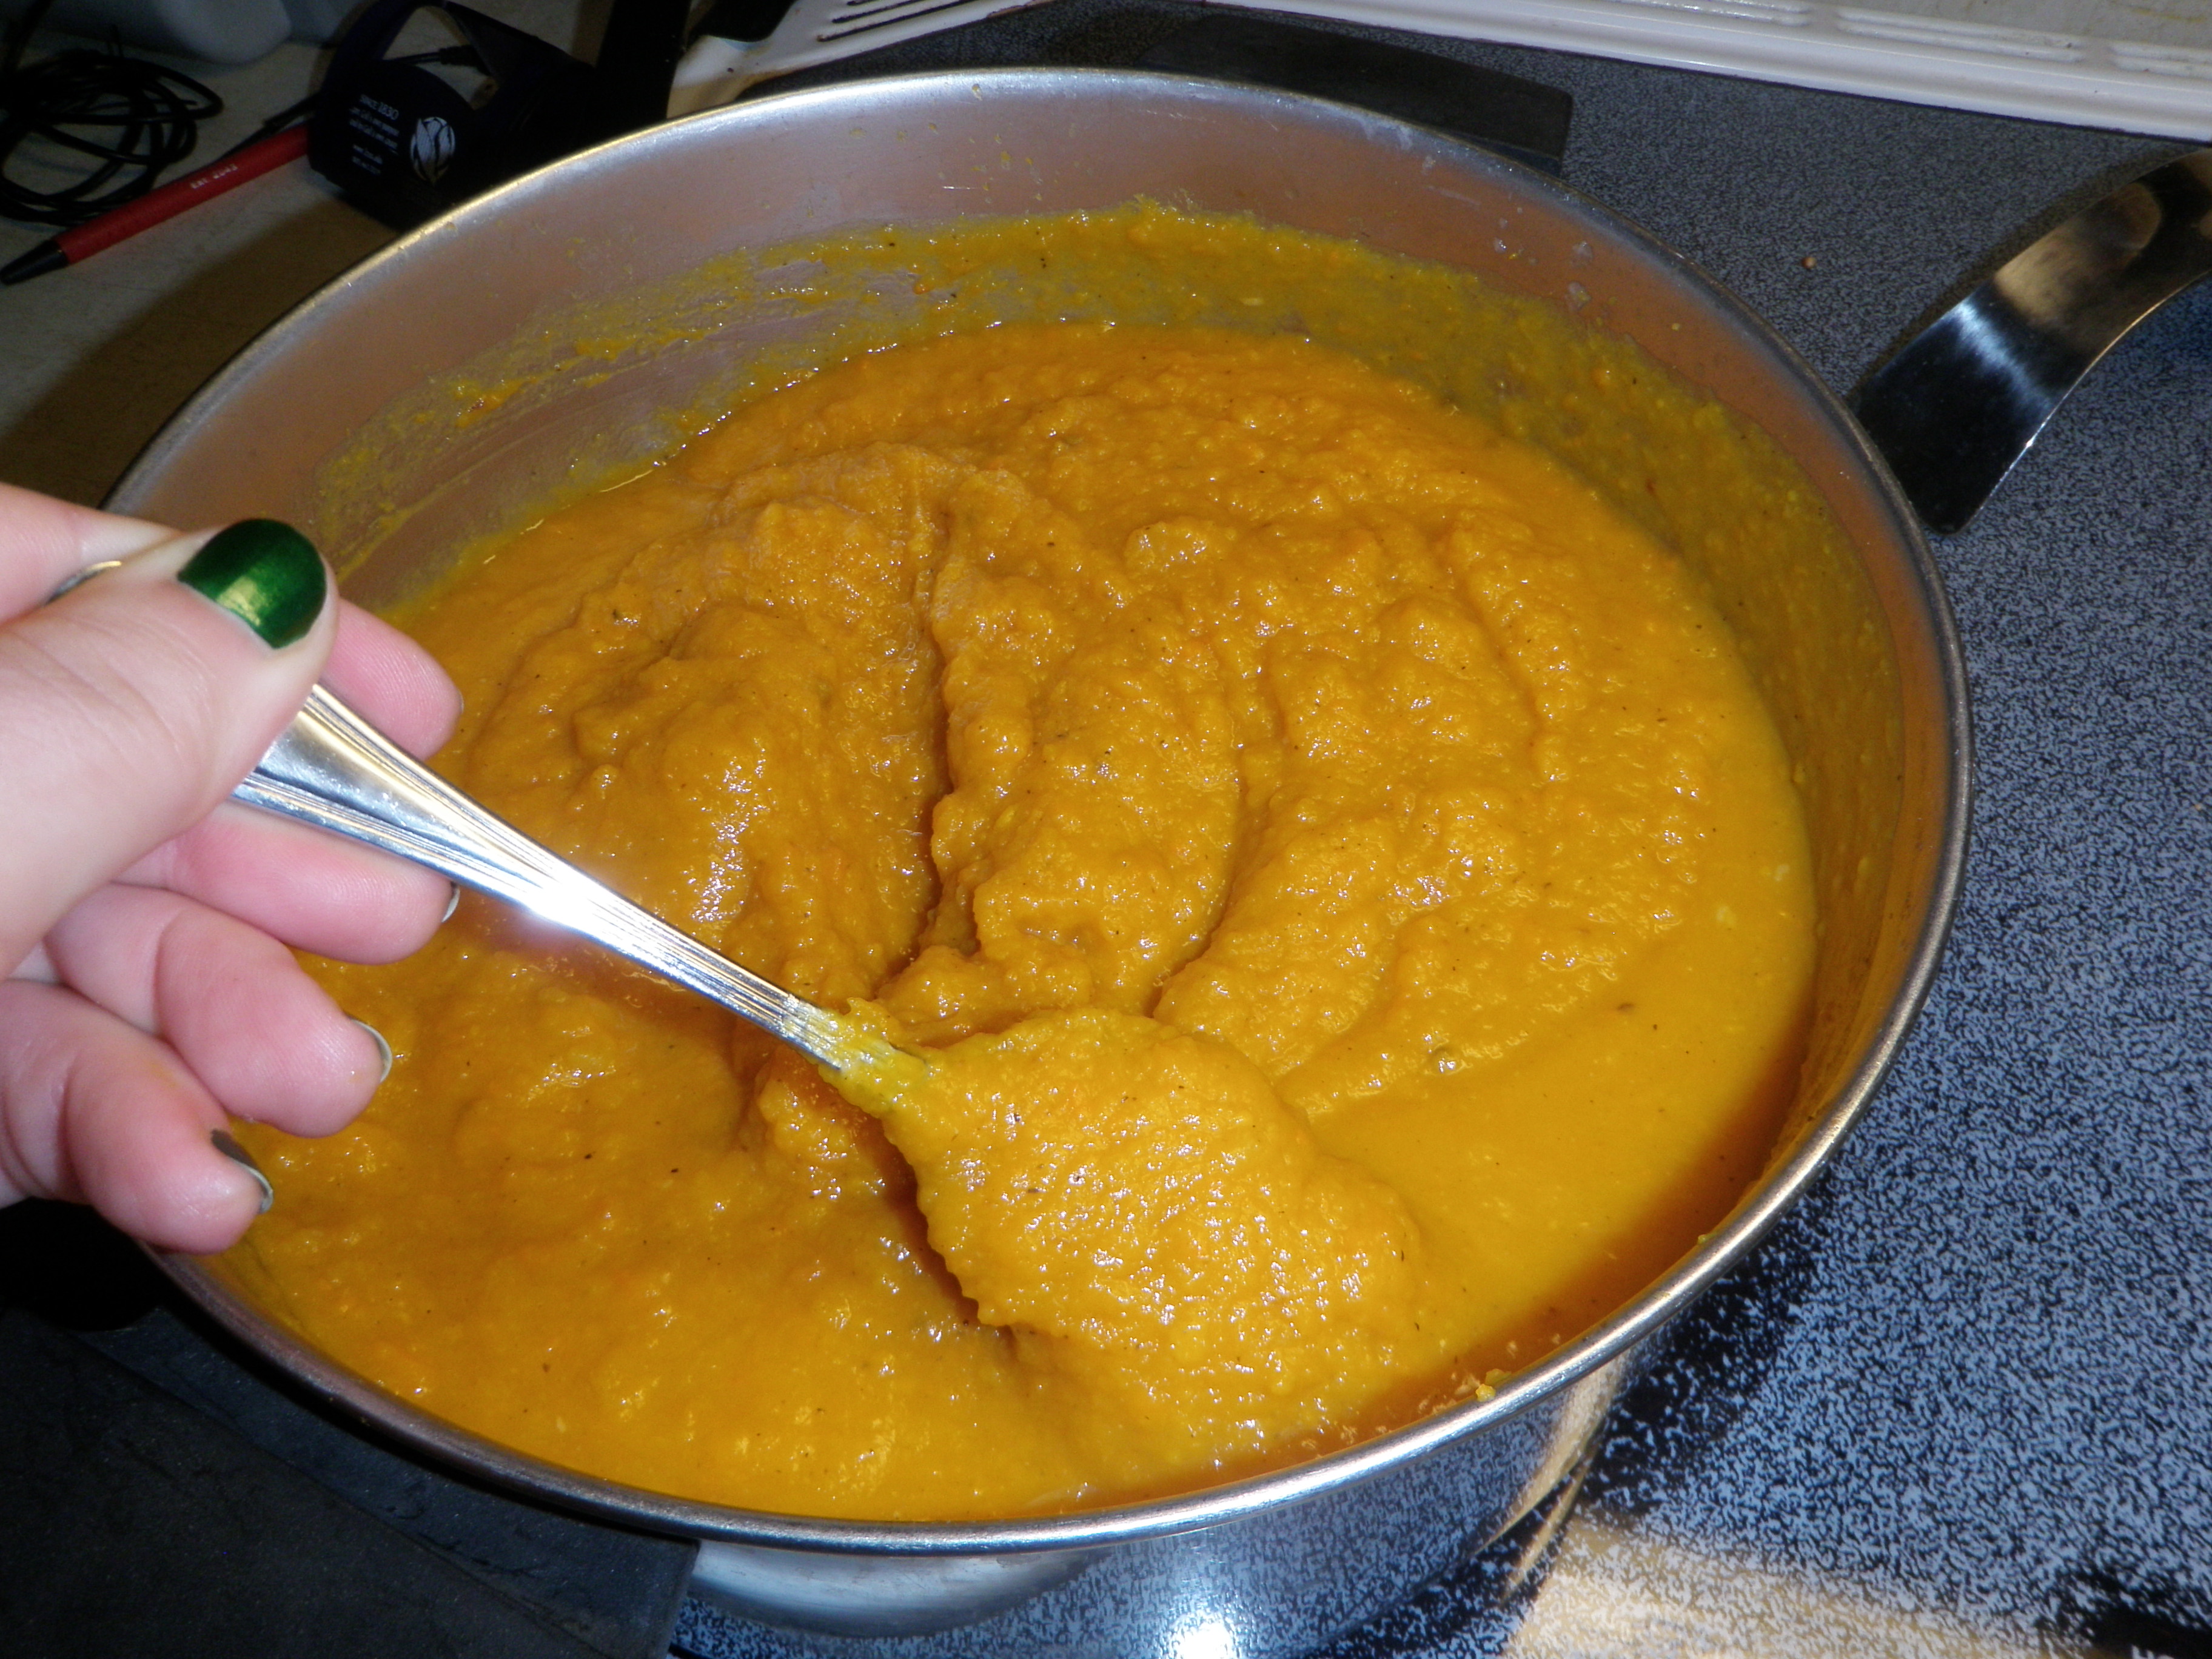
If you’ve watched chefs on cooking shows make soup, you’ve seen the two methods: blender or immersion wand. Both can achieve the same level of smoothness, but the traditional blender will get you there faster; just make sure the veggies have cooled to room temperature before using the traditional blender. Me, I like the convenience of the immersion wand because I can pretty much put all of the veggies in at one time and both see and feel the consistency as I’m blending; it offers a level of control that you don’t get with the traditional blender.
I like my soups with a strong “mouth feel,” which usually translates into thick or stew-like. I know it makes the blended soups look like baby food and/or baby poo, which, by the way, reminds me to tell you that this is exactly how to make your own baby food; studies show that children who eat the same food and same seasonings in their baby food as their parents have on their plates aren’t as picky during their formative years, making meal time much easier to deal with.
When my Mom insists on the sweeter version of this soup, it goes something like this:
Butternut squash
Carrots
Onion
Cream
Ginger, Nutmeg, Cinnamon, Brown Sugar (during blending)
This version comes out similar to sweet potato soufflé (aka sweet potato casserole) with Thanksgiving spices and sweetness. I just don’t happen to like that very much.
Note for Sarah: other ways I use butternut squash:
Oven or deep fried fries…similar to sweet potato fries
Winter Veggie Salad with b. squash, zucchini, carrots, onions (or mix with orzo or rice or risotto)
There’s this new local soup and sandwich shop Ladles in Sweetgrass (the new Harris Teeter off Hwy 17 N) that serves up a fantastic Greek Lemon Chicken Soup…not tart, but fresh lemon flavor, hint of garlic, and just oh so comforting…even in the hot Lowcountry summer, which has gotten an early start.
But it’s not always convenient to go get it. And I needed something to make for my lunches this week that would make a little extra for one of our dinners. And…I’m a soup fanatic. Love it….hot or cold weather…but not really many cold soups.
So…what makes Greek Lemon Chicken Soup special? Well, to tell you the truth, it’s basically homemade chicken noodle soup with a special touch right at the end. Here’s how it goes.
Ingredients:
6 large chicken breasts, skinless and boneless (about 4 lbs)
2 cups Israeli couscous (little tiny pasta balls)–or 2 cups white rice which is more traditional and naturally gluten free
3 eggs
juice and zest of 2 large lemons (alternate: 1 cup lemon juice)
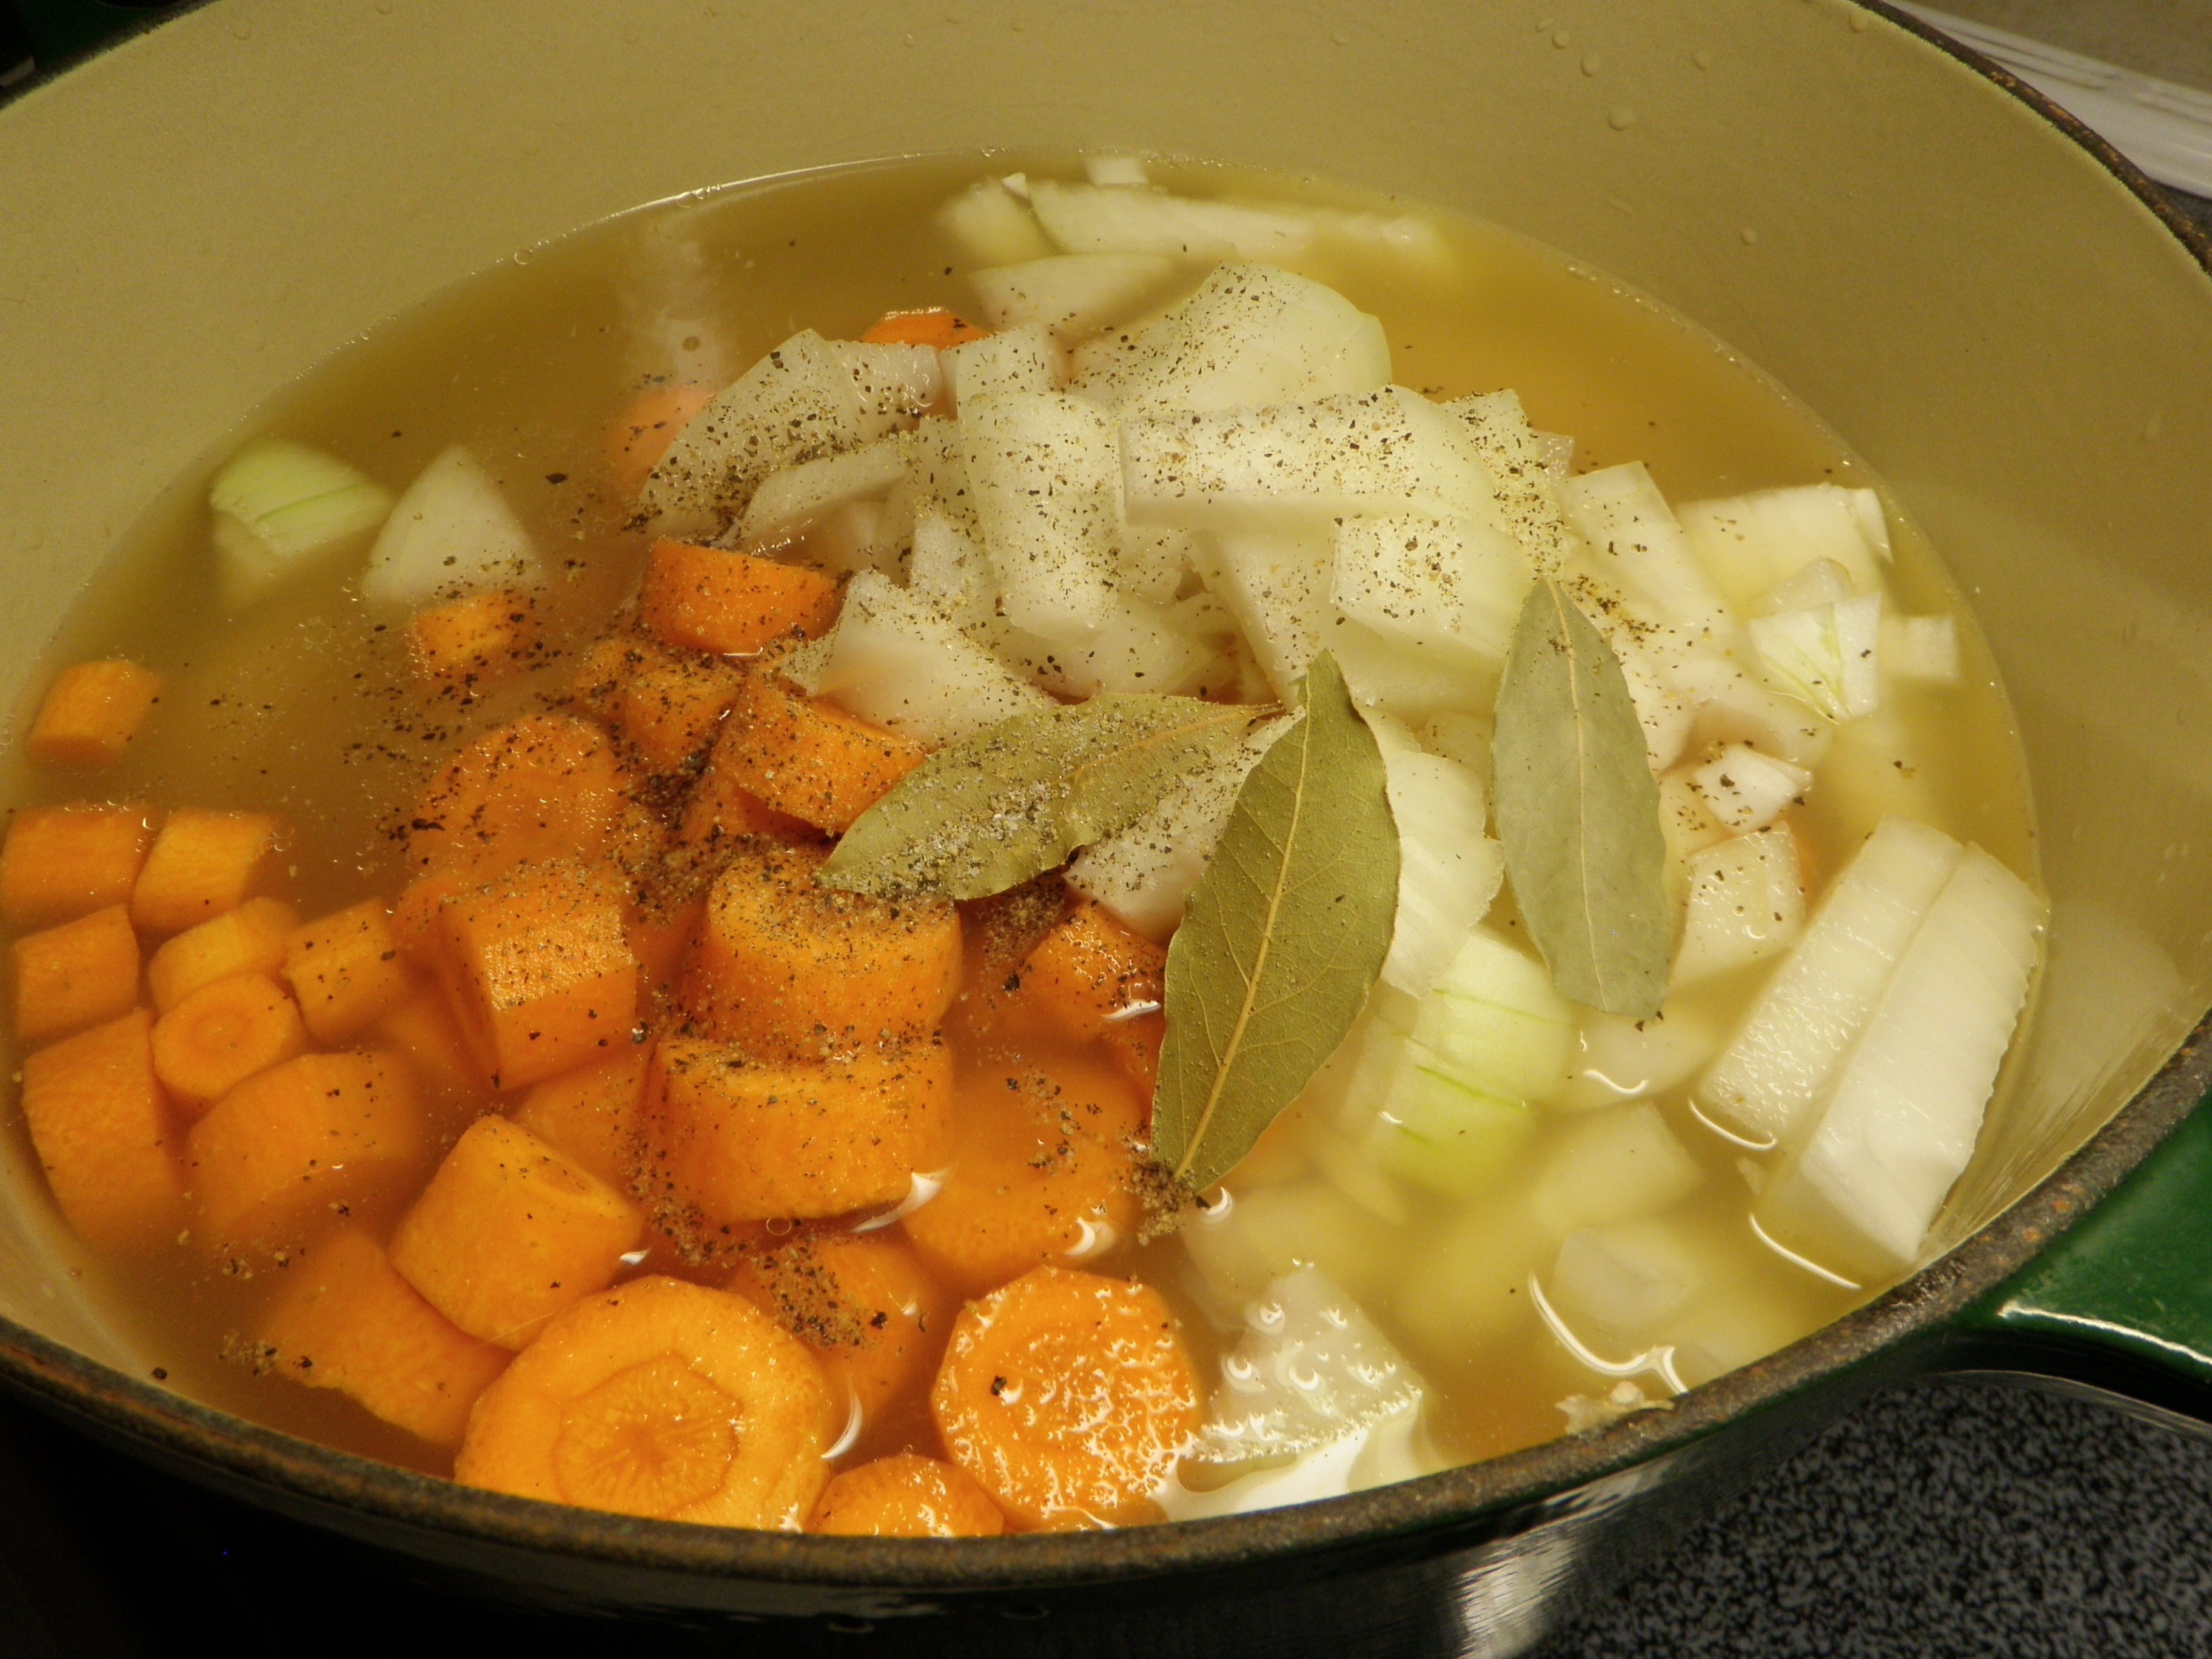
Place the chicken, carrots, onions, garlic, bay leaves, and salt and pepper in a stock pot; cover with 32 oz of chicken broth (about 4 cups). Bring to a boil, then cover and simmer for 30 minutes. This is to cook and flavor the chicken.
Remove the chicken and add the couscous and another 32 oz of chicken broth (about 4 cups). Cover and simmer while you shred (or chop) the chicken.
Add the chicken back in and stir well.
At this point, you have a fantastic and well-flavored Chicken Noodle Soup…and might very well choose to stop here.
Or…you can make and add the “Greek” part.
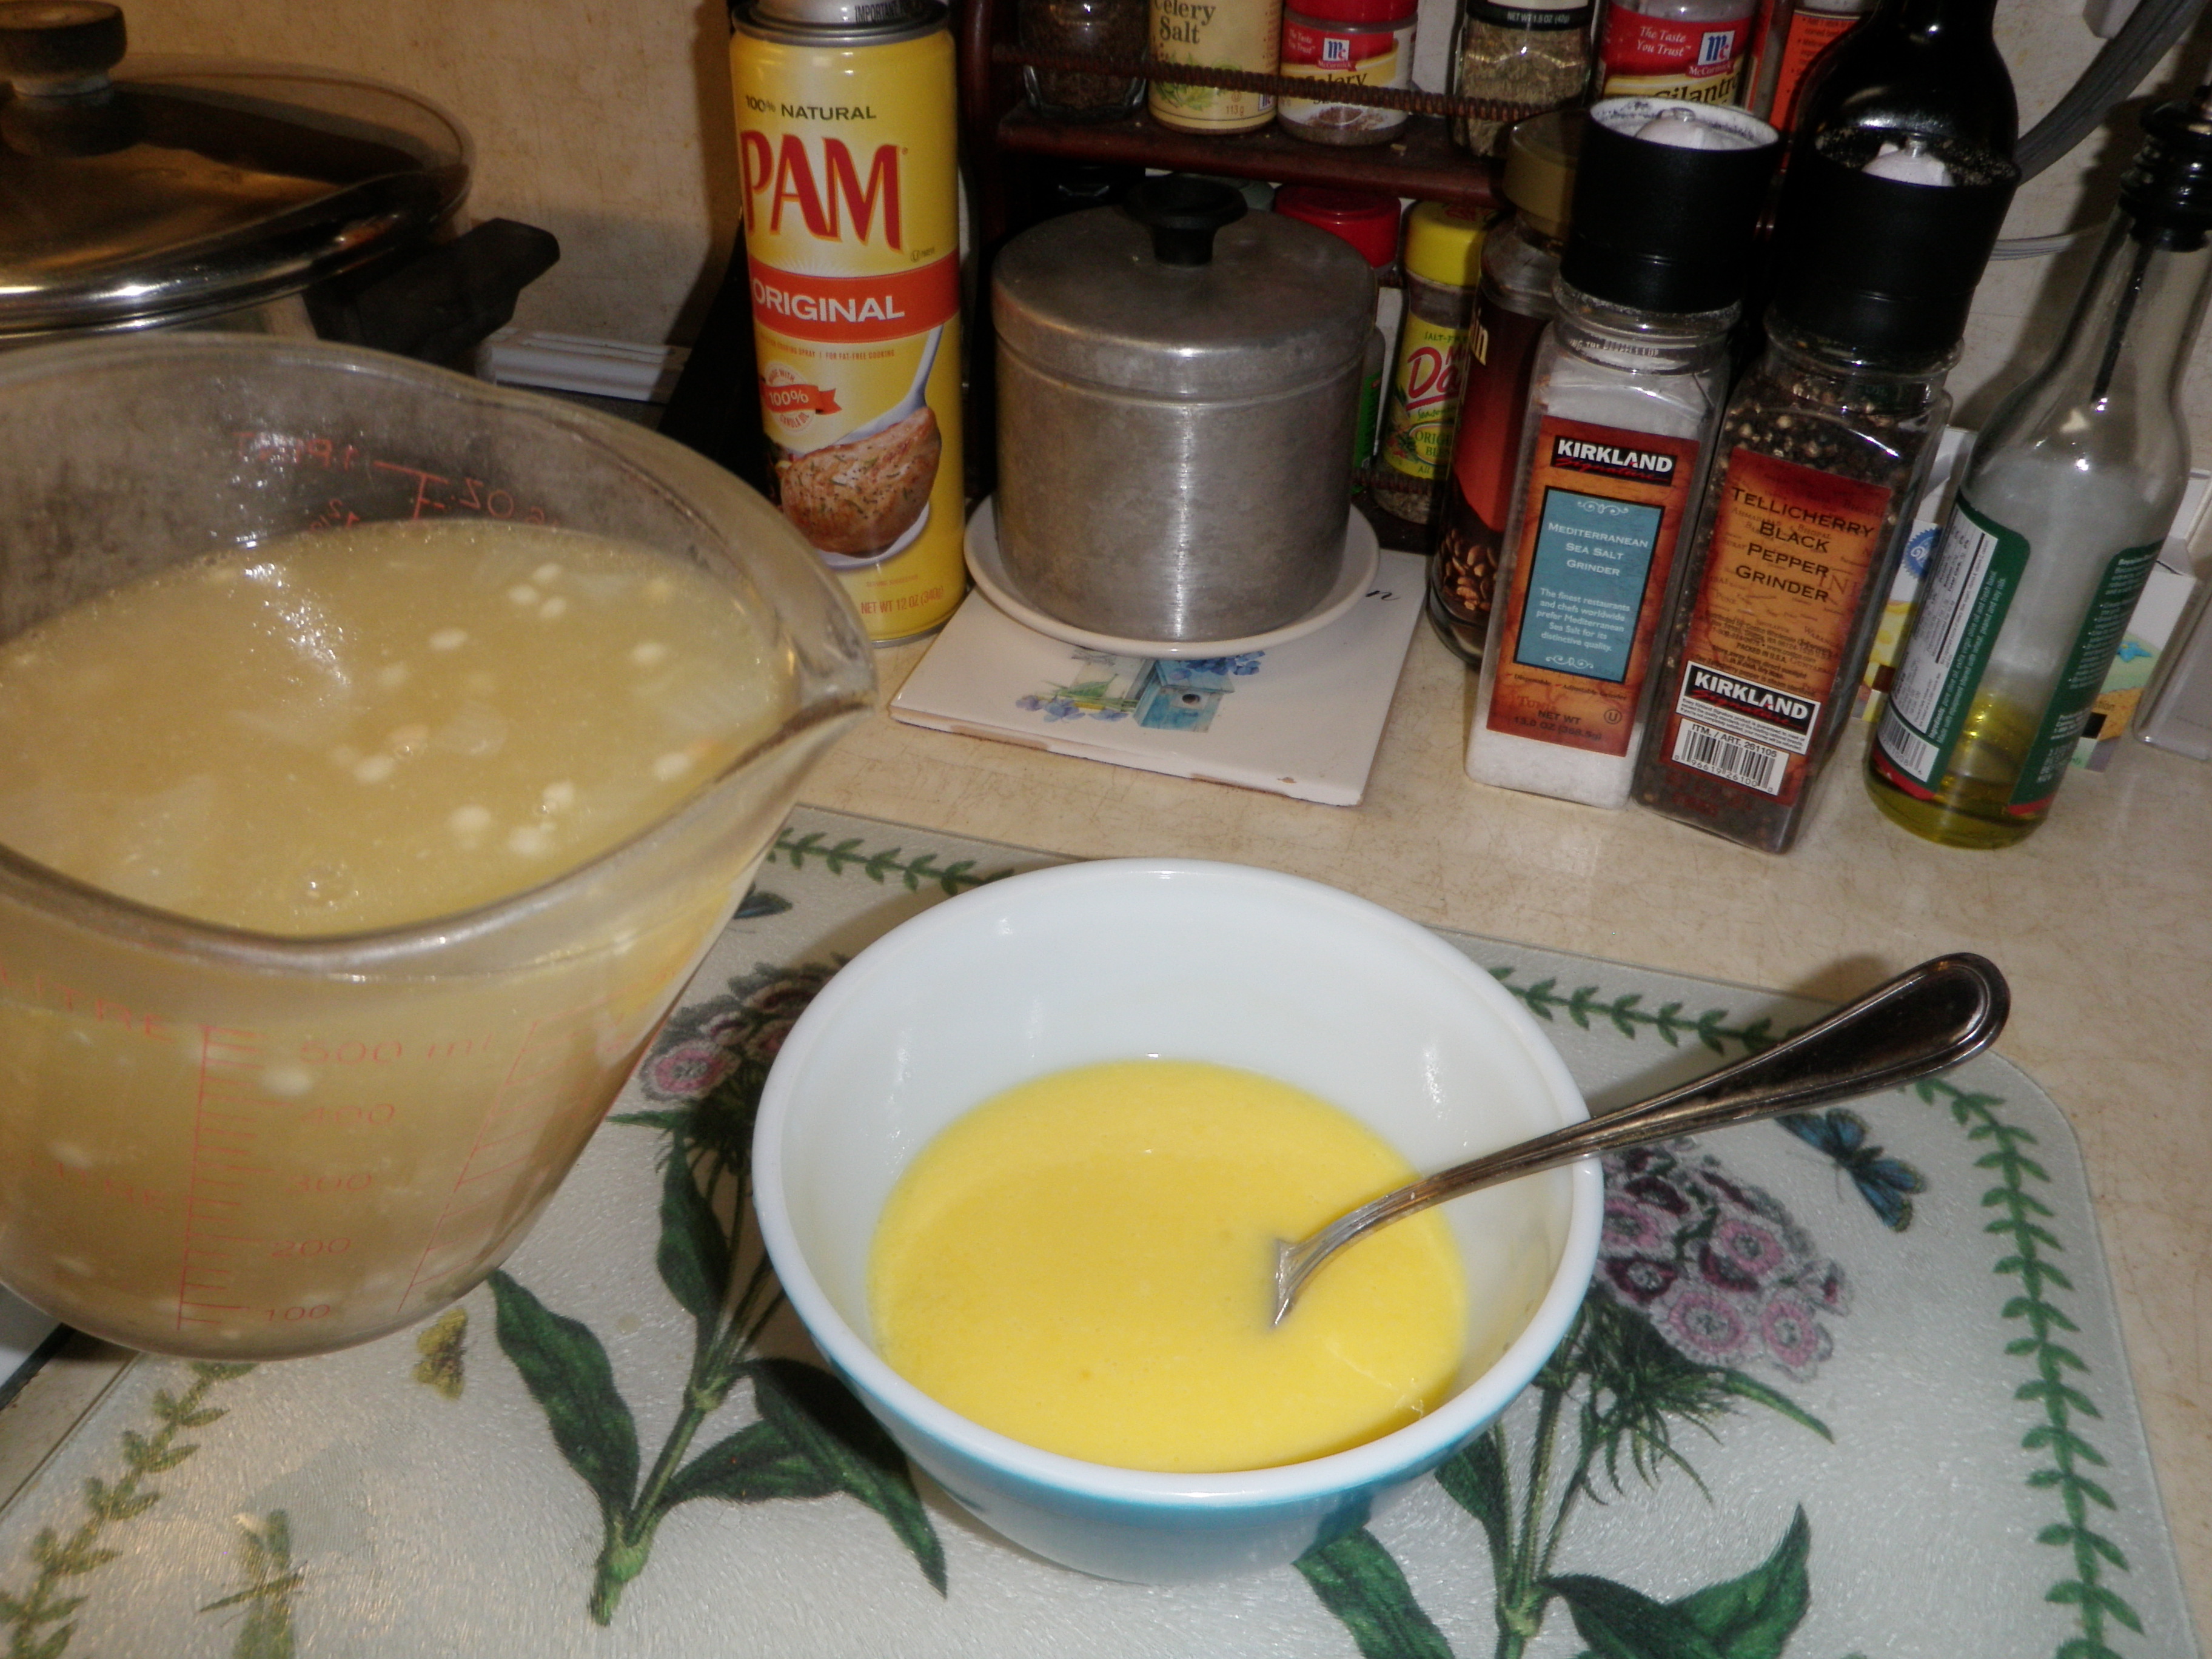
Whisk together three eggs and the juice and zest of two large lemons (about 1T zest and about 1/2 cup juice) in a large bowl. Be sure to use a large bowl, much larger than you think you need, because next you are going to add 2 cups of soup broth while whisking.
Get 2 cups of hot broth out of the soup pot; it’s okay if there’s some onion or couscous in it. I dip the broth out with a soup ladle and into a large measuring cup with a pour spout. This will come in really handy as I pour it into the egg mixture.
Now, take the measuring cup of broth in your left hand and your whisk in your right hand (or vice versa if you are left-handed).
Start whisking away gently.
Dribble the hot soup broth into the egg mixture very slowly, whisking the whole time.
It will take about five minutes, so be patient and DO NOT rush this step. This is called “tempering” the eggs, warming them up without cooking them so that when you add the mixture to the soup, it will become naturally creamy from all of the proteins!
When you’ve incorporated all of your broth, take the soup off of the heat and add the mixture to the soup. Taste and see what you think.
If you want more lemony taste, add some more lemon juice.





 )
)
 and/or disinfectants








 Singing about Cooking