Living is about indulging your passions…for me that is singing and cooking…sometimes even at the same time
Author: singingaboutcooking
If you've had my cooking or heard me sing, you've shared some of the happiest and most memorable moments of my life. But if you've been lucky enough to listen to me sing while I cook, well, then you've seen the real me. And if you've sung and cooked with me, you know what being loved by me is!
The videos are hilarious and clever, some evoking a Mel Brooks-esque Robin Hood: Men in Tights and others reminiscent of a cross between “My Little Pony” and “Care Bears” – depending on the brand.
FACT: spray that claims to neutralize the most noxious and permeating bathroom disasters is a real thing.
EVIDENCE
there are currently 3 unique brands: Poo-Pourri, Unicorn Gold, and V.I. Poo
one brand even appeared on Shark Tank for another product and won investment from Shark Lori
these brands sell their product online individually
some of these brands sell their product on a subscription, so you’re never out
all of these brands sell in stores, some boutique but up to being carried by Target
there is an entire DIY movement already in full swing
NOTE
Before I go on – and before you read on – know that I have not tried any one of these products either as a retail purchase, a donated item, a conditional trial, or even a DIY. I first thought the videos I started seeing about 3 months ago were spoofs, and when I finally saw an actual television commercial, I added this idea to my stocking stuffer list for my parents – one for home and one for travel.
THE BASICS
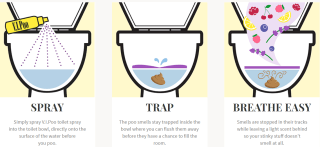
Of the three, V.I. Poo’s graphic is the simplest:
HOW THEY WORK
So far, there are two chemicals method for neutralizing the odors of poop:
Poo-Pourri and V.I. Poo uses natural essential oils to create an oil film on top of the water that will trap the poop and its odors under the surface of the water. Because oil is hydrophobic – hates water – it stays on top and, even when broken by the poop, will quickly close the rift so as not to mix with the water. One instance of verbiage on the V.I. Poo website seems to indicate that the scents are from Air Wick, and I can confirm that the V.I. Poo line of products is carried directly on the Air Wick website, listed under the Products menu heading.
Unicorn Gold uses gold nanoparticles to create a neutralizing reaction with sulfur, the main mineral causing the worst of poop odors; after that, your chosen scent takes over to product a pleasant experience. The product claims to use essential oils for the pleasant scent, and also claims to be the only marketed product that works below and above the water line – which means this one may have some effect sprayed even after the “incident.”
IT’S NOT ROCKET SCIENCE
As I mentioned in the Evidence section, one way to verify that a product has market traction is by the size and breadth of the DIY community. A simple Google search for “DIY poop spray” reveals what one site claims is the Poo-Pourri recipe; this is the very first search result, by the way.
While the essential oil version of poop spray is pretty simple to crack and copy, the formula using gold – incidentally the only one claiming to work on poop rising above the water line – is less simple, less easily DIY-able, and likely less cost effective to accomplish by DIY.
HOW ABOUT A PRICE COMPARISON
They all recommend 3-5 sprays per use, before doing the deed.
They all come in a 2 oz size; some come in larger sizes as well.
The average price for the 2 oz size is $10.07 – ranging from $9.95 to $10.25.
CAUTION
I have to assume that the 3-5-spray recommendation is designed for low-water toilets because I simply cannot imagine that’s enough oil+carrier solution (it’s a 100% oil solution) to create a uniform film over the often 8″x8″ water surface of an old fashioned toilet. Perhaps trying will out the truth.
WHAT WILL CECE DO?
Because Poo Pourri is available at four local stores within 5 miles of my home, I am most likely to purchase my first bottles as the stocking stuffers I first intended them to be. All of these stores are locally-owned and operated independent businesses, not part of chain stores small or large.
My dad grew up country and military, so he learned how to make something delicious out of nothing early in the life and from both his momma and his daddy – my Grannie and Papa Joe.
Between camping and hunting, Boy Scouts, and military life all using campfire cooking, a favorite campfire skillet breakfast is born: Campstyle Eggs.
Here’s the proportions for a 4-serving batch, which I made this evening for my Vietnam Veteran dad – Ed Mikell.
1/2 lb breakfast sausage (Jimmy Dean Hot, one of my dad’s favorites)
2 medium potatoes diced pretty small, or equivalent baby potatoes (we prefer yukon gold or red potatoes)
1 small onion diced (sweet for us)
1 small green bell pepper diced
1 clove garlic, minced (optional and not a traditional ingredient)
3 jumbo or 4 large eggs (subs: 1 cup Egg Beaters, tofu scramble)
1 T milk per egg
Prep your potatoes, onions, and peppers before you start; this dish goes fast!
Brown up the sausage on medium high heat, using your wooden cooking spoon to break it up into a fine crumble. Use a slotted spoon to remove the sausage to a paper towel, leaving all of the pork fat grease in the pan.
Drop in the potatoes, stir to coat in the pork fat grease well, and smooth into a single layer. Now leave them alone for a good 2 minutes (if diced really small) or 3 minutes (if diced a little larger) to get a light crispy golden crust on that one side. Stir gently to unstick the potatoes and roll them onto their other sides to continue cooking. I like the really small dice for this dish because you can crisp up the potatoes pretty quickly and get the whole dish done in under 20 minutes.
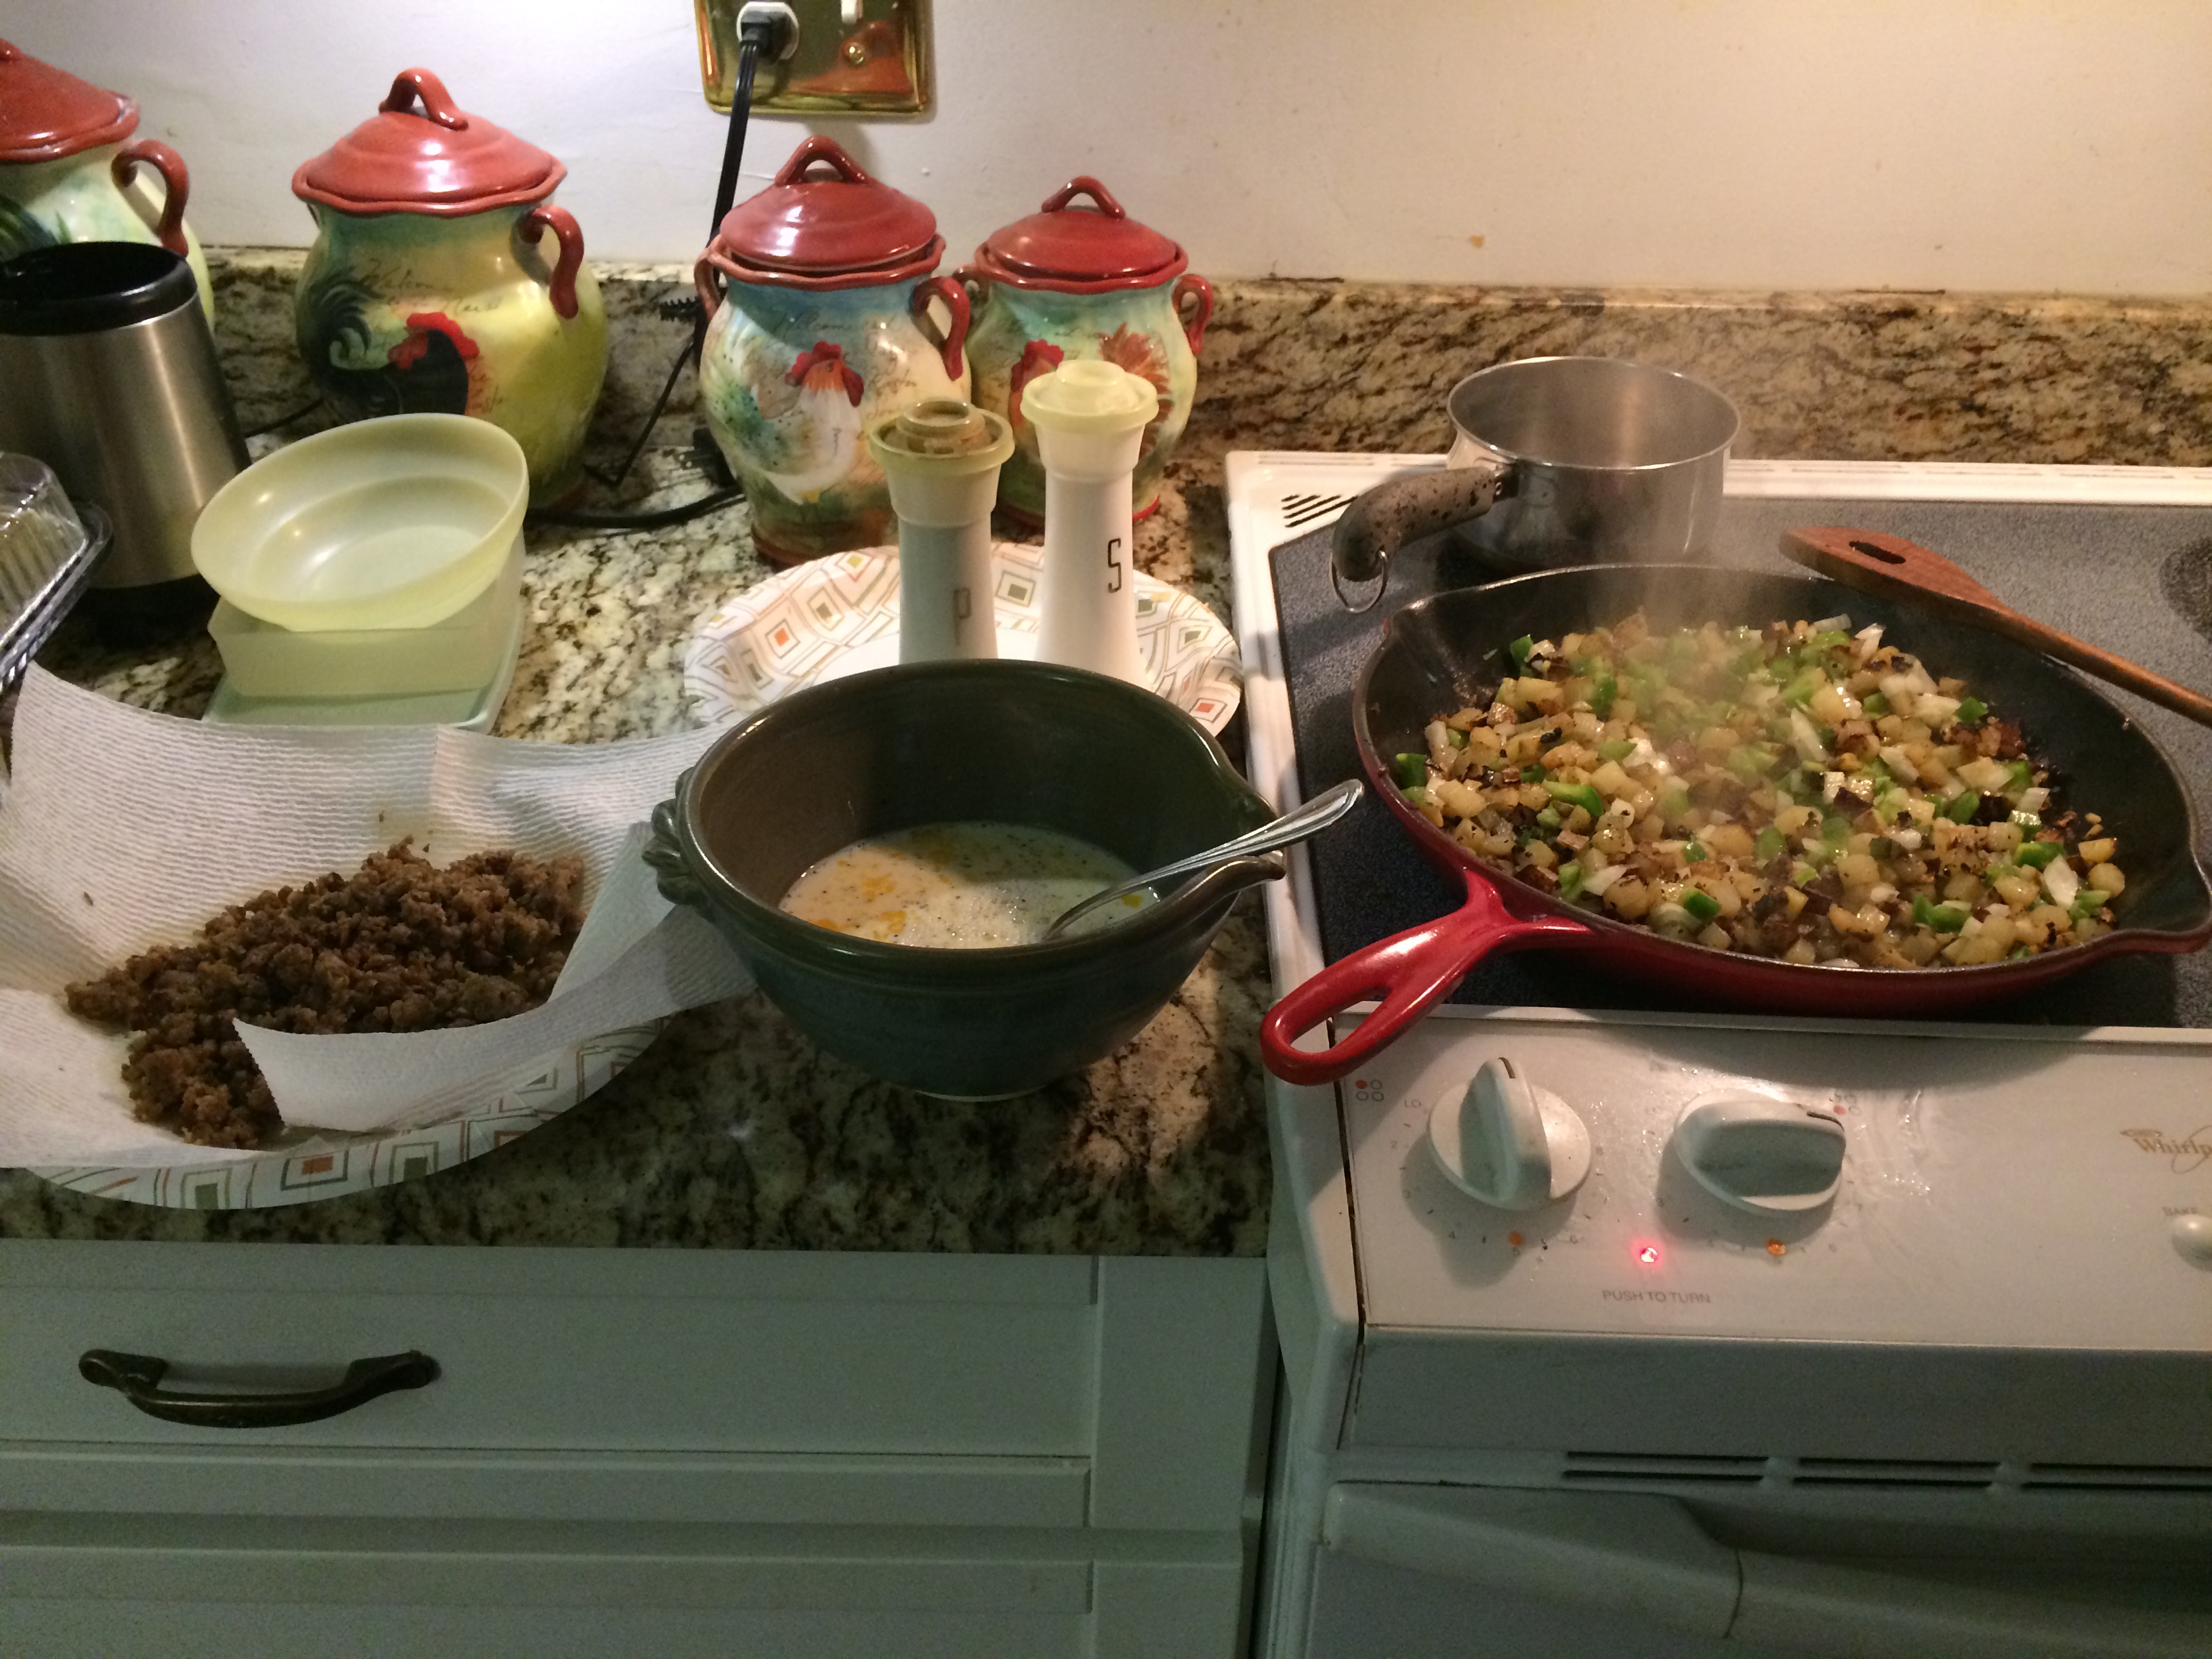
All the veg in the pan; all the meats waiting for their turn.
Once the potatoes have softened but may still have some crunch or bite to them still, drop in the onion and pepper to begin cooking. If you wait until the potatoes are completely and perfectly done, you’ll end up with half hard crunchy over cooked potatoes and half smushed potatoes, neither of which are desireable in the final dish.
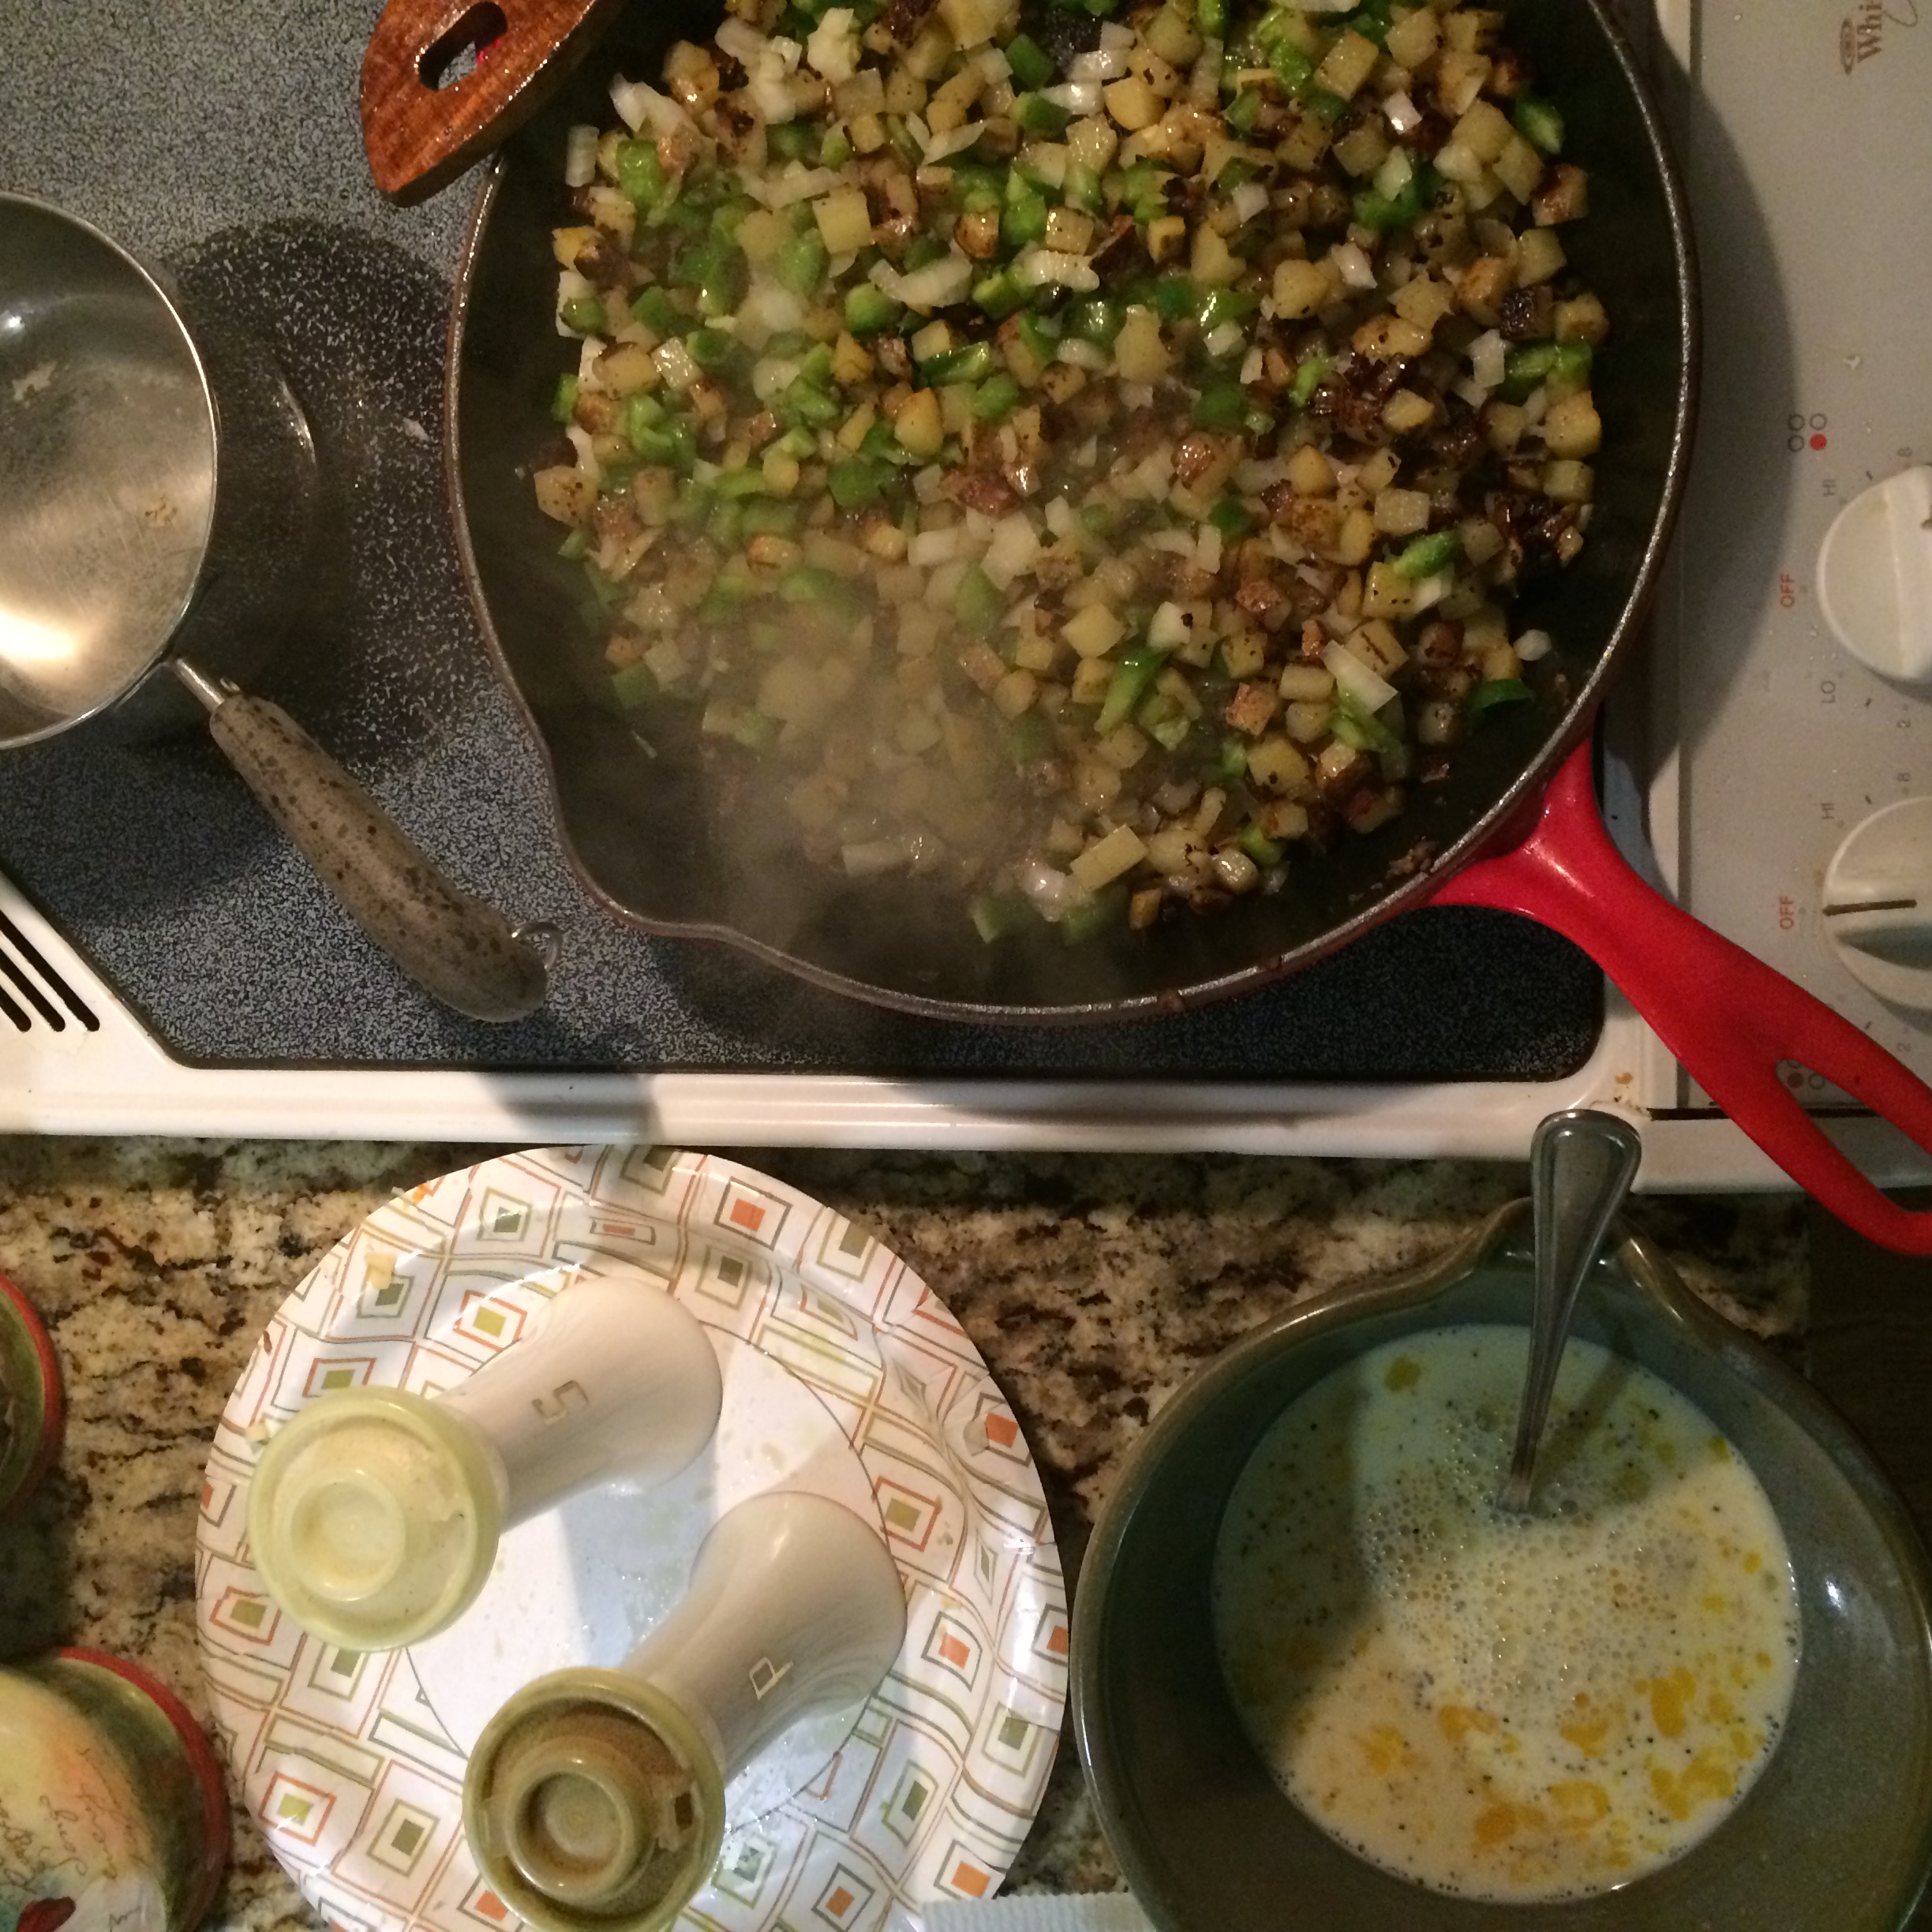
Everything is in the pan, waiting for the eggs!
While the potatoes, onions, and peppers are finishing, scramble 3 eggs with about 2 T milk; be sure to salt and pepper your egg scramble or the eggs will be bland.
I only had 3 large eggs, but this dish is very forgiving of amounts!
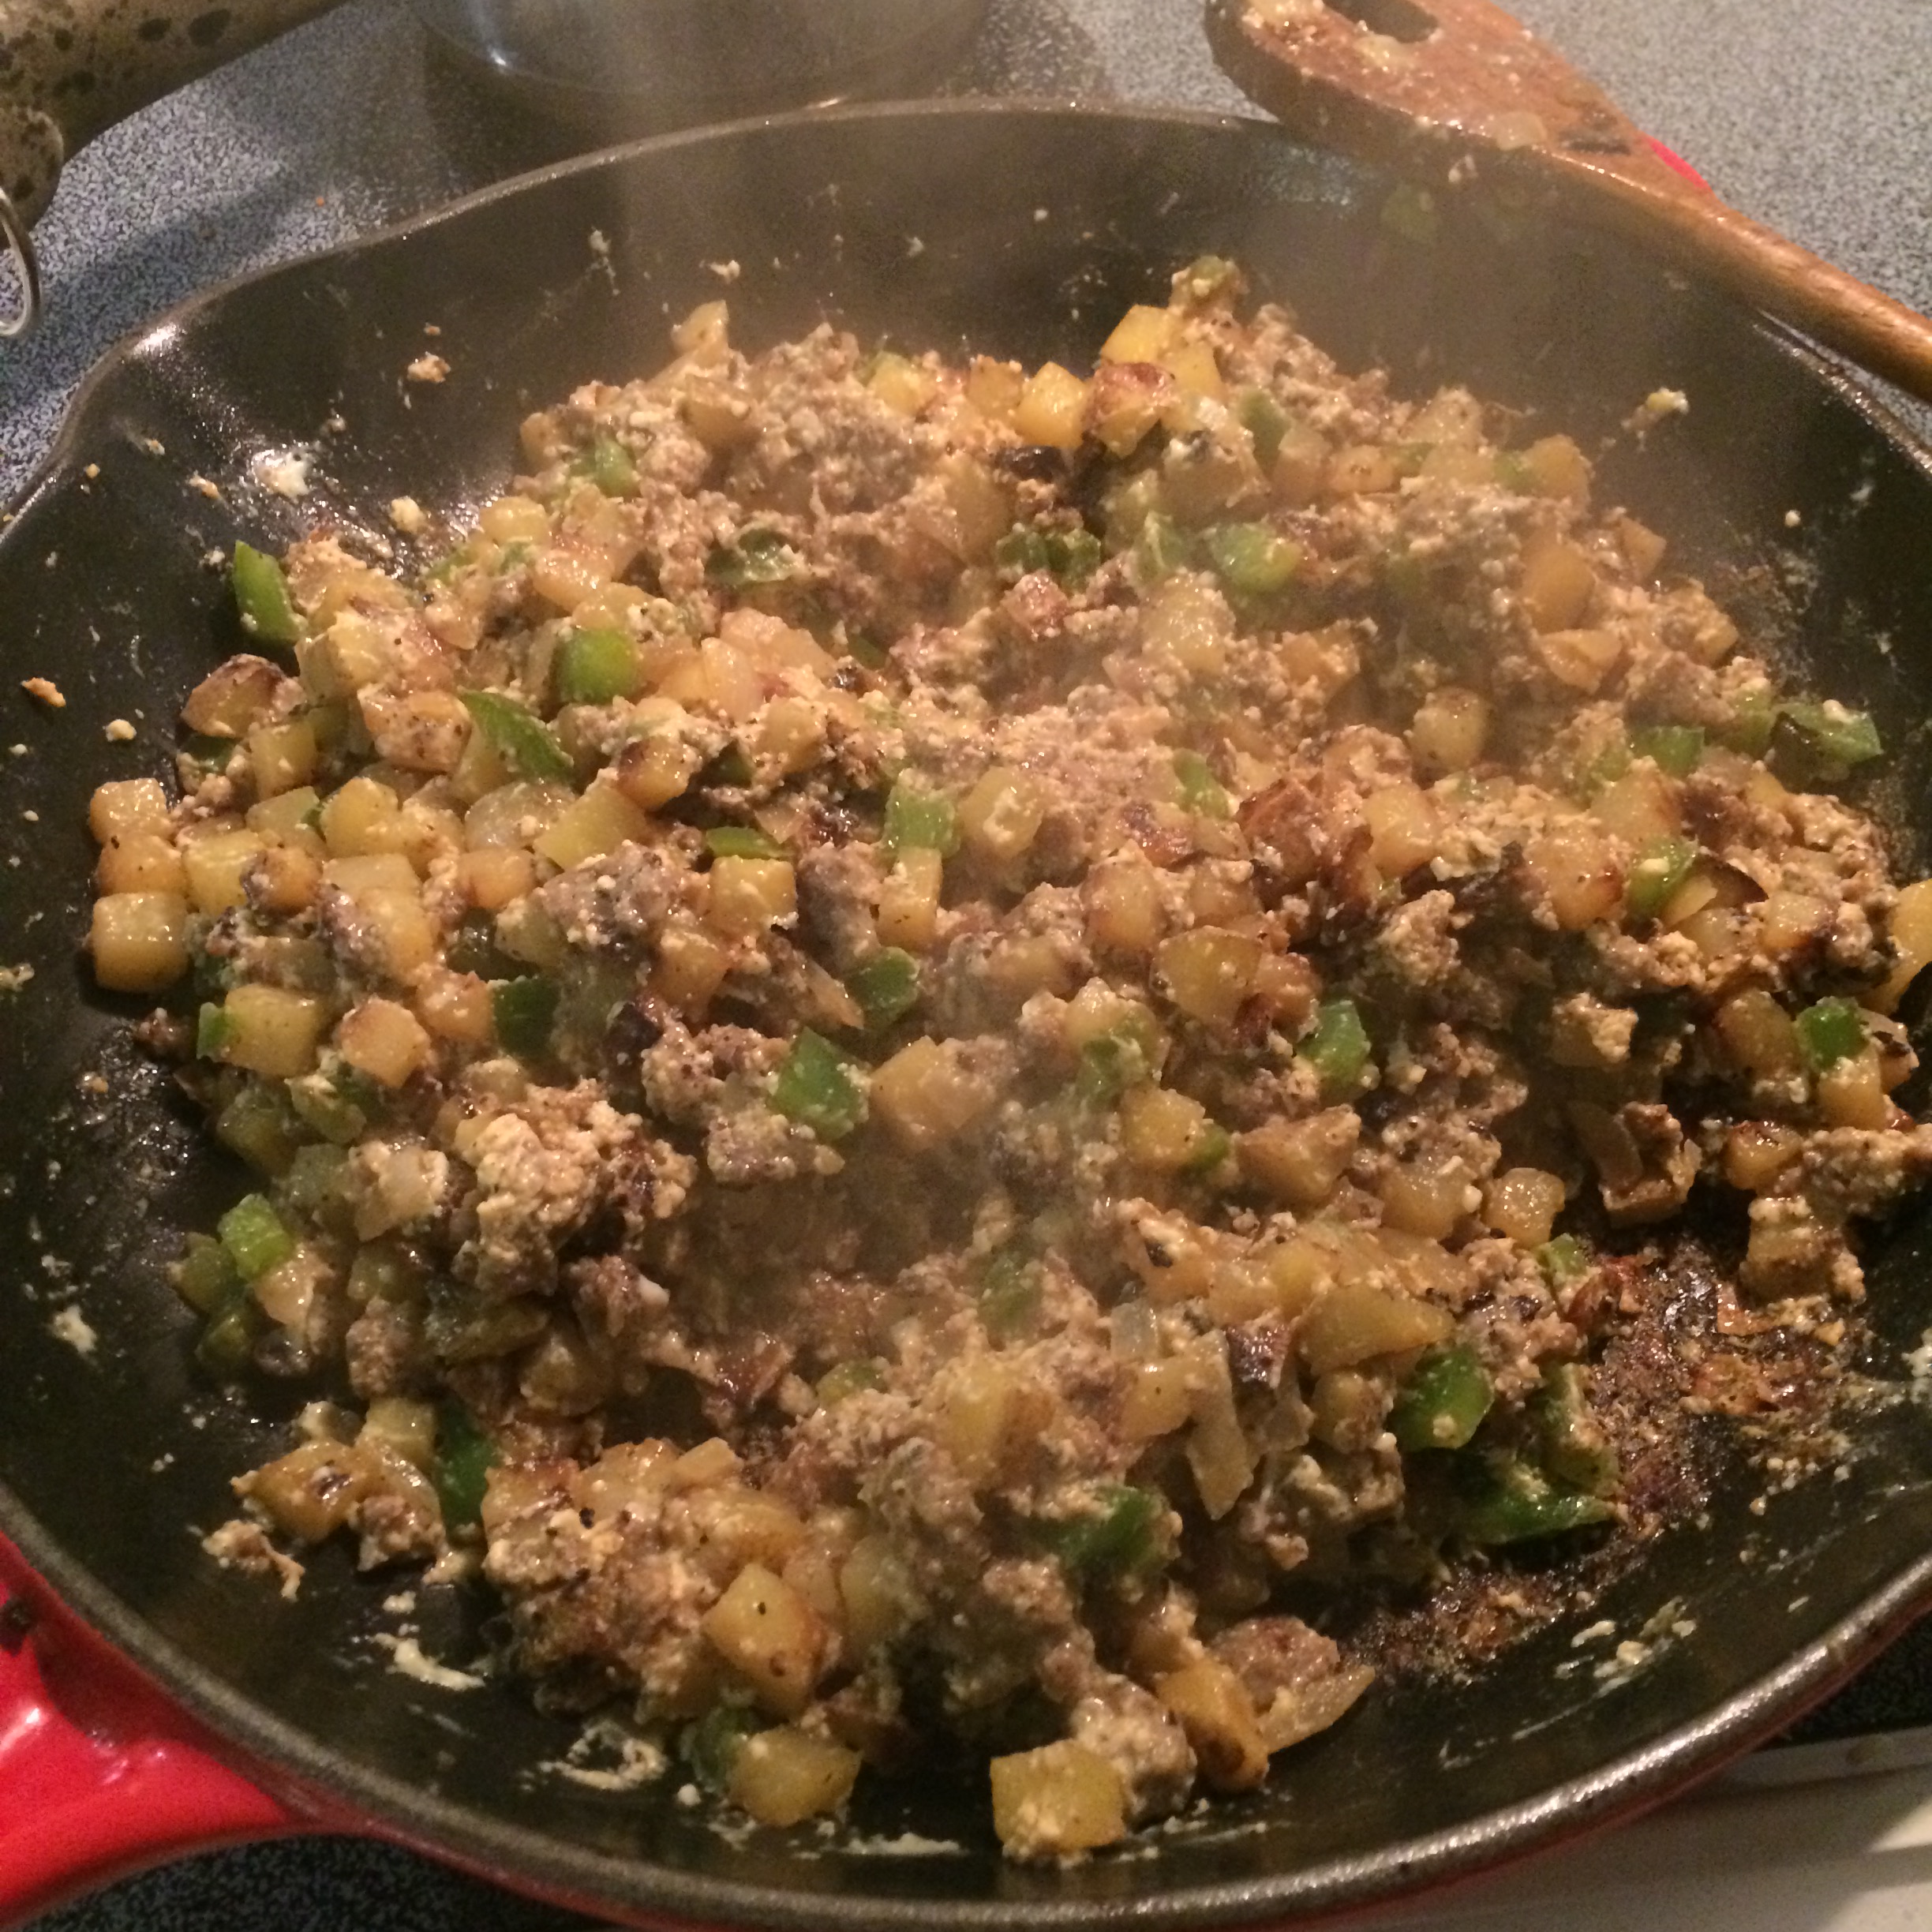
When the potatoes, onions, and peppers have reached your favorite level of doneness (takes about 5 minutes for my family), add back in the sausage and stir well. Gently pour the egg/milk scramble over the whole dish and stir gently to coat everything with the egg as it is cooking. It’ll take about 1 minute for the eggs to cook and the dish to be ready to serve.
All done. It’s not the prettiest thing, but it’s delicious!
As soon as the egg is done to your liking (some like wet eggs, some like rubbery eggs, to each his/her own), take the pan off of the heat. This is important: do not leave the pan on the burner to “keep it warm” or you’ll overcook the egg and begin to burn the rest of the ingredients.
When we have this as a breakfast, this is it. As our dinner tonight, we enjoyed it with some local tomatoes sliced and fresh biscuits with butter and preserves.
Vegetarian/Vegan Alternative
Sub veggie crumbles or seitan crumbles for the sausage (will need to use an oil for the potatoes, onion, and peppers)
Sub tofu scramble or The Vegg Scramble for the egg
Boiled stuff…all together…including boiled dough. Only the countriest of country kitchens in the American South have been able to render boiled dough a culinary delight.
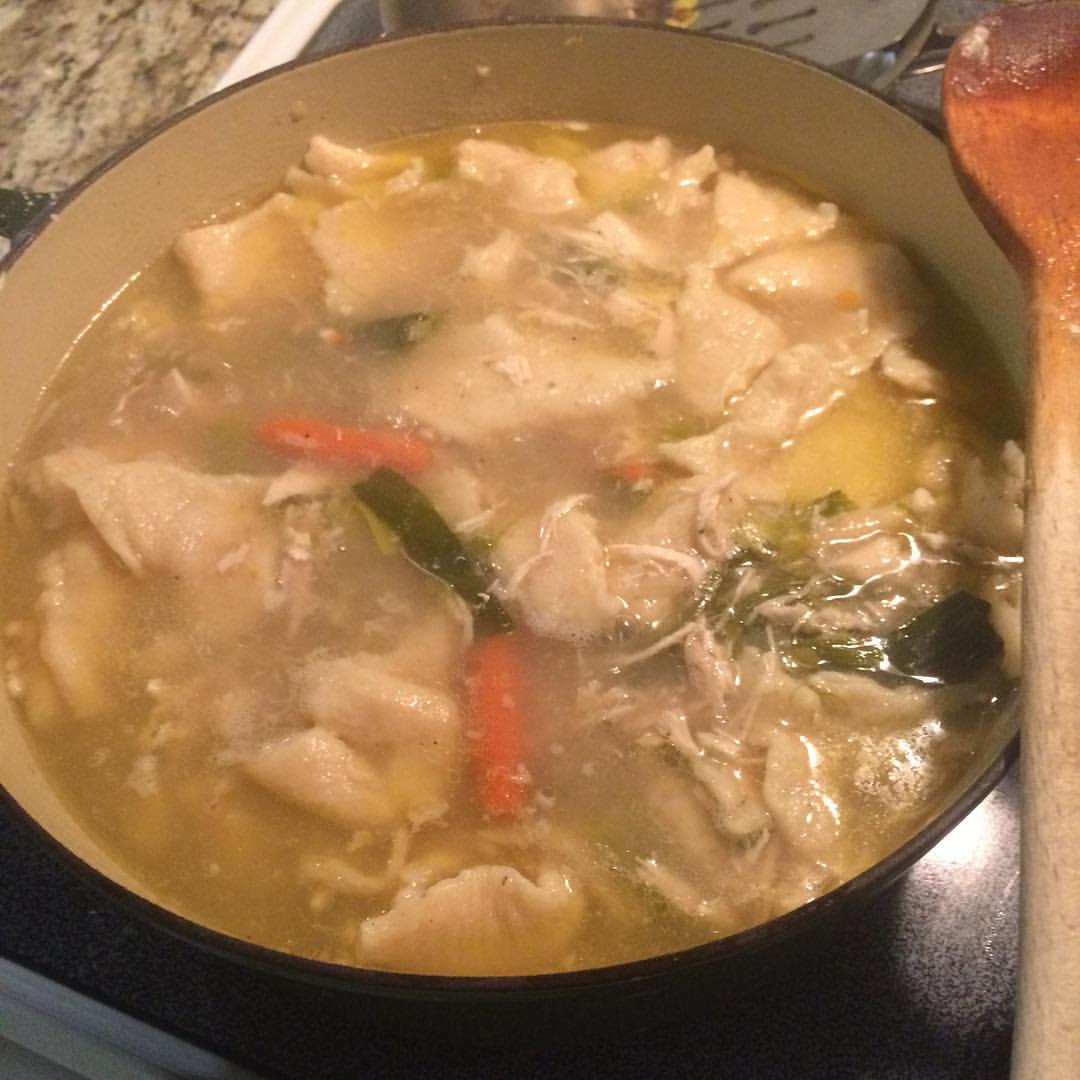
My Grannie’s chicken and dumplings, one of my dad’s favorites
Many younger and even some middle-aged (like me) Americans believe a dumpling is the original creation of the Asian cuisines: a little pocket of dough filled with something. They seem to focus on the filled part and ignore the boiled part.
You see, country people got stuff to do. They don’t have time to roll and cut the dough and fill it with the chicken and vegetables from the stock before boiling it. But at the very root of things, country American chicken and dumplings are arguably a deconstructed Wonton soup. Hmmm, so it really is all in the presentation.
For me, I’ll stick with ugly yummy classic American chicken and dumplings:
Step 1: boil chicken and make stock – these things happen simultaneously
It’s important any time you are making a chicken stock or chicken soup that you use skin-on and bone-in chicken and that you use both white and dark meat. Why? That’s where the flavor lives: in the fat and in the bone. I promise that leaving the skin on will not make your stock oily, only that using the most flavor-filled parts of the chicken will make it rich and dark stock. That’s what you want: not golden or yellow but a light to medium brown color!
1 whole split chicken (ask your grocery store butcher to do this for you or buy 2 split breasts and 4 split thighs with skin and bones)
4 large carrots, cut however you want (I like 1-inch barrels) or half a bag of baby carrots
1-2 onion family choices: white or sweet onion sliced, leek or green onion chopped to 1 inch pieces
3-10 cloves of garlic – depends on how many vampires you’ve got hanging around
salt and pepper
hot water to cover the chicken completely
Turn on the sink faucet to the hottest setting to let it get hot. In the largest stock pot you’ve got (at least 8 quarts), place your carrots and onions and garlic on the bottom. Place the chicken pieces on top of this; smush it all down well. Liberally salt and pepper the pot, roughly 2 tablespoons of each; yes, it really needs that much salt. Cover with hot water from the kitchen sink, probably to about 1 inch from the top of the pot.
Place the full stock pot on your large burner on high. It’ll take 20-30 minutes to come to a full boil; be patient. Let it roil for 3-5 minutes, and then turn it down to medium low to simmer for 2-3 hours. You want to see a tiny bit of movement on the water; it should not be completely still. Turn the burner off and get ready for step 2.
Once you remove the chicken for picking (step 1), you may find that your stock fills only half of your pot. If you’ve followed my flavor instructions and your stock is a rich medium or dark brown, add up to 4 cups of hot water to dilute the stock for direct eating. I often have 2-cup servings of frozen stock in the freezer and may add one of these as well; my freezer stock is actually broth with much more vegetables and already diluted for immediate eating.
Step 2: Cool and pick the chicken
Using a slotted spoon or tongs, remove the chicken from the pot. I usually place mine in a colander so that it gets good airflow for quicker cooling. Once cooled, pick the chicken.
What, you don’t know what that means? Truly I know a lot of people who don’t know how chicken gets from pieces to shredded. Before you get started, make sure you have a chicken plate and a discard plate; I use paper plates for this step. So here’s how it goes:
pick up a piece of chicken in your right hand (reverse the hands if you’re left handed)
use your left hand fingers to grasp the chicken skin and fat flabs and pull them off; place them in the discard plate or bowl. Generally breast pieces will have less skin and fat than thigh/leg pieces
switch the piece of chicken to your left hand
use your right hand fingers to pull the large chunks of chicken off of the bone and place them on the chicken plate; discard the empty bone to the trash plate
take up the large chunks in your left hand
using a pinching motion, use your right hand fingers to pinch and tear the large chunks into many smaller ones
continue until you have picked all of the chicken off of all of the pieces
Now some of you reading have already rolled your eyes and dubbed me patronizing to be so specific, but I’ve had the pleasure of teaching my same-aged friends and their children cooking basics, and you can’t even imaging how difficult it is to employ these basic motor skills for the first time as an adult.
NOTE: some folks also remove the vegetable flavorings, but I like them so I keep them. Other traditional vegetable additions include celery and peas (see side note at the bottom).
When you’re about 30 minutes from serving time, you’ll take step 3.
Step 3: Make the dumplings
There are lots of styles of dumplings, but the dough is about the same. If your people have memories of fluffy round dumplings, you’ll want to keep the following dough pretty wet and sticky; these are biscuit dumplings. If your people have memories of long flat dumplings, you’ll want to add a little more flour to form a solid ball of dough to work with; these are pie crust dumplings. The basic recipe is the same:
2 cups all purpose flour (make this gluten-free by replacing standard flour with Bob’s Red Mill Gluten-Free All Purpose Baking Flour)
1 t baking powder
1 cup chicken stock
1 egg
Drop them all in a bowl together and use a fork to blend them; do not use a whisk or you’ll end up with a blob of unblended dough inside the tines of the whisk and it’ll be a pain to get it all out.
If you want the puffy biscuit dough dumplings, stop mixing as soon as everything is combined. Drop the dough into the boiling stock. Since dumplings cook through in about a minute, this is a fast process.
If you want the flat pie crust dumplings, keep dusting the mixture with flour (probably 2 T at a time) and mixing until the dough comes together into a ball that does not sag or flatten and the sides stay smooth when you tough them, not sticky or tacky. Sprinkle a handful of flour on your clean kitchen counter and coat both of your hands with flour. Pinch off a generous handful of the dough and, on the floured counter, use your fingers to press it into a long flat lasagna noodle shaped dough. With a sharp knife, cut the dough into 1 inch strips on the short edges (1-inch x 2-inch). Peel the dough strips off of the counter one by one and drop them into the boiling stock. Repeat until all of the dumplings have been dropped.
Add the picked and shredded chicken back into the stock and dumplings to warm for about 20 minutes. Serve piping hot!
Side Note: One of the most beautiful things about this recipe/technique is that it’s almost a chicken pot pie. Yep, use the same stock making, the same dumpling making, and use the stock to make the pot pie sauce. Really couldn’t be simpler.
My mom is diabetic. And even though her dad was diabetic her whole life, and she was raised essentially on a diabetic diet (as it existed in the 60s and 70s), she’s got very diabetic-unfriendly eating habits.
But one good choice she craves and sticks to is granola. The oats are a great carb choice for diabetics, a slow digesting carbohydrate whether eaten cooked or raw. She loves oatmeal during the winter months, but really needs to have the sweet bite to it. She loves yogurt, but really needs to have a sweet bite to it. She really (psychologically) needs the sweet or she feels like she’s deprived.
But she won’t buy granola from the store because it’s saturated in various sugars: brown sugar, honey, corn syrup, maple syrup, and more.
Thus is born our experiment, beginning with what I consider Basic Granola.
And like so many “recipes,” this is a system, not a by-the-numbers or it’s wrong kind of food.
So here’s my system – which tracks pretty closely with the vast majority of granola “recipes”:
1.5 cups oats
1 cup nuts – mix as many as you like into the blend, but only 1 cup total
1 cup dried fruit – mix as many as you like into the blend, but only 1 cup total
Yep, it’s that simple.
Now, for the recipe people, here’s exactly what’s in my Basic Granola pictured here:
1.5 cups rolled oats (Publix brand, no need to go fancy)
1T dried ground cinnamon (Publix brand)
1t dried ground nutmeg (Publix brand)
1t salt (Morton’s)
1 cup water
Mix these five items together in a bowl, cover and let sit in the refrigerator overnight.
Prep your nuts; I used what I already had in the cupboard:
1/3 cup sunflower seeds (Publix organic unsalted from the produce section)
1/3 cup hemp seeds (Manitoba Harvest Hemp Hearts)
1.3 cup slivered almonds (Mariana from the Publix produce section)
Prep your binding; because my granola places emphasis on being diabetic friendly, I have limited sugar to a functional role and eliminated all granular sweeteners – natural or artificial:
1/3 cup honey (from a local farm near me)
1/4 cup oil or melted butter (Pompeiian Grapeseed Oil)
When you’re ready to bake, mix the nuts and the binding into the softened oat mixture. Spray or grease a medium or large cookie sheet with at least a little lip, spread the mixture in a thin layer in the sheet. Bake at 250° for 1 hour and 15 minutes; increase heat to 300° for 20-40 minutes more. The longer time is especially useful in high-humidity climates or times of year.
As your mixture sits to cool, it will harden into the crunchy texture most people are looking for, so don’t get frustrated if it doesn’t harden while still in the oven. It won’t, and you’ll risk overcooking or burning your granola.
Serving Ideas: the standard serving is 1/4 cup
cooked oatmeal topper (tip: prepare half of an oatmeal serving and add 1/2 cup granola to finish out the meal)
yogurt mix-in
ice cream topper
fruit pie topping (instead of crust)
blend into smoothie for an oatmeal smoothie
sweet potato casserole topping
roasted root veggies topping
My mom is really happy with this batch and can’t wait for my Christmas blend using pistachios and dried cherries.
Props: the result of someone’s talent that helps you illustrate at least one answer below – I chose to focus on the “when” and show my grandmother’s portrait painted by a 78-year-old novice watercolorist
Just before you came up here you saw Pastor Mike welcome four new members to the church, and he asked them three questions. They are all important questions, but the last one, though simple, really has a lot packed into it. That question is “Will you be a faithful member of the church?”
Our new members said yes, and one thing that means is that they will use a sheet called a Time and Talent sheet to find out the different ways they can share their talents through the church’s activities and ministries.
So here’s my question to you:
What are talents?
accept all kinds of answers, including examples of talents
you could get lucky (like I did) and get the “perfect” answer: talents are special gifts that come from God that we can use to help others
Who gives us talents?
accept all kinds of answers, including talent teachers like musicians, coaches, teachers, etc.
Samuel wrote down for us what happened when Saul needed help. You see, Saul had a lot of bad days, and when he had a bad day, nothing could make it better. It took a while, but Saul learned that God had given someone the talent of playing a lyre – a tiny harp – and that hearing that person play could make the bad days get better. So Saul asked for help finding someone who plays the lyre well, and someone found David, a shepherd who could also play the lyre. David came to work for Saul. He played the lyre to make the bad days get better and also learned to help Saul in other ways too.
Nell Jones (portrait, watercolor) by Lucy Williams
Now I have another question for you: When do we get our talents?
accept all kinds of answers: when we’re born, when we need them, when we’re ready
It’s so important to remember that ALL of those answers are right. If we were to read further in Samuel’s book, we’d learn that as David grew up, he received many more talents from God to use at different times. You know, my grandmother’s best friend Lucy was over 70 years old when God gave her a new talent as a watercolor painter. And she painted this portrait of my Nannie as a gift for her. And she also paints portraits for many of her friends and cards. She’s even painted me a few cards for my birthdays and special occasions in my life, and I cherish them and her talent.
Okay, last question: How many talents do we get?
accept all kinds of answers
Well, let’s count how many talents David has when he first meets Saul:
he’s in the field with the sheep, so he has a talent as a shepherd
he plays the lyre well, so he has a talent as a musician
So David has at least two talents, and I encourage you to read ahead in Samuel to see what other talents God gives to David as he grows into a man and becomes a King.
Will you pray with me?
Dear God, thank you for giving us talents so that we can do the things you ask us to do. Help us to be patient and practice our talents to do the best job we can. Amen
Delivered on Sunday, November 6, 2016 at Palmetto Presbyterian Church in Mt. Pleasant, SC.
Different Mustards: Yellow French’s, Spicy Dijon from France, tangy Herlocher’s from Germany, sweet potato mustard from right here in Mt. Pleasant, spicy Chinese mustard, course brown mustard from India, honey mustard salad dressing from Chic-fil-a
It’s World Communion Sunday so I’ve brought some of my favorite things from all over the world. [point out the different mustards]
What do all of these things have in common? [mustard] That’s right! And they all came from this tiniest tree seed in the world. [hold up a single mustard seed].
How much mustard do you think we can get from this one seed? Enough for a sandwich? Enough for a hot dog or hamburger? Probably not.
So how do we get enough seeds to make enough mustard? [take various answers]
We plant one seed to make a tree of more seeds. Now, from what I’ve read, it takes 3-10 days for a mustard seed to send up its first stems and leaves.
When we come to church, we often talk about faith and that helps our faith grow from a teeny tiny seed into a giant tree. And Jesus tells us that if you have just a teeny tiny bit of faith – like this teeny tiny mustard seed – and you share that faith with others, then you can grow a faith tree just like this teeny tiny seed can grow a huge mustard tree. [show picture of mustard tree with house underneath to illustrate how big it can become]
What’s really cool is that churches all over the world, in all different languages, are celebrating communion today, the same as we are, and that’s what it’s like when we have and share just a little bit of faith and help it grow – a faith tree that’s a big as the whole earth.
Prayer: Dear Jesus, you showed us that faith starts small, as small as the tiniest mustard seed, and grows into a huge group of believers when we plant it and share it with others. Help us to show others our faith every day. Amen
Delivered on Sunday, October 2, 2016 at Palmetto Presbyterian Church in Mt. Pleasant, SC.
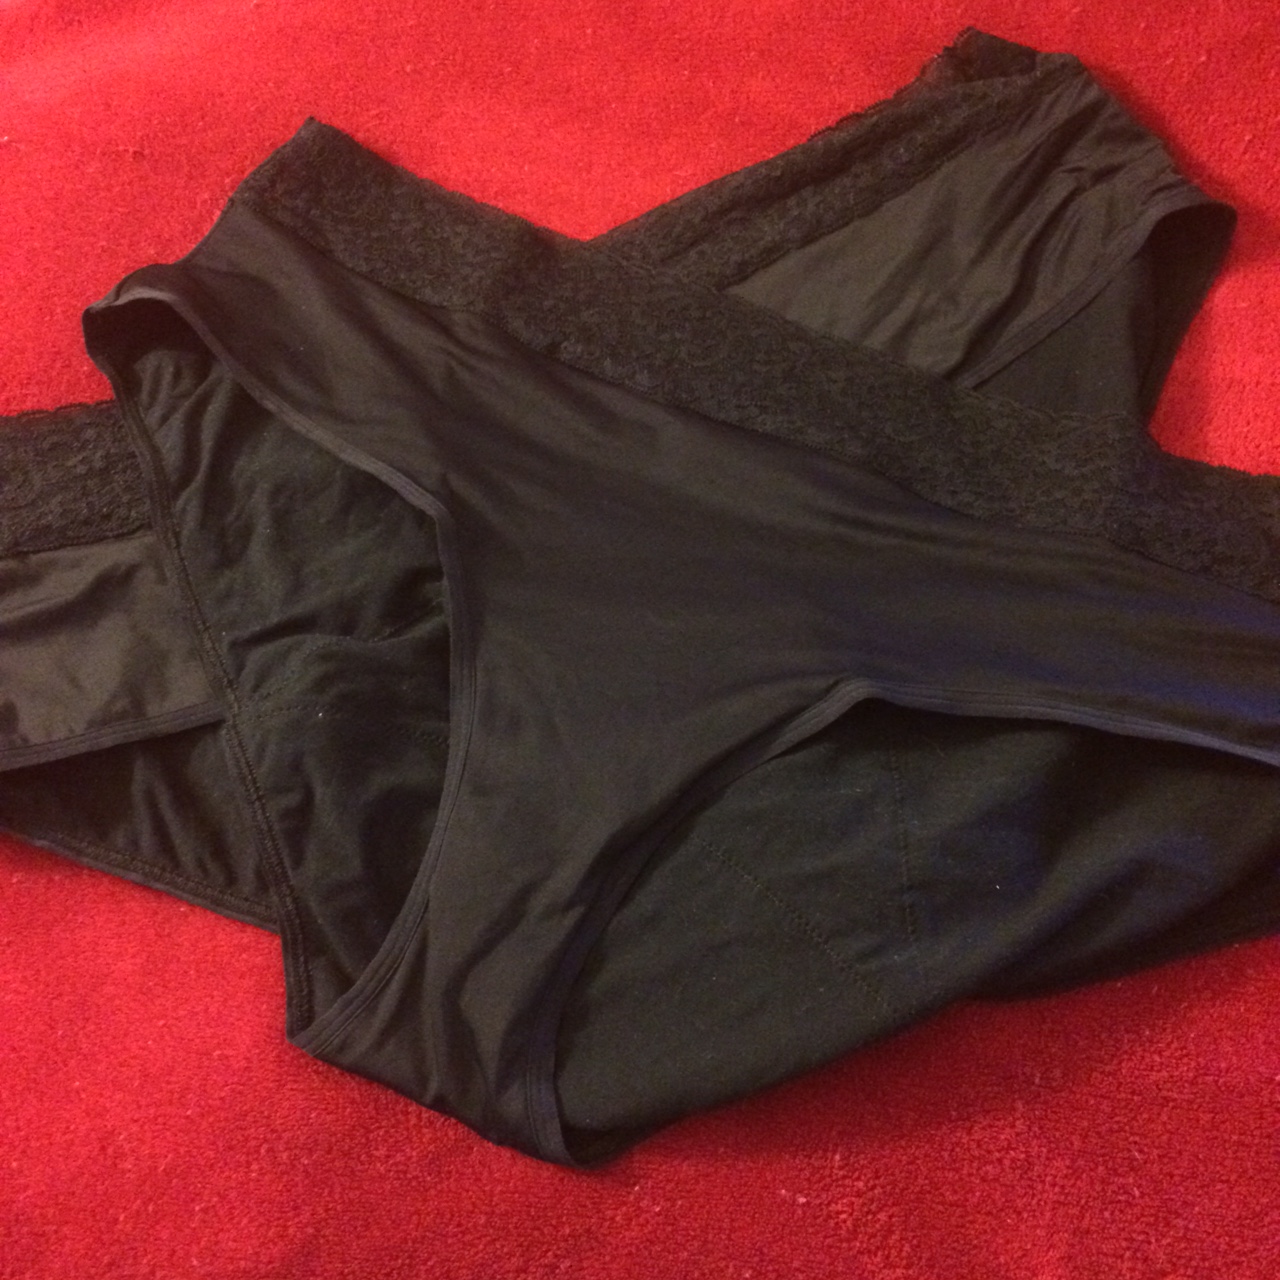
2 of the 3 pair of THINX I purchased; I’m wearing the 3rd pair now.
I’m keeping them. And getting some more!
NOTE: The following account of my trial of THINX is completely unsolicited and unpaid; I paid regular price out of my pocket for these period panties and have had no communication with THINX other than the purchase transaction.
Here’s why I tried them:
Aside from performance, I’m always looking for a more sustainable way to manage hygiene, and these are reusable with no solid waste to cause biodegradability concerns.
That comes with the added benefit of being more cost effective in the long run; I estimate it will take 2 months per pair of panties for the cost equivalency of my current disposable method.
And then there’s the education and supply mission of the company: for every pair I purchase, they donate a pair to a woman in a country where period products are simply not available, where girls are banished to a shed for their week a month, missing school, work, income opportunities, etc. Like Tom’s shoes in that way.
Here’s what I chose as my trial kit:
For starters, I got 3 pair (best discount) of the hiphugger style to try; it’s one of two styles designed for “heavy days”. If I don’t like them (doesn’t seem like that will be the case), I simply send them back for a refund – even if I’ve used them.
I ordered the 2x, which is currently their largest size. For sizing comparison, I wear a 22 or 24 in pants without stretch, 20 in pants with stretch.
Here’s my period profile:
So that you can judge how THINX would perform for you, it’s necessary for me to disclose my period profile. I’m a 100% free-bleeder, using pads exclusively.
My period lasts almost exactly 5 days:
First 12 hours: comparable to spotting
Next 24 hours: what I consider regular, using 1 pad per 12 hours
Next 24 hours: what I consider heavy, using 1 pad per 6 hours largely due to clotting – really tricky for the overnight
Next 48 hours: return to regular, sometimes with a 4-6 hour period with no bleeding at all
Next 12 hours: spotting through completion
THINX has attempted to give guidance on how long you’ll be able to wear a particular pair, but as they only use standard tampon size as their guide, those of us who free-bleed (especially those who have only ever free-bled and not used tampons at all) have no frame of reference. I will attempt to provide that below, even specifying the brand and size of pad I typically use during different phases of my period.
Here’s how they performed:
Day 1: since I started midday, and my first day is just spotting, I used a pad. No sense in wasting one of my three precious pairs of THINX on spotting IMO.
Day 2: roughly 9 am – 11 pm – regular flow
Today is my regular flow day on the front end, and I’ve been wearing the first pair since about 9 am. The only time I feel wetness is when I pull them up after going to the bathroom. It’s a fleeting coldness more than wetness that lasts less than 15 seconds. I’ve also paid particular attention to smell, and so far, I’ve had to put my nose within 12 inches of the panties to smell anything at all and even then it’s faint. No leakage at all, and again, I’ve had one pair on for almost 12 hours now.
I’m not at my heaviest flow yet. That will start overnight tonight and continue through tomorrow, so I’ll let you know on that. For reference, during my heavy flow, I use two long, overnight Always pads as the same time with an overlap right in the middle. And I clot pretty significantly during that 24 hours.
Day 2 Overnight: roughly 11 pm – 10:30 am – Transition from regular into heavy
The overnight went great. It wasn’t until the morning wake up when I get a little restless that the panties slipped and sagged in the butt, allowing 1 small leak onto the bedsheets. The panties are comfy, but I didn’t really register that the material is much more slippery, silky almost, than my regular cotton panties. So they slide easily. In addition, I’m a side sleeper and it was easy to see how the side (around the leg toward the outer hip where there’s no absorption planned) has more blood than the front panel (where there is absorption planned). This likely won’t be a problem for back sleepers as that’s where the full coverage absorption is in the hiphugger panty.
Day 3: roughly 11 am – 3 pm – Heavy day
This day was the truest test. I deliberately checked frequently (went to the bathroom) and tried to keep them on as long as possible to really test capacity. Just as when I wear pads during heavy days, the THINX filled quickly and started slipping off, creating the same saggy butt problem as I experienced when first waking up. It’s the same problem babies have with a full diaper. I had 1 leak while sitting, but to be fair, it was right as the panties hit capacity, not any kind of deficit in the design or concept.
They lasted 5 hours, just shy of my double-pad 6 hour stretch, so I consider that a huge win for capacity.
With only one pair left to test, I switched to regular panties with double pad because first pair were not yet dry to wear (not surprising, just noting). I’ll address my laundering experience below.
At this point, I estimate the capacity to be as follows: 2 regular tampons (THINX estimate) = 4-5 hours on heaviest day = 1 tampon per 2.5 hours.
This is pretty consistent with other accounts of THINX performance by both paid and unpaid trials. (Reminder: my trial is completely unpaid; I paid regular price out of my pocket for these period panties and have had no communication with THINX other than the purchase transaction.)
Day 4: are they dry yet?
I mentioned laundering earlier, and it is actually the part of the THINX concept that elicited the most varied criticism, with users reporting anywhere from 24 hours to 4 days for the washed panties to dry enough to be worn. So here’s what happened with mine:
The first pair I wore (day 2), I rinsed in the sink (as instructed before washing) and hung them to dry; I didn’t wash them immediately because I really wanted to find out about the drying. I’d read that the panties took up to 4 days to dry, so there would practically no way to wear a pair twice in one cycle. Thankfully, I can confirm that roughly 36 hours after rinsing (they were thoroughly soaked) the first pair is completely dry. I suspect that, as with the “feeling of wetness” issue, the panties dried in an air conditioned setting were simply cold, not actually wet.
I started them drying in the bathroom overnight, hung from a hook in the shower where they didn’t touch the wall or anything. In the morning, I moved them to a hanger and hung them from the door jamb so they could continue to benefit from full circulation. By 8 am this morning, they are completely dry and ready to wear again.
For comparison, the two other pair stayed in the bathroom and are still quite wet. It should be no surprise that hanging dry in the least humid room of the house will speed up the drying, but it was worth the comparison.
So after a brief switch back to pads during the heaviest phase of my cycle (since all three pair were in rinse, clean and dry mode), I’m back in the first pair and also back to a regular day and expect to be able to wear one pair for the day.
Here’s what I’ll try during my next cycle (September):
I want to test the hiphuggers a little further during my heavy days/nights, especially the sagging and leakage to see if it was/is a result of capacity or if the panties just won’t stay put. So in September I’ll be using pads in THINX during the heavy phase.
This is pre-emptive of simply purchasing the only fuller coverage panty available from THINX.
Here’s what I really want to do when my budget allows:
I intend to purchase six more pairs
three pairs of the high waist for the heaviest day and for overnights
three pairs of the hiphuggers to round out the set
That should allow me to get through my entire cycle without having to worry about laundering and drying when it’s not convenient.
Costing It Out:
The site runs a special discount when you purchase three pairs that basically makes is $100 for a 3/pack. With the basic economy pack of pads coming in a $7 and lasting (me, at least) 2 months, that’s $3.50/mo in pads. At that rate, it will take 7 years and 2 months to break even on the panty investment ($300/3.50/12).
I don’t necessarily foresee a need to replace the panties before then if they’re only being used 12 times a year (assuming I get my full 9-pair collection) – that’s roughly 85 times over that period.
In that same amount of time, I would NOT be using and disposing of approximately 1,600 pads.
Special Shout Out to a Man
I doubt I would have the candor or even simply the idea to be this open and natural about my own period or the process of managing a period if I hadn’t had one specific man-friend many years ago ask as part of the sexual history part of our getting-to-know-you. Thank you to the unique men who recognize that physical processes and activities are not shameful, are part of a shared life with a female partner, and respect that many choices result from those conversations.
I wrote these scripture-based lyrics to Leonard Cohen’s “Hallelujah” because a bride asked for it but did not like the generic wedding versions available such as here and here.
Mark 10: 6-9
In the beginning, God had a plan
Created woman for the man
To be no longer two but of one flesh.
Man leaves behind his former life
To be united with his wife
What God has joined, let none divide Hallelujah
Song of Songs 8: 6-7
Place a seal upon your heart
Like the seal upon your hand
For love is strong and always prevails
Blazes like fire, a mighty flame
Seas and rivers will only inflame
Unquenchable love in Christ Oh Hallelujah
1 Corinthians 13
Love is patient, love is kind
Protects and trusts and will always bind
Two lives in one perfect unity.
Now with Christ who is our guide,
In Faith and Hope and Love abide
And the greatest of these is love Oh Hallelujah
Ruth 1: 16-17
Wherever you go, so I will go
Wherever you stay, so I will stay
Your people will be my people, your God my God
Thou art my joy, be near me now
Then shall my soul contented bow
I am forever at thy side Hallelujah
Good morning! How many of you look at the bulletin before church starts? [praise raised hands, welcome anyone who identifies as a newcomer]
One of the things I notice about today’s bulletin is that the word “work” appears a LOT of times. Do you go to work? [expect lots of NOs]
Are you sure? [more NOs]
Are you really sure? [more NOs]
What if I told you that you got hired for your first job on the day you were born? That you go to work every single day?
That’s right! Before God sent Jesus to earth, He gave us some rules, and the first four start with LOVE.
And when Jesus came to earth, He reminded us that the #1 rule of life is to love one another as much as God loves us.
Who remembers how much God loves us?
[Read or have a child read John 3: 16]
Now as I look back at our bulletin for this morning, we start out our service with Miss Crystal chiming the hour – you’ve head the big bell, right?
And them Preacher Mike shares announcements and invites others to come up and remind us of what’s happening at and through the church this week.
And then he says “now let us greet each other in ritual friendship.” What do we do then? [expect or prompt answers like say good morning, say hello, hug, shake hands]
Those are really great ways to show friendship, to show love. Can you think of some new ways? [I give the example that all of the choir members can’t reach each other to shake hands so they wave, or give the peace sign, or blow kisses]
[Praise examples] I want to show you one that I really would like to see you practice next week: Can you make a heart with your hands [praise everyone for doing so]. Now how about I make half the heart, and you make the other half. Now that’s a new sharing of love.
And that’s what God hired us all to do on the day we were born: to show and share love with everyone in the world.
Pray with me: Dear God, thank you soooooooo much for sending us Jesus to show us how to share love in many ways here in our church and out in the world. Amen.
Delivered on Sunday, July 10, 2016 at Palmetto Presbyterian Church in Mt. Pleasant, SC.
Props: 1 book Bible, 1-2 digital bibles (app on phone, tablet), power cords for digital devices
Preparation: pull up the Luke 4: 14 scripture on all devices
Alright, pop quiz time.
[Hold up the book Bible] What’s this? [praise answer]
[Hold up the phone with the Bible app showing] What’s this? [phone: praise answer]
[Hold up the tablet with the Bible app showing] What’s this? [tablet/kindle/ipad: praise answer]
[Hold up the power cord(s)] What’s this? [power cords: praise answer]
You guys all get an A! Now what do all of these things have in common..and why on earth have I been allowed to bring my phone and my tablet into church?
[allow for 3-4 answers; if you’re lucky enough to get bible apps as an answer, praise it]
All of those are great answers, but I have a surprise thing that’s the same about all of these. They are ALL bibles!
And if I open my book Bible to my bookmark, it’s today’s reading.
And click on my phone app, it’s today’s reading.
And click on my tablet app, it’s today’s reading.
And they all tell us that reading God’s word in the Bible as often as possible is really important.
Now, wait, these power cords can’t pull up the Bible. How do they fit in here? [allow for 1-2 answers]
Yes! They charge up the phone and the tablet – they give it power – so that we can read the Bible. And reading our Bible gives us power – power to learn what God and Jesus want us to know and power to do what they ask us to do.
Pray with me: Dear God, thank you for sending us your word to read every day and for giving us the power to understand you and do what you ask us to do. Amen
I delivered this children’s sermon on July 3, 2016 at Palmetto Presbyterian Church in Mt. Pleasant, SC.
 THE BASICS
 As I mentioned in the Evidence section, one way to verify that a product has market traction is by the size and breadth of the DIY community. A simple Google search for “DIY poop spray” reveals what one site claims is the Poo-Pourri recipe; this is the very first search result, by the way.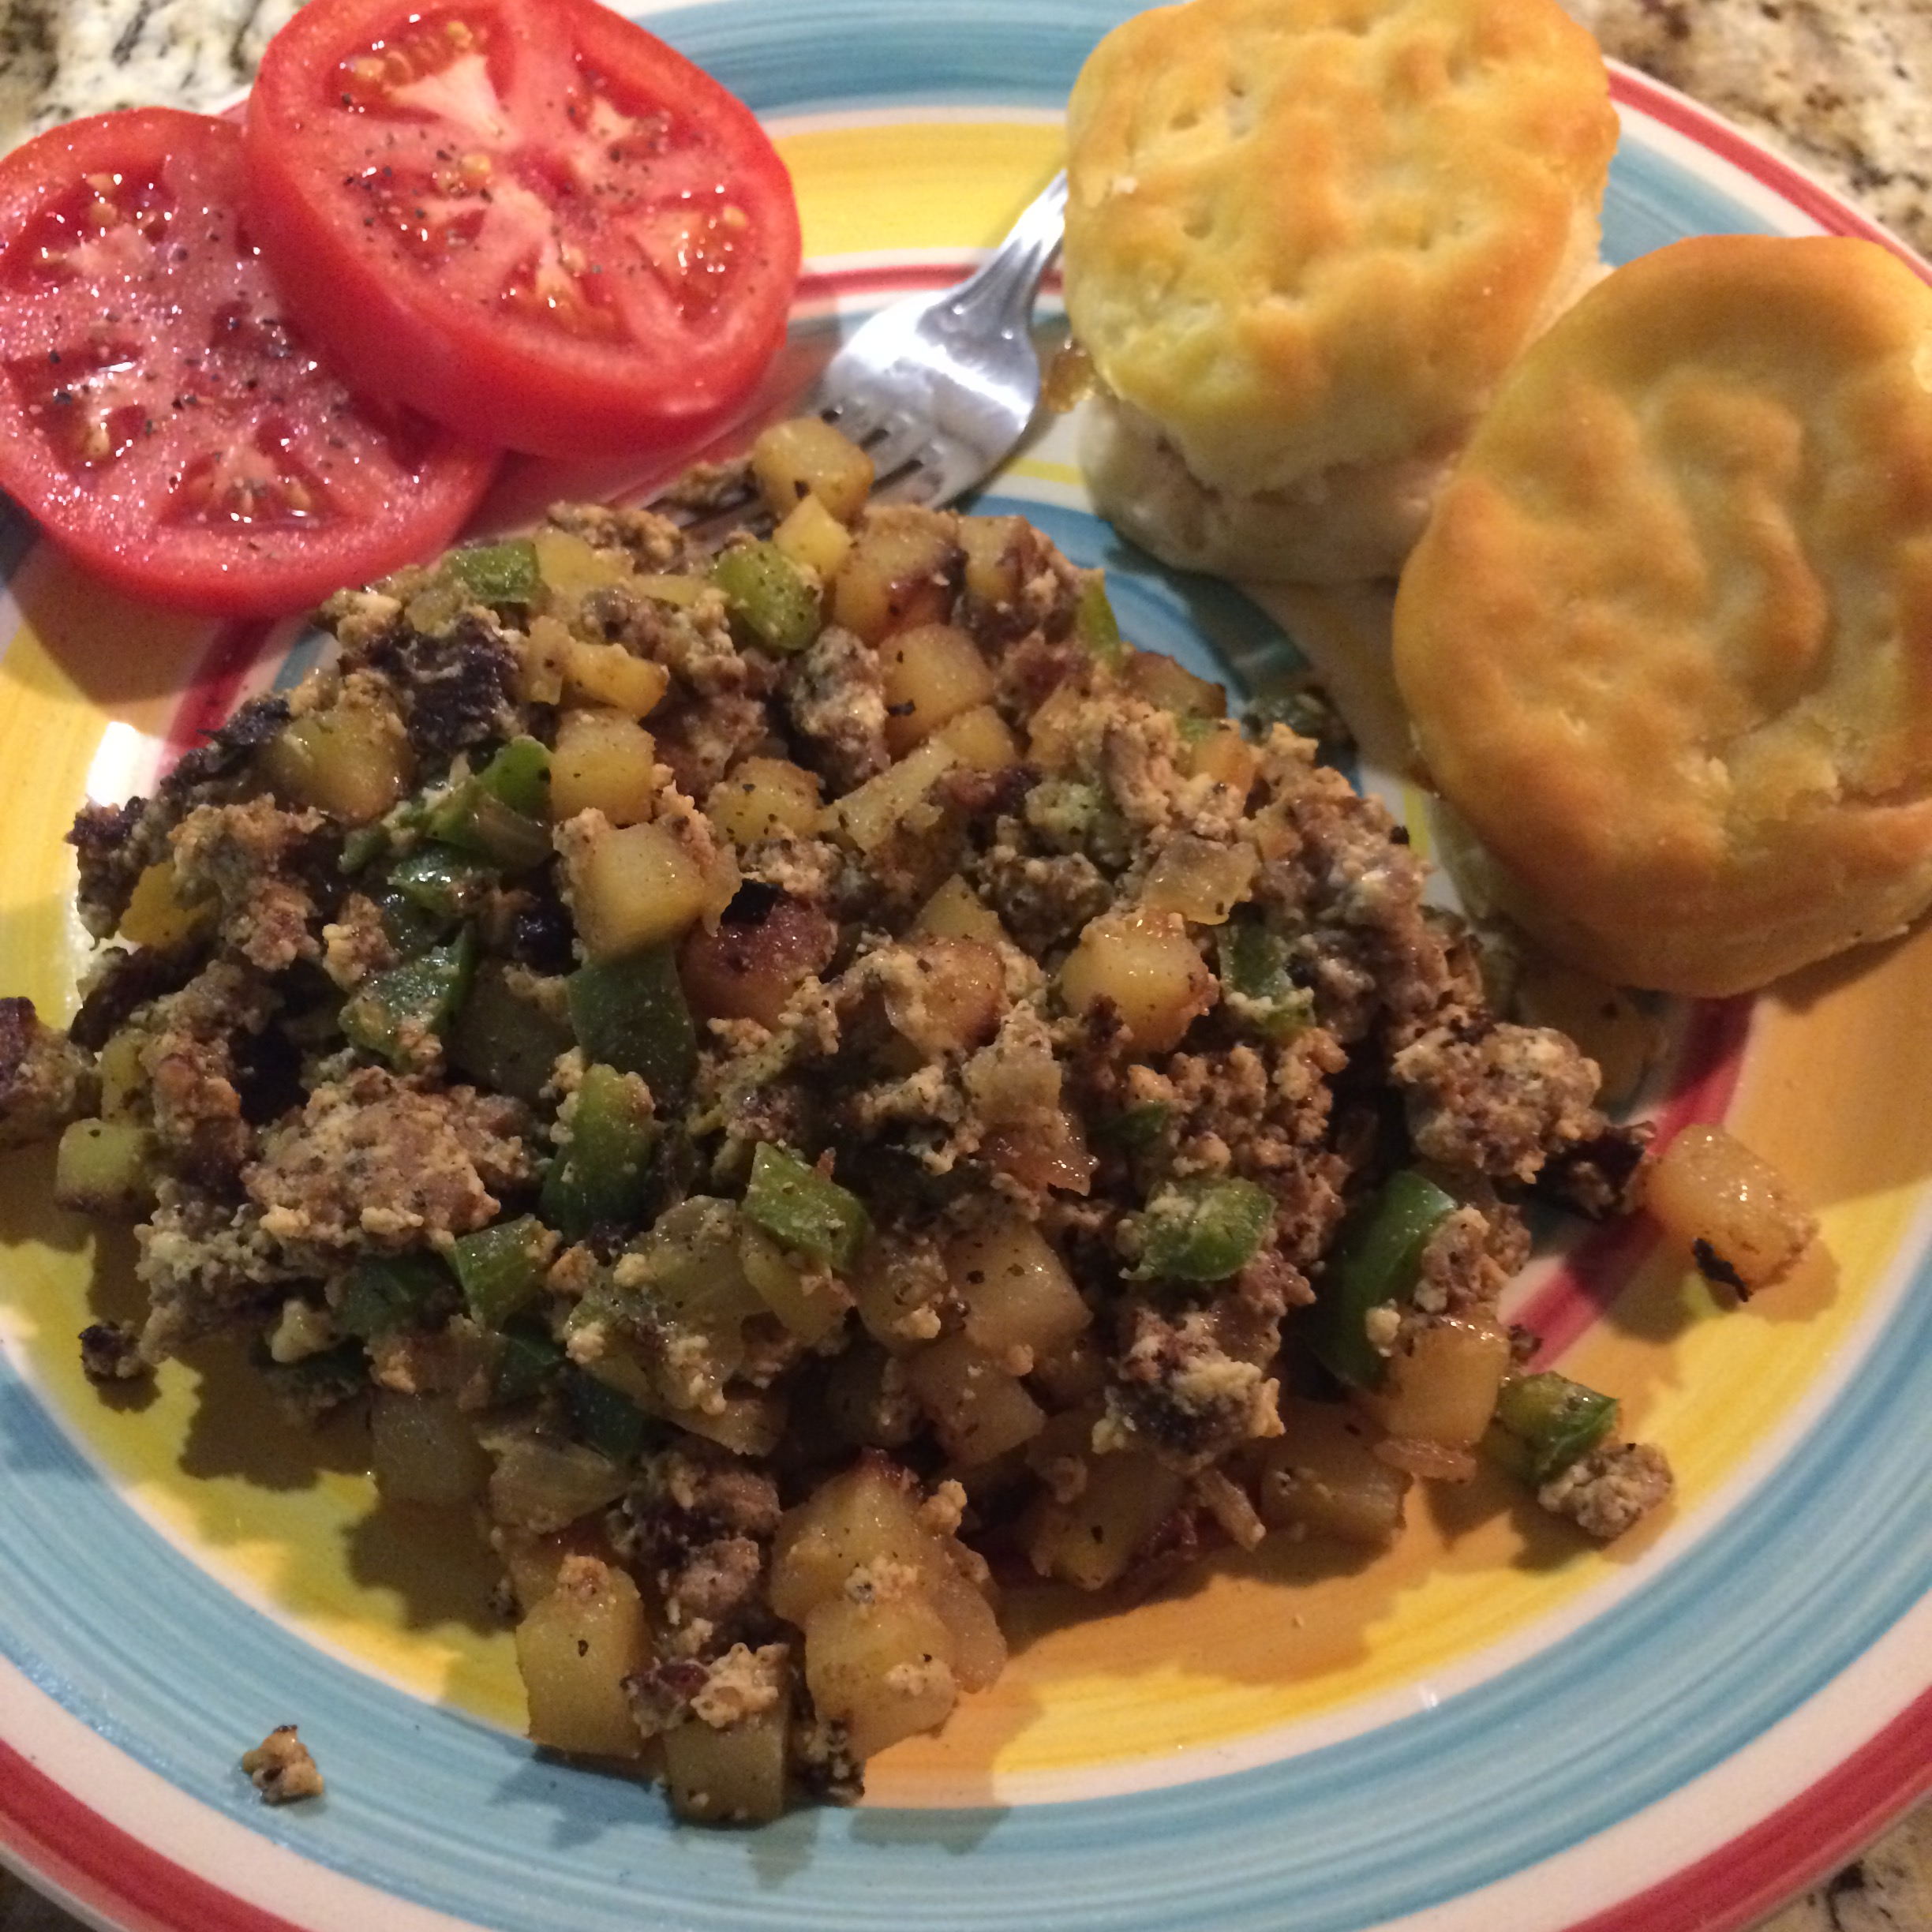






 Singing about Cooking
