Posted in Being Healthy, Cooking, corn free, gluten free, nut free, soy free

Oatmeal Raisin Cookies (aka cleaning out the cupboard)

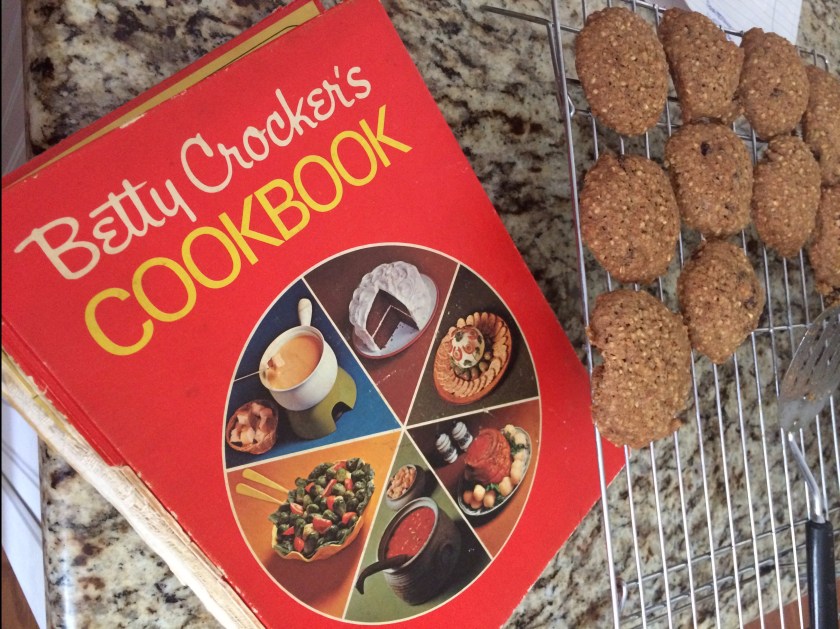
As I was sorting and re-organizing the cupboards and the freezers the past few days, I’ve come across several ingredients I rarely use: leftovers from some Tasty.com experiment or a houseguest. Luckily, I’m able to use most of them in some delicious Oatmeal Raisin Cookies.

The two main ingredients I wanted to use up are whole wheat flour and steel cut oats. Neither are part of my regular pantry, but I appreciate the earthy, nutty flavor they bring to anything cooked with them. And my budget this week was a little too short for anything sweet in grocery shopping. Yep, you interpreted that correctly. No ingredients were purchased to make these cookies happen!

Betty Crocker's Cookbook and Oatmeal Raisin CookiesFor such a classic cookie, I always start with my Mom’s use-worn Betty Crocker cookbook, where butter is always listed as “shortening.” But I made a few adjustments to let me use up as much of these random ingredients as possible.

Wet Ingredients

  • 1.5 sticks (3/4 cup) of softened butter (vegan: 3/4 cup coconut oil, peanut butter or other soft or liquid vegetable fat)
  • 1 cup packed brown sugar
  • 1/4 regular sugar
  • 2 eggs (vegan and gluten free: 2 egg blend of The Vegg or other vegan baking substitute)
  • 1/2 cup water (don’t skip this because the oats need it)

Dry Ingredients

  • 1.75 cups whole wheat flour (gluten free: use same amount of GF all purpose flour)
  • 1 t baking powder
  • 1/4 t baking soda (omit for a flatter, chewier cookie)
  • 1 t cinnamon
  • 1/2 t ground cloves
  • 1 t salt

Add Ins

  • 2 cups steel cut oats (or rolled oats)
  • 1 cup chopped dried fruit: raisins, craisins, cherries, apricot, prunes
  • 1 cup chopped nuts: pecans, almonds, walnuts (nut-free: try toasted hemp seeds or sesame seeds in place of nuts)

Preheat your oven to 350°F.

Blend the wet ingredients together. Add the dry ingredients to the wet and blend well. Add your chosen add-ins and mix well.

IMG_1825Drop by teaspoon-fuls onto a silpat or a greased cookie sheet; for this step, I use one of my few Pampered Chef tools: a teaspoon ice cream (or cookie) scoop. It really helps to make quick and not-messy work of this step.

IMG_1826When I use all three of my baking sheets at once, I can get nearly all of the dough in at the same time. I had about 1 dozen left for the second round. That’s another great strategy for making cookie baking easier and faster. Works when you’re doing cut out and decorate cookies too!

Bake at 350°F for 15 minutes. Be sure to preheat all the way before putting your cookies in.

Transfer to a cooling rack immediately. These will cool to eat quickly!

Makes 5-6 dozen.

Posted in Being Healthy, Cooking, corn free, gluten free, nut free, soy free

Cheddar Potato Soup

IMG_1755
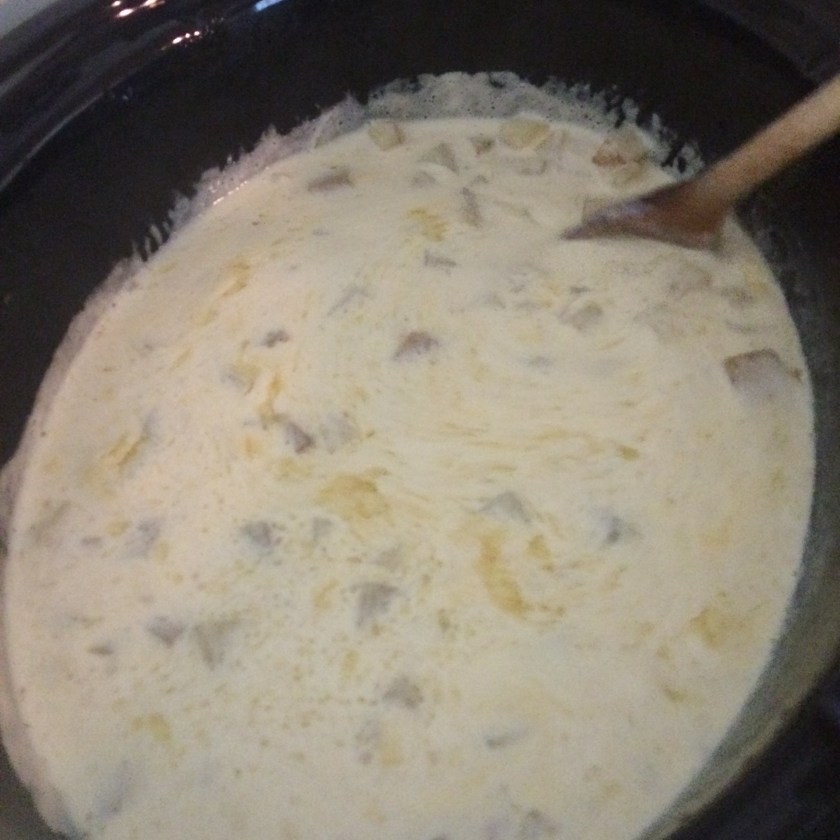
Sure. It’s just regular Potato Soup with cheddar cheese added, but I just learned that my younger cousins never learned our Nannie’s Potato Soup recipe. I did because it’s my mom’s “sick soup.”

Ingredients

  • 2-4 cups of chicken stock (or veggie if you’re looking for a veg version)
  • 3-4 cups of cubed potatoes – any kind or mixed, but our favorite are Yukon gold potatoes – cube them about the size of a standard set of dice
  • 1 medium onion, diced small
  • 1-3 cloves of garlic, minced
  • 1T pepper
  • 1t salt (you can always add more, but start small)
  • 1t nutmeg
  • 2 cups heavy cream (or unsweetened, unflavored almond or soy milk for a veg version)
  • 2 cups of your favorite cheddar cheese – any cheddar, muenster, manchego are all good choices!

IMG_1753This is one of my favorite soups to do in the crock pot, mainly because my chicken and veggie stock are made ahead and frozen, and I can’t ever remember to thaw them out. Using the crock pot, I can put all but the heavy cream and cheese in at once and set it on Low for 6-8 hours. It takes a little more than an hour for the frozen stock to thaw and cover the potatoes and onions and cook.

Add the cream and cheddar and let cook for about 30 more minutes. Viola – you’re ready to serve!

Posted in Cooking, gluten free, nut free, soy free

Easy Baked Empanadas

IMG_1754Sometimes you can find empanada wraps in the grocery store, already cut into circles of the right size. And sometimes you have to make them yourself. That’s what I did today, using supportive guidance from MyColumbianRecipes.com. Pay particular attention to the filling suggestions…YUM!

Empanada dough is pastry dough, so if you have a basic cookbook with a non-sugar pie crust, you’ve already got an empanada dough recipe. Use it! What I found in this recipe post was a good feel for the actual assembly as well as some fantastic ideas for fillings for a future dinner! #ChickenBrieApricot

The dough is naturally soy and nut free, easily gluten free using any AP gluten free flour, and easily vegan using Crisco (in place of butter) and The Vegg baking mix in place of egg (yep, the egg wash too!).

Posted in Cooking, gluten free

Chicken Tetrazzini

IMG_1722The night-before dinner for the Cooper River Bridge Run (Charleston, SC) demands a classic power-pasta dinner, but my runner is pretty picky about his food. Luckily he loves Chicken Tetrazzini, and I am especially proud of how pretty tonight’s dish came out!

Here are the ingredients for tonight’s dish; some notes follow regarding dietary adjustments:

  • 1 package of thin spaghetti, broken in half and cooked according to package instructions
  • 1 whole rotisserie chicken, shredded (approximately 3 packed cups of shredded/cubed protein)
  • 3 cups of vegetables (my blend is fresh mushrooms, onion, and bell pepper, chopped)
  • 1 can of cream of chicken soup
  • 1 can of cream of mushroom soup
  • 2 cups of shredded mozzarella cheese
  • Optional toppings: shredded parmesan, garlic panko/bread crumbs

Mix all ingredients well in a large bowl; pour into a greased casserole dish and sprinkle desired topping. Bake for 30 minutes at 350°, 50 minutes if you made it ahead and had it in the refrigerator.

Makes 8 generous servings or 12 potluck servings.

Semi-homemade versus Traditional: This is a common dish for some semi-homemade action, using a store-bought rotisserie chicken or leftover grilled or roasted chicken from a previous night’s dinner, some frozen veggies, and canned soup instead of the homemade garlic parmesan cream sauce of a truly traditional tetrazzini.

Spaghetti versus Shapes: You’re right; it doesn’t have to be spaghetti at all. We’ve been known to use penne, bowtie, and elbow – basically whatever box of pasta is in the pantry. I can also confirm that egg noodles and even rice (gluten free!) work exceptionally well too!

More than Usual Vegetables: You may also notice that my measurements feature as much as 3X the amount of vegetable that a traditional recipe calls for. When I make a casserole, I’m looking for a truly balanced meal without needing a special side; that always means doubling or tripling the vegetables!

Fresh versus Frozen Vegetables: I also use a combination of frozen and fresh: always fresh mushrooms because canned are gross, but take help from frozen peppers and onions. When I have them on hand, I also add fresh onion and peppers to add crunch.

Sneak in a Vegetarian Meal: this dish is super-easy to make vegan. 3 cups of seitan, tofu or a blend is easily hidden by the wonderful flavors of the vegetables and the cream soups or sauce.

There are canned vegan cream soups already available. If you’re feeling especially domestic, make your own vegan and gluten-free cream of mushroom soup with my recipe, which has the added benefit of being corn free; 2 cans is approximately 1 2/3 cups of homemade cream sauce or soup.

Use mozzarella/pizza shreds both mixed in and as a topping.

Gluten-Free and Delicious: It may seem impossible if you’re new to a gluten-free diet or not kitchen-friendly, but either a great store like Whole Foods or Trader Joe’s or and great online store like Amazon Pantry can make it super easy with prepared gluten free pastas and canned soups. I would recommend first trying this dish with Manischewitz GF egg noodles and the Pacific brand of gluten free cream soups; I find that the GF egg noodles cook up nicer than many of the GF pastas and make the transition from traditional to GF pasta easier. Toast some GF panko or bread crumbs in olive oil and fresh garlic for a superb and safe topping (it’s what you see on top of mine in the photo :-)).

Posted in Cooking, gluten free, nut free, soy free

Faux-sagna: Lasagna with help from Cheese Ravioli

img_1455I’m not anti lasagna noodle – whether the traditional cooked kind or the no-cook kind. But when I can combine two steps in the mixing and layering into just one, it makes assembling a lasagna so much easier.

And when you add using the delicious Celentano frozen gluten free cheese raviolis, you’ll have a wonderful, luscious lasagna to enjoy.

Today’s faux-sagna is vegetarian, makes 4 servings, and will be my lunch for this week:

  • 1 bag of Celentano frozen gluten free cheese ravioli
  • 1 jar of organic marinara (I’m using Publix Greenwise Roasted Garlic marinara)
  • 3 cups of chopped vegetables that you like (I’m using onion, tri peppers, mushrooms, and zucchini)
  • 1T preferred cooking oil (I use Pompeian Grapeseed Oil)
  • 2-4 cups shredded mozzarella (I’m using Publix shredded part-skim, low moisture mozzarella)

Boil your ravioli according to package instructions; drain and let hang out in the colander – it won’t hurt a thing.

Onions, tri peppers, mushrooms, zucchini, and garlic.

In the same pot you boiled the ravioli, heat 1 T cooking oil on medium and drop in all of the veg at once. Lightly salt and pepper your veg and cook for 15-20 minutes until onions are translucent, peppers and mushrooms are darker in color, and zucchini slices are soft and fold easily. Remove from heat and prepare to layer.

My layering protocol is (from bottom to top of an 8×8 or 9×9 baking dish):

  • Layer 1 of Raviolisauce
  • ravioli (12 pieces)
  • veg
  • cheese
  • sauce (use a spoon to tamp down the lumps and smooth out the surface for beginning the next layer)
  • ravioli (9 pieces)
  • veg
  • One full set of layerscheese
  • sauce
  • cheese

Before topping with that last layer of cheese, use a spoon to tamp down the lumps and smooth out the sauce, making sure the sauce goes all the way to the edges. That’s key for ensuring the pasta doesn’t dry out when you bake it.

TIP: make sure you get all of the sauce out of the jar by adding 1/4 cup of red wine or balsamic vinegar. Cap the jar and shake well. Pour the sauce and liquid right on top of the lasagna.

Remember, as long as you get it all in the pan and you’ve got a layer of ravioli stabilizing it at the bottom, your layering game can’t be wrong.

Full to the top and ready to bake!If I’m planning to eat the first serving the same day I make it, I’ll pop it into the oven to melt the cheese and blend the flavors at 350°F for 20 minutes. Otherwise, it goes in the fridge until I’m ready, when I’ll cook it at 350°F for 30 minutes – it takes a little longer when it comes straight from the fridge. After the initial cooking, I’ll heat individual servings on a plate in the microwave for 2 minutes, check, and then perhaps 1 minute more, depending on the microwave strength.

Why this isn’t corn free:

  • the Celentano gluten free pasta uses blends/ingredients that contain corn starch, the BIG BAD dextrose (aka corn syrup), and white vinegar
  • all pre-grated cheeses contain corn starch, which is used to keep the shreds separated