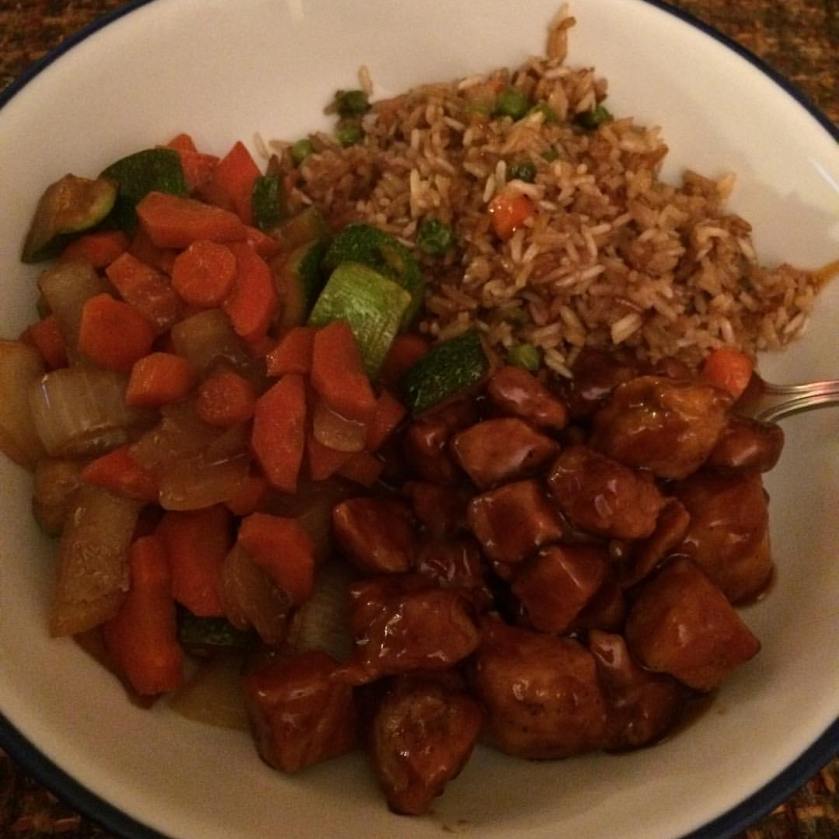
I LOVE the show and the flavor of a great Japanese hibachi meal, but I don’t have one of those amazing, huge hotplates for making everything at the same time. So I turned to what I know of cooking rice casseroles and oven steaming veggies to see how I could make this dinner easier and faster. Here’s how it goes:
- Time at Counter: 30-45 minutes
- Time Food is Cooking: 60 minutes
Sorry – I didn’t think I’d be blogging this whole meal, so I didn’t take pics along the way. I’ll add some next time I do this dinner…which should be soon based on my family’s reviews!
Prep the Fried Rice for the Oven
Preheat oven to 350°F.
In your 8×8 or 9×9 baking dish, pour all of the ingredient:
- 1 cup uncooked white or brown rice (regular, not instant or frozen)
- 1.5 cups water
- 1/4 cup sesame oil
- 1/4 cup soy sauce (or use my soy-free soy sauce)
- 1 cup frozen peas and carrots mix (get the store brand on sale some time)
Stir to combine the liquids and put in the oven for 1 hour.
NOTE: you can use any combination of veggies you like; just keep the total amount to no more than 1.5 cups or you’ll overwhelm your rice.
Prep the Hibachi Veggies for the Oven
Chop, dice, slice, or whatever cut you like up to 4 cups of raw or frozen veggies. Keep in mind that frozen veggies will not be crisp when cooked. I like to use
- 3 fresh zucchinis, quartered lengthwise and then copped into 1-inch pieces
- 4 fresh large carrots, cut into coins or half moons (for the fatter end of the carrot)
- 1-2 sweet Vidalia onions, thick sliced and quartered
- 1/4 soy sauce
- 4 T butter or margarine
When I have them or think of them, I’ve been known to add sliced water chestnuts, baby corn (chopped in 1/2-inch pieces), bamboo shoots, mung bean sprouts.
Toss veggies with soy sauce and top with 5-6 pats of butter (4 T butter or margarine). Cover with foil and put in the oven for 20 minutes with foil on and 20 minutes with foil off. Stir veggies when you remove the foil.
NOTE: by this time, you’ve been at the counter for about 15-25 minutes, depending on how efficient (faster and maybe messy) versus perfectionist (slower and cleaning as you go) you are in the kitchen. You’ve got anywhere from 15-25 minutes to go, depending on your style.
Prep the Teriyaki Glazed Pork Loin
Put a large skillet, preferable cast iron, over medium heat with 2 T of your favorite cooking oil; do NOT use butter or margarine for this step. You’ll need the equivalent of 2 boneless pork chops worth of cubed pork per person. For my family of 4, roughly 1/4 of a large pork loin renders generous portions.
- for 2 adults: use a package of 4 boneless pork chops
- for 4 adults: use 1/4 (about 8 inches) of a large pork loin
- for 6 adults: use 1/2 of a large pork loin
TIP: don’t buy cut boneless pork chops; they are nothing more than that huge pork loin on the bottom shelf sliced up. Watch for the pork loin to be on sale or BOGO. You can save TONS of money slicing your own pork chops – thin for skillet frying or oven cooking and thick for grilling.
While that skillet is heating up with the oil, get cubing and drop your cubed pork in the skillet as you cut it. No need to wait to add it all at once.
As long as you really do have your skillet on medium and not higher, you won’t have to worry about burning, or even stir for about 10 minutes. Give it a quick stir every 2-3 minutes, checking to get the pink sides down. After about 20 minutes, even if you still see a little bit of pink, pour in a bottle of teriyaki glaze – I use Kikkoman – or roughly 1.5 cups of my soy-free teriyaki sauce reduced (assume you’ll need to do this before starting this dinner). Drop the burner down to low, stir to coat every piece, and let it simmer and thicken further while the rice and veggies finish in the oven.
Now is a great time to pour yourself a glass of Japanese plum wine or a nice Riesling or Late Chardonnay or Moscato for a little sip of sweetness against the slightly salty hibachi dinner. Sit down and rest until the timer goes off.
BONUS: you’ve only got 3 cooking dishes, a cutting board and maybe a couple of measuring cups for clean up. No collections of mixing dishes to try and fit into the dishwasher or on the drying rack.

 Mine: chicken breast with ginger aioli, brussels sprouts, asparagus and mushrooms, and creamer potatoes.

 Let it cool and divvy it up into four microwave safe food storage containers. Voila. Lunch for the week – for me, at least, since I have only four days with a fixed lunch hour.

 Preheat oven to 350°F.
 Use two forks to shred the chicken. Stir to mix thoroughly with the rice.